3
1 2
4
a
b
c
d
e
f
g
a
e
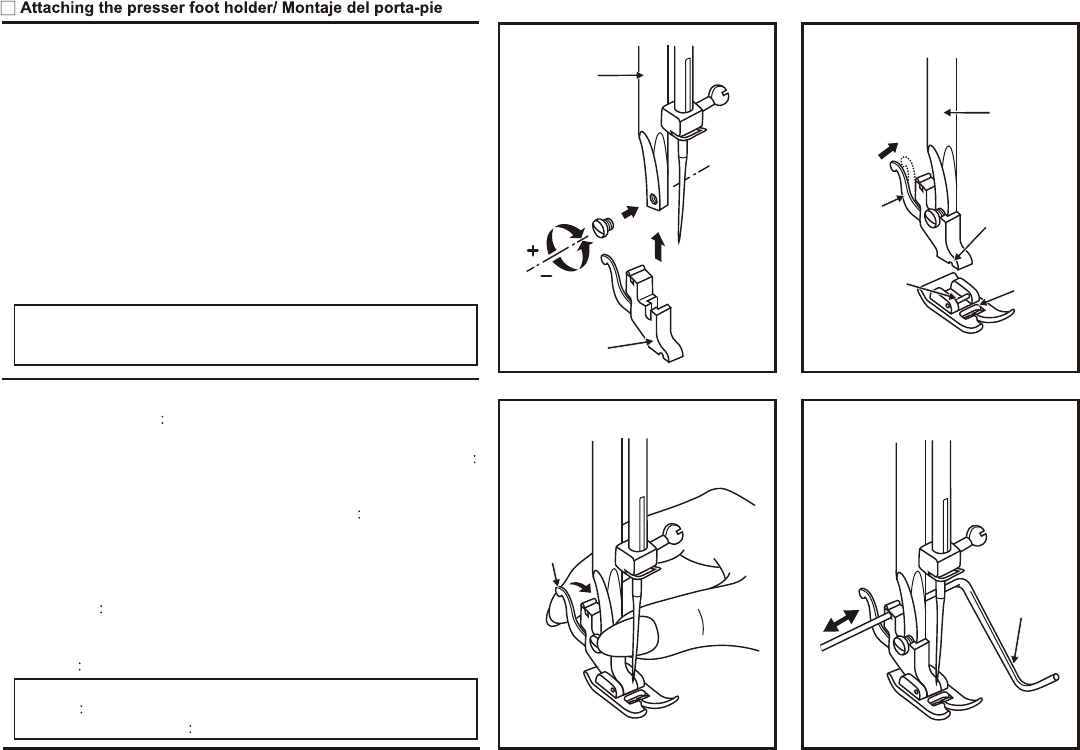
Raise the presser foot clamp "a". (1) Attach the presser foot
holder "b" as illustrated.
Attaching the presser foot
Lower the presser foot holder "a" until the cut-out "c" is directly
above the pin "d". (2)
Raise the lever "e"
Lower the presser foot holder "a" and the presser foot " f " will
engage automatically.
Removing the presser foot
Raise the presser foot. (3)
Raise the lever "e" and the foot disengages.
Attaching the seam guide
Attach the seam guide "g" in the slot as illustrated. Adjust
according to need for hems, pleats, etc. (4)
Attention:
Turn power switch to off ("O") when carrying out any of the
above operations!
Levantar la barra presatelas "a" (1) e introducir el porta-pie "b"
como en la ilustracio n
Montaje del pie
Bajar la barra presatelas "a" hasta que la ranura "c" este
directamente sobre la espiga "d". (2)
Empujar ligeramente la palanca "e" hacia adelante. Bajar la
barra prensatelas "a" y el pie " f " se quedara enganchado al
porta-pie.
Desmontaje del pie
Levantar el pie. (3)
Apretar ligeramente la palanca "e" hacia adelante y entonces el
pie quedara libre.
Montaje de la regla de borde
Montar la reglar de borde "g" con cuidado, como en la
ilustracio n.
Para dcbladillos, pliegues, etc. (4)
Atencio n:
Cualquier manipulacio n debe efectuarse con el interruptor
9


