


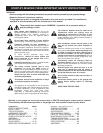

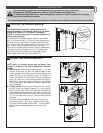

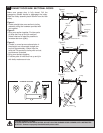
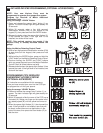
COMPLETED INSTALLATION (TILT DOOR EXAMPLE SHOWN)
As you proceed with the assembly, installation and adjustment procedures in this manual, you may find it helpful
to refer back to this illustration of a completed installation for tilt doors (for sectional doors refer section 21).
6
9
8
7
1
2
12
4
11
13
10
5
NOTICE
DOOR
3
14
15
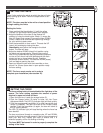
BEFORE YOU BEGIN:
1. Look at the wall or ceiling above the garage door. The header bracket must be securely fastened to structural
supports.
2. Do you have a finished ceiling in your garage? If so, a support bracket and additional fastening hardware (not
supplied) may be required.
3. Do you have an access door in addition to the garage door? If not, model CM1702 Outside Quick Release
Accessory is required. This accessory allows manual operation of the garage door from outside in case of power
failure.
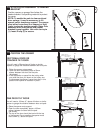
4. Complete the following test to make sure your garage door is balanced and is not sticking or binding:
• Lift the door about halfway. Release the door. If balanced, it should stay in place, supported
entirely by its springs.
• Raise and lower the door to see if there is any binding or sticking. If your door binds, sticks, or is out of
balance, call a trained door technician.
(1) Header Bracket
(2) Idler Pulley Assembly
(3) Trolley
(4) Pole
(5) Chain
(6) Hanging Bracket
(7) Power Cord
(8) Opener
(9) Light Lens
(10) Manual Release
Rope & Handle
(11) Curved Door Arm
(12) Straight Door Arm
(13) Door Bracket
and Plate
(14) Trolley Release Arm
(15) Stop Collar
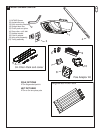
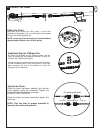
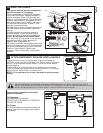
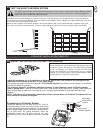
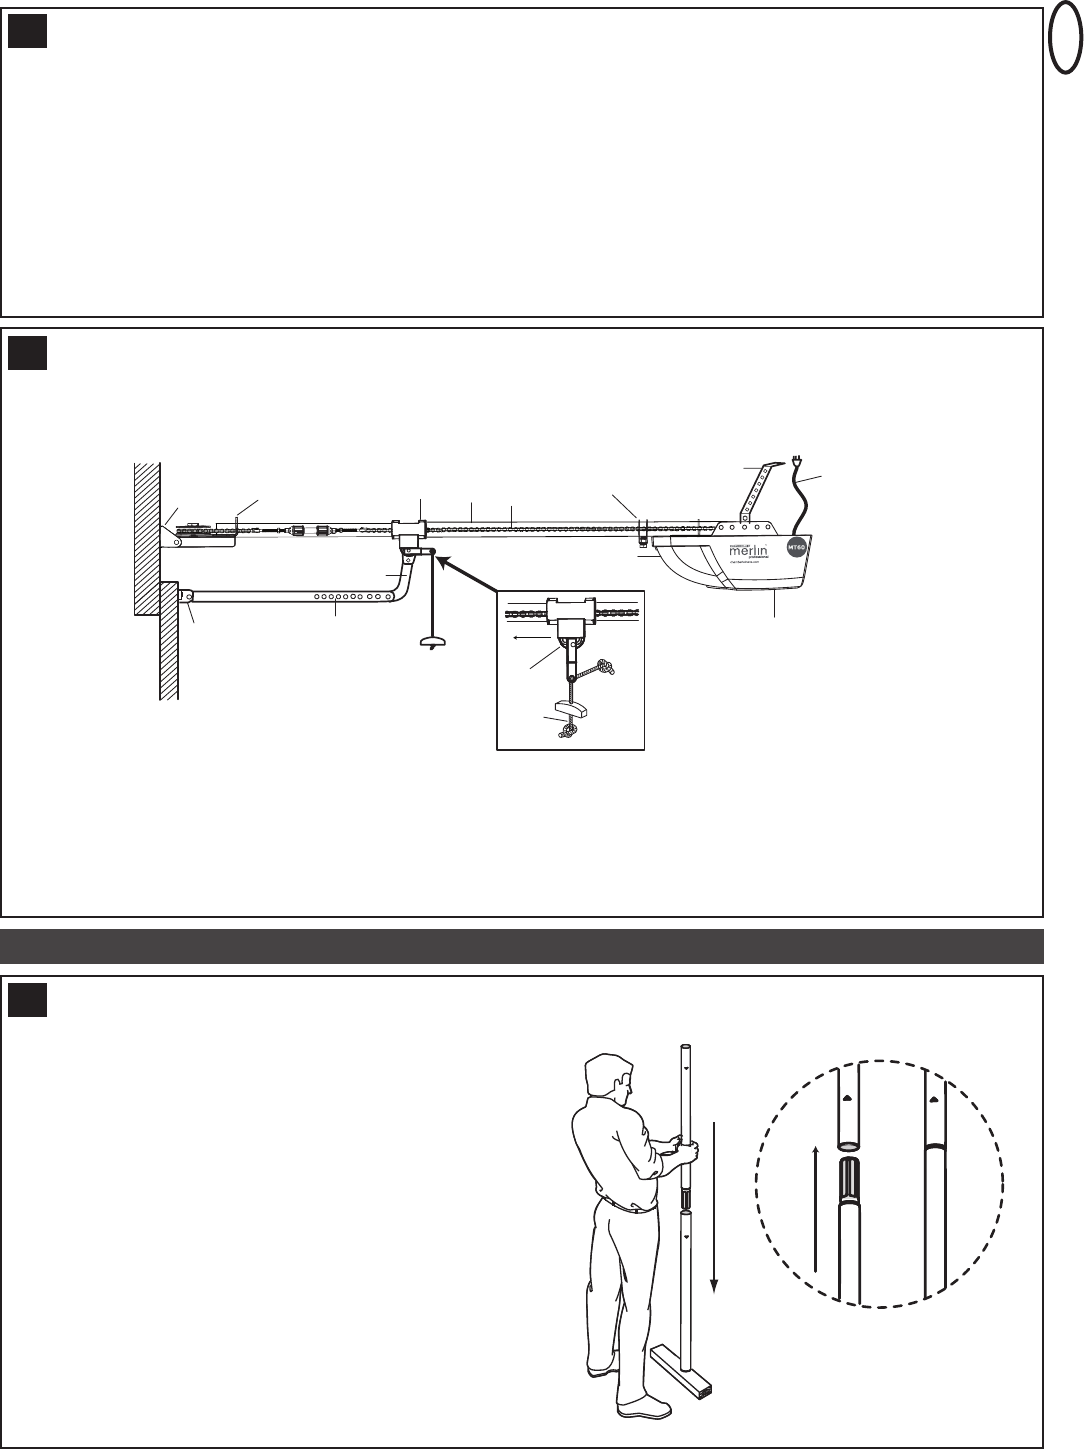
ASSEMBLE POLE PACK
Remove the 5 sectional poles from the carton and lay
them out on the floor. The end pole (i.e the pole without
a tapered edge) should be placed at the header end.
Assemble the poles by inserting the tapered end into the
non-Tapered end of the next pole as illustrated. Ensure
that each pole is pushed firmly into the next.
NOTE: If using a mallet to drive the joins home, use
a piece of timber at each end to minimise burring.
6
5
4
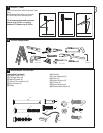
ASSEMBLY SECTION
7