


23
CONTENTS
MACHINE
KNOWLEDGE
EMBROIDERING MAINTENANCE
ERROR
MESSAGE
TROUBLESHOOTING
PATTERNS
EMBROIDERING
USING A SMALL
FRAME
(OPTIONAL)
EMBROIDERING
USING A
EXTRA-SMALL
FRAME (OPTIONAL)
EMBROIDERING
USING A LARGE
FRAME
(OPTIONAL)
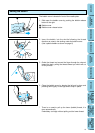
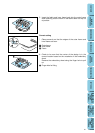
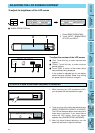
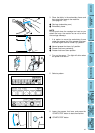
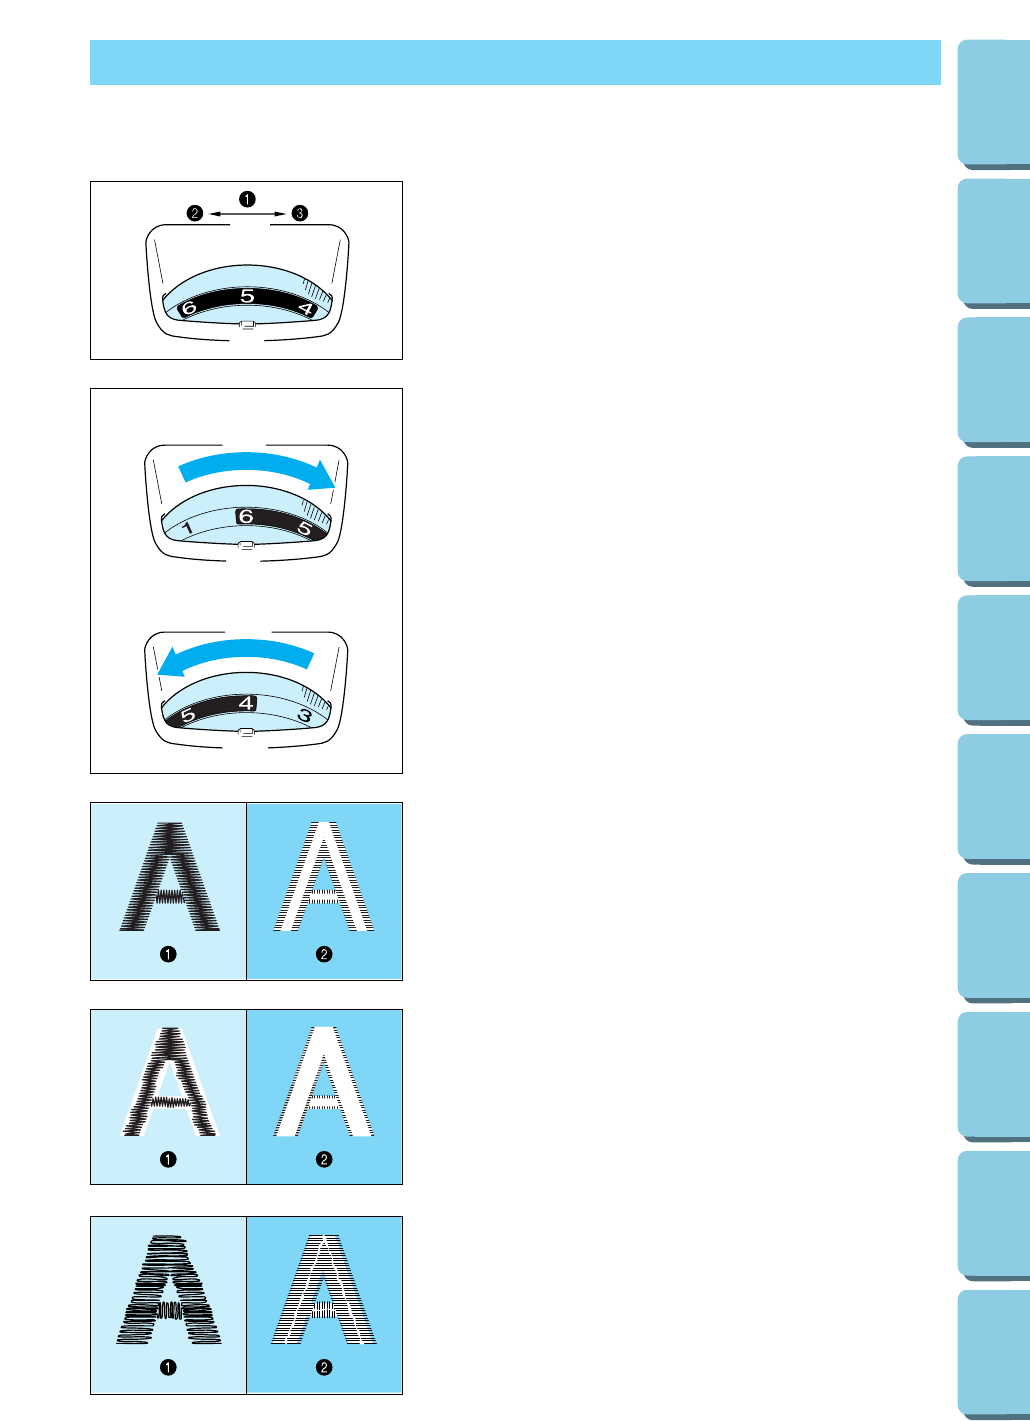
Upper thread tension dial
1 Upper thread tension setting
2 Weak (Decrease thread tension)
3 Strong (Increase thread tension)
A– To tighten the upper thread tension, adjust the dial to the
right.
B– To loosen the upper thread tension, adjust the dial to the
left.
* The standard position is between “4” and “6”. However, a
sewing test should always be done to check for the proper
thread tension.
Thread tension may need to be adjusted with the use of
different thread, fabric or stabilizer fabric.
A
B
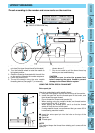
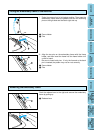
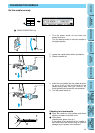
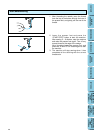
Correct thread tension
Adjust so that the lower thread stitch width on the reverse
surface of the fabric is about one-third of the total width.
Correct tension is important because too much or too little tension
will cause poor quality embroidery or your fabric to pucker.
1 Top surface of fabric
2 Reverse side of fabric
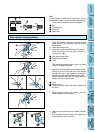
If upper thread tension is too strong
The lower thread will be visible on top surface of the fabric.
Decrease the upper thread tension.
1 Top surface of the fabric
2 Reverse side of the fabric
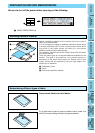
If upper thread tension is too weak
The upper thread will be loose.
Increase the upper thread tension.
1 Top surface of fabric
2 Reverse side of fabric
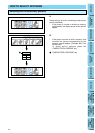
THREAD TENSION ADJUSTMENT
Use this procedure when changing the thread tension.