


Mastering
Your
BERNINA
®
BERNINA
®
Sergers
MASTERING YOUR BERNINA
®
SERGER 2/15/03
126
Notes
©2003 BERNINA® of America, Inc. Permission to copy granted only to Authorized BERNINA
®
Dealers
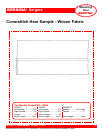
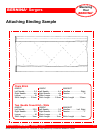
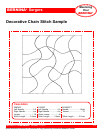
Attaching Binding
Cover Stitch Option:
Following the instructions in your owner’s manual, thread the serger for
cover stitch.
Wrap the bias binding around one 6” side of the quilted fabric; secure in
place with 505 temporary spray adhesive.
Place the fabric under the needles with the unstitched edge of the
binding even with the inside of the left floating toe, with the quilted
fabric to the left.
Coverstitch the binding to the quilted fabric.
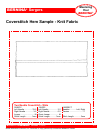
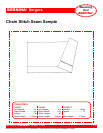
Chain Stitch Option:
Following the instructions in your owner’s manual, thread the serger
for chain stitch.
Wrap the bias binding around one 6” side of the quilted fabric; secure
in place with 505 temporary spray adhesive.
Place the fabric under the needles with the unstitched edge of the
binding even with the inside of the left floating toe, with the quilted
fabric to the right.
Chain stitch the binding to the quilted fabric.
Trim and mount the sample.
Fabric ................................................................ pre-quilted fabric, 3” x 6”
............................................... 20” length of wide prefolded bias binding
Needle............................................................................. 80/12 Universal
Thread........................................................... 2 or 3 cones serger thread
Presser Foot .......................................................standard or Coverstitch
Stitch ................................................................ chainstitch or coverstitch