


AXIS M1124–E Network Camera
Video
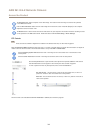
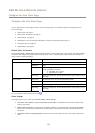
White Balance
To change this setting go to Setup > Video > Camera Settings
White balance is used to make colors in the image appear the same regardless of the color temperature of the light source. The Axis
product can be set to automatically identify the light source and compensate for its color. Alternatively, select the type of light
source from the drop-down list. For a description of each available setting, see the online help
.
The white balance window is enabled for the Automatic and Automatic outdoor options that appear in the White balance drop-down
list. Select one of the options from the drop-down list to set the white balance window properties. Select Automatic to use the
default settings for the Automatic and Automatic outdoor options (in the White balance drop-down list). Select Custom to manually
set a reference window for white balance in the view area.
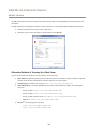
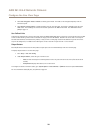
Wide Dynamic Range
Wide dynamic range (WDR - Forensic Capture) provides balanced images in scenes when there is a considerable contrast between
light and dark areas in the image. The camera automatically handles the transition between such scenes and low-light conditions. In
rare light conditions disabling WDR might give a better image.
Important
Use WDR in combination with automatic exposure control. Other exposure settings could give undesirable results.
Use the Highlights recovery slider to improve the image appearance by decreasing brightness in the bright parts of the image.
Use the Shadows recovery slider to improve the image appearance by increasing brightness in the dark parts of the image.
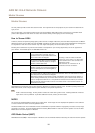
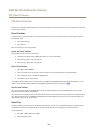
Exposure Settings
Congure the exposure settings to suit the image quality requirements in relation to lighting, frame rate and bandwidth
considerations.
Exposure value - Use the Exposure value slider to adjust the overall brightness of the image.
Exposure control - This setting is used to adapt to the amount of light used. Automatic is the default setting and can be used in
most situations. The shutter speed is automatically set to produce optimum image quality. Flicker-free 50 or 60 Hz is used to remove
icker which can be caused by uorescent and other light sources. The Hold current option locks the current exposure settings.
Exposure zones - This setting determines which part of the image is used to calculate the exposure. For most situations, the Auto
setting can be used. For particular requirements, select a predened area.
Exposure priority - When Motion is prioritized and maximum Shutter time is set to a small value, motion blur in the image is
minimized. This can be useful for recognition of moving objects such as people and vehicles. However, prioritizing motion may cause
an increase in image noise, especially in low light situations. When Low noise is prioritized and Gain is set to a small value, image
noise is minimized. The le size is reduced, which can be useful if storage space or bandwidth is limited. However, prioritizing low
noise may result in a very dark image, especially in low light situations.
Shutter & Gain
Normal Light - Use the slider to set the Priority between Low motion blur and Low noise. When prioritizing low noise (slider
all the way to the left) the Axis product will automatically decrease shutter speed as brightness decreases. When the shutter
speed reaches 1/30 s the Axis product will increase gain until the set maximum gain for normal light is reached. Select the Max
gain value from the drop-down list. This denes the upper limit for gain in the context of normal light. Max fast shutter sets
shutter speed limit in normal light conditions. Depending on a scenario, the shutter speed limit may need to be dened. This is
done through System Options > Advanced > Plain Cong.
Low Light - Use the slider to set the Priority between Low motion blur and Low noise. When prioritizing low motion blur (slider
all the way to the right) the camera will automatically increase gain as brightness decreases. When the gain reaches the set
maximum gain for low light, the camera will decrease shutter speed until the set maximum shutter for low light is reached.
This is the default priority setting for low light.
22