Installation (for qualified installers only) 7
© Travis Industries 100-01157 4041116
SAFETY NOTICE:
Please read this entire manual before you install and use your new room heater. Failure
to follow instructions may result in property damage, bodily injury, or even death.
Contact local building or fire officials about restrictions and installation inspection
requirements in your area.
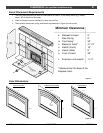
Planning The Installation
We suggest that you have an authorized Travis Industries dealer install your fireplace insert. If you
install the fireplace insert yourself, your authorized dealer should review your installation plans.
Check with local building officials for any permits required for installation of this fireplace insert and
notify your insurance company before proceeding with installation.
Preparation for Installation
• Check for damage to the exterior of the fireplace insert (dents should be reported, scratches can be
fixed by applying touch up paint).
• Check the interior of the firebox (replace cracked firebrick and make sure baffle is in place).
The fireplace insert can be lightened by removing the firebricks and baffle (pg 29) - replace before
operation.
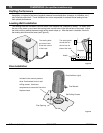
Packing List
• Touch-Up Paint
• Leveling Bolts
• (3) Chimney Brackets with (6) Tek Self-drilling screws (for attaching the flue to the fireplace insert)
• (6) 10-24 x 1/2" Type F Screws (for surround panels)
• (7) Spring Clips (for surround panels)
• Rheostat (for blower)
• Pull Tool for Bypass
Additional Accessories Needed for Installation
1 Face (see your dealer for details - see pg 14)
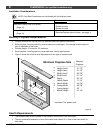
2 Surround Panels (see page 12)
Suggested Order of Installation
1 Remove the firebrick and baffle components from the fireplace insert (see pages 29 and 31).
2 Place the fireplace on the hearth 12" from the fireplace (on top of cardboard to prevent
scratching). If power is on the left side, switch the power cord at this time (see page 15).
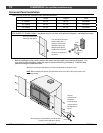
3 Install the side suround panels (see page 12).
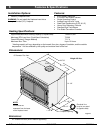
4 Slide the insert into place (it should portrude 1-1/4" from the fireplace opening).
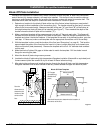
5 Hook up the flue (with the baffle components removed - this allows for access from within the
firebox).
6 Install the top panel and trim. Then replace the firebrick and baffle components.
7 Install the face (see page 14).


