


Testing and Maintenance
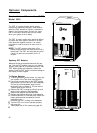
Your AT&T Security System 8300 requires very
little maintenance. All you will normally need to do
is keep the components clean and replace any
batteries that run low. Many dealers offer annual
maintenance checks, and they will replace any
batteries that are running low. If you need to
change a battery yourself, follow the directions
below to put your system in the Test mode and
then turn to the Optional Components section for
that component for further directions.
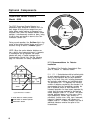
To clean your components:
Wipe the outside of system devices every six
months (more often in dusty or dirty areas). Use a
cloth that has been slightly moistened in a solution
of mild detergent. You can also use a vacuum to
remove dust, but do not use a vacuum on smoke
detectors. Do not disconnect components,
submerge them in liquid, or use any cleaning
sprays on them.
Weekly System Test
Perform the following test procedure, every week,
to ensure that your system is working properly.
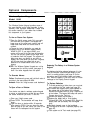
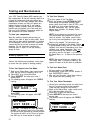
To Put Your System in the Test Mode:
Begin at the Status Menu, under normal condi-
tions, with the Level of Protection set to
Off.
Press NEXT to go to the Main Menu.
Select
SECURITY
and enter your Level 1
access code.
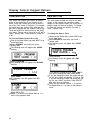
The following screen will appear with
CODES
flashing:
II
11
II
CODES
PROGRAM
TEST CLOCK
<
>>
I‘
II
I
Select
TEST.
The following screen will appear, with
LIST
flashing:
1,
I
II
TEST MODE:
L’
LIST SEND
<
>>
II
‘1
Select
LIST.
The display will show
NOTHING
IN LIST.
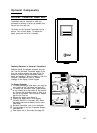
Your system is now in the Test mode.
No alarms will be generated by violated sensors.
The system will return to the
Off
level
of protec-
tion after any 10 minute period of inactivity.
To Test Your Sensors:
Put your system in the Test Mode.
When your display shows
NOTHING IN LIST,
move through the premises activating each
sensor (open doors, walk in front of
PIRTs,
push
the buttons on your smoke detectors and
universal transmitters, etc.). As the system
detects each activation, the Display Control
Keypad beeps.
NOTE:
Some sensors are grouped into zones.
You must activate every sensor in a zone to
verify all sensors. Your dealer should inform
you of any zone configurations in your system.
Return to the keypad. The last sensor you
activated will be listed in the display. Select.
.
.
to go backwards through the list. There may be
violations that occurred inadvertently and some
violations may repeat themselves. After you
have confirmed all the violations select
.
.
.
if
you wish to view the list again,
>>
to return to
the Status Menu, or
<
to return to the previous
Menu.
NOTE: You
cannot leave your system in the
Test mode. After 10 minutes of inactivity, the
system will return to the
Off
level of protection.
To Test Your Alarm Siren:
1
Put your system in the
Test
mode.
2 Simultaneously, press both POLICE buttons or
both EMERGENCY buttons.
3 After you hear the alarm, cancel it by entering
your access code and pressing OFF.
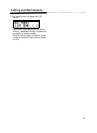
To Test Your Phone Connection:
Contact your monitoring service and notify them
that you are going to send a test message.
There may be a charge for this service.
Begin at the Status Menu, under normal condi-
tions, with the system set to Off.
Press NEXT to go to the Main Menu.
Select
SECURITY
and enter your Level 1
access code.
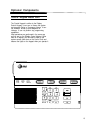
The following menu will appear with
CODES
flashing:
I
.
1
II
CODES
PROGRAM
TEST CLOCK
<
>>
II
I’
Select
TEST.
J
22