


After the system is properly installed and connected to both electrical and water supplies, it can be started.
START-UP PROCEDURE:
Mounting
Before filling with water, check mounting to verify that the steam chamber is level and securely supported. Refer to Maintenance
Section, page 29, for details on securing the steam chamber.
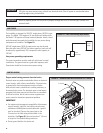
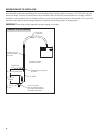
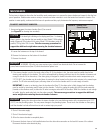
Piping
Verify that all piping connections are completed as recommended and that water pressure is available.
Use cold or hot supply water. If the water pressure is above 60 psi (415 kPa) and/or water hammer is excessive, install a
pressure-reducing valve or shock arrester. Even though the humidifier has an internal 1” (25 mm) air gap, some governing codes
may require backflow prevention.
IMPORTANT: Minimum water supply pressure is 25 psi (175 kPa).
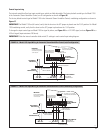
Electrical
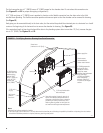
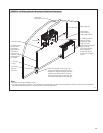
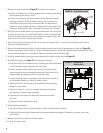
Before start-up, verify that electrical connections have been made per
governing codes and the wiring requirements listed in this manual.
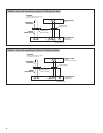
• Verify that all power terminal screws and lugs are tight from power block to
heaters. See
Table 5 for torque specifications.
• Verify that the transformer, drain valve, fill valve, and contactor electrical
plugs located under the humidifier shroud are completely plugged in.
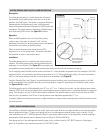
• Confirm the internal controller board slide switch S1 and S2 positions
marked 1 through 16 are in the correct on or off position.
OPERATION
HUMIDIFIER START-UP PROCEDURE
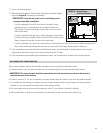
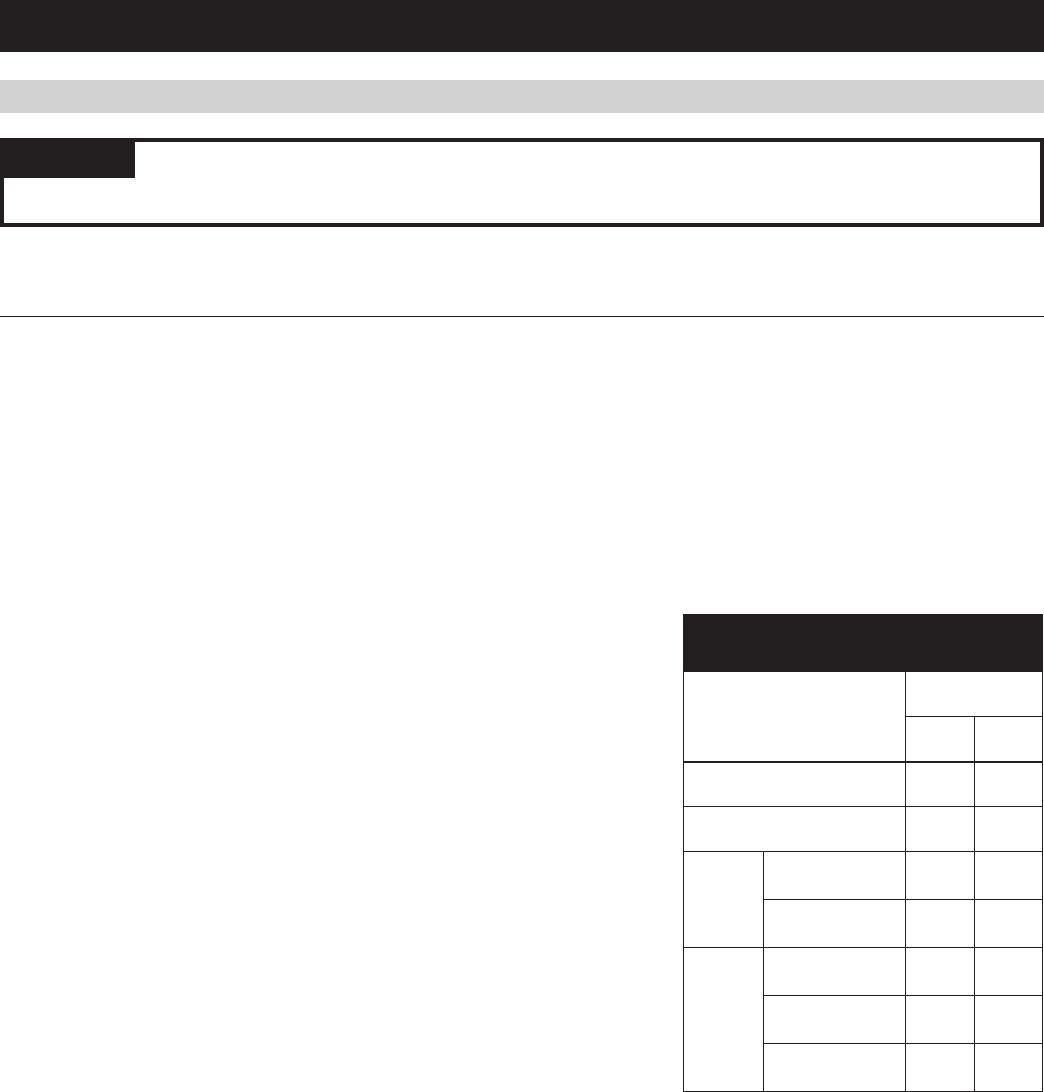
TABLE 5 – Torque Specifications
Screw or lug location
Torque
inch-lbs Nm
Power block 16 1.8
Contactor or Relay 16 1.8
Heater
nut
8-32 nut
(8.5 mm)
20 2.2
10-32 nut
(9.5 mm)
25 2.8
Heater
wire lug
6 gauge wire
(10 mm
2
)
35 4.0
8 gauge wire
(6 mm
2
)
25 2.8
10-14 gauge wire
(<6 mm
2
)
20 2.2
WARNING
240 volts may cause serious injury or death from electrical shock. Do not remove the power/ heater
terminal cover until electrical power is disconnected. Only qualified electrical personnel should perform start-up procedure.
27