25
2. REMOVAL OF THE LOG GUARD
2.1 To remove the log guard:
—Lift log guard clear of the supporting brackets.
—Rotate to clear the sides of the door opening.
Do not use appliance without the log guard in position.
3. FITTING AND REMOVAL OF BAFFLE
3.1 See Installation Instructions, Section 4.
3.2 It is important to remove and clean the baffle system to
ensure the flue ways are clear of soot and debris and
to ensure the safe, efficient operation of the stove. The
frequency of cleaning depends on the stove operating
conditions.
3.3 The baffle system is designed to give safe and efficient
operation of the stove. Replace any damaged baffle
immediately.
3.4 Do not modify the baffle system.
4. FITTING AND REMOVAL OF
THE GRATE
4.1 See Installation Instructions, Section 5.
5. FITTING AND REMOVAL OF CAST IRON
FIREBRICKS
5.1 See Installation Instructions, Section 7.
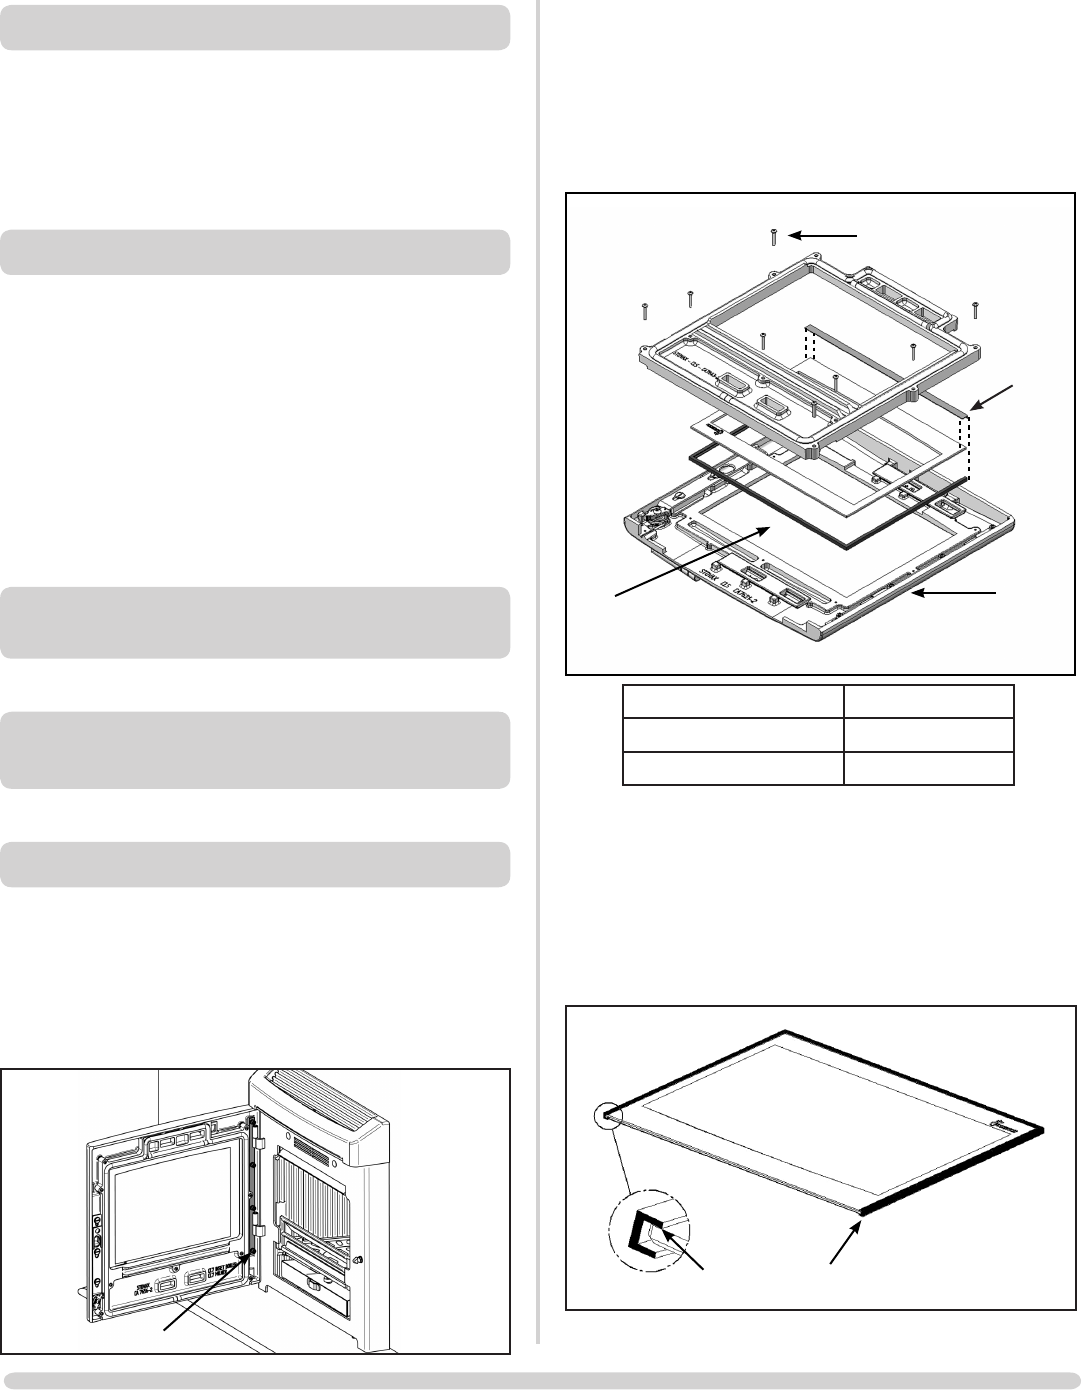
6. FITTING A NEW DOOR GLASS
6.1 To maintain safe use of the appliance damaged door glass
must be replaced immediately. To do this the door must
first be removed:
—Using a 5mm A/F Hey Key remove the door by opening,
removing the 4 bolts and lifting the door free of the
appliance body.
PR7084
4 Bolts
MAINTENANCE and SERVICING
—Lay the door flat on a soft flat surface to protect
the paintwork and glass.
—Remove the glass clamp and screws x 8. The old
glass can then be lifted clear of the door. Note how the
sealing rope is placed around the glass.
Dispose of the old glass safely.
Fixing Screws x 8
Door
PR8738
Glass rope
seal
B
Seal Length (mm)
Glass rope seal A 1000
Glass rope seal B 100
—Clean, and re-paint, the rear of the door if required.
—Clean the screws with light oil.
—Coat with high temperature anti-seize grease to aid
future removal.
—Carefully wrap glass sealing rope (A) round the sides and
bottom edge of the glass.
PR8757
Glass rope seal
A
—Fix glass sealing rope (B) to the matt black side of the top
face as shown.


