


English 9
ing station; avoid any steep gradients in
the process.
Note
While using other batteries (for e.g. batter-
ies from other manufacturers) the total dis-
charge protection level must be reset by the
Windsor aftersales service according to the
respective battery.
ƽ Danger
Risk of electric shock. Observe supply net-
work and fuse protection - see "Charger".
Only use the charger in dry rooms with suf-
ficient ventilation!
Note
Average charging time is approx. 10 hours.
The recommended chargers (matching the
batteries used) are regulated electronically
and will automatically switch off the charg-
ing process.
ƽ Danger
Danger of explosion. Wet batteries can only
be charged with opened hood.
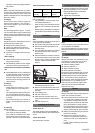
Î Empty the dirty water reservoir.
Î Tilt the dirty water tank backwards.
Î Remove battery plug and join it to the
charging cable.
Î Connect the charger to the mains and
turn it on.
Î Switch off the charger and remove the
plug from the socket.
Î Pull the battery cable from the charger
cable and connect it to the machine.
Î Add distilled water one hour before the
charging process comes to an end; fol-
low the correct acid level. There are
corresponding indicators on the battery.
At the end of the charging process, all
cells must gas.
ƽ Danger
Risk of injury!
– Adding water to the battery in its dis-
charged state can cause the acid to
leak.
– Use safety glasses while handling bat-
tery acid and follow the safety instruc-
tions to avoid personal injury or damage
to clothes.
– Should the acid spray on to the skin or
clothes, rinse immediately with lots of
water.
ṇ Warning
Risk of damage!
– Use only distilled or desalinated water
(VDE 0510) for filling the battery.
– Do not add any substances (so-called
performance improving agents), else
warranty claims will not be entertained.
If you use wet batteries, then follow the fol-
lowing instructions:
– It is necessary to conform to the maxi-
mum battery dimensions.
– While charging wet (maintenance-free)
batteries, it is necessary to tilt the seat
up.
– While charging wet batteries, follow the
specifications of the battery manufactur-
er.
Note
Pull the red battery plug to put all functions
out of operation immediately.
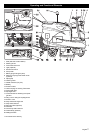
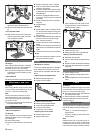
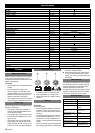
Î Cut plastic packing belt and remove foil.
Î Remove the elastic tape fasteners at
the stop points.
Î Four indicated floor boards of the pallet
are fastened with screws. Unscrew
these boards.
Î Place the boards on the edge of the pal-
let. Place the boards in such a way that
they lie in front of the four wheels of the
machine. Fasten the boards with
screws.
Î Slide the four support beams included in
the packaging under the ramp.
Î Remove the wooden blocks used for ar-
resting the wheels and slide them under
the ramp.
Î Insert battery plug.
Î Set main switch to “1”.
Î Press the drive direction switch and
slowly move the machine down from the
ramp.
Î Set main switch to “0”.
The sweep brushes must be installed be-
fore the initial operation (see "Maintenance
work").
The brushes are mounted.
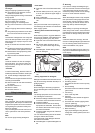
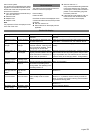
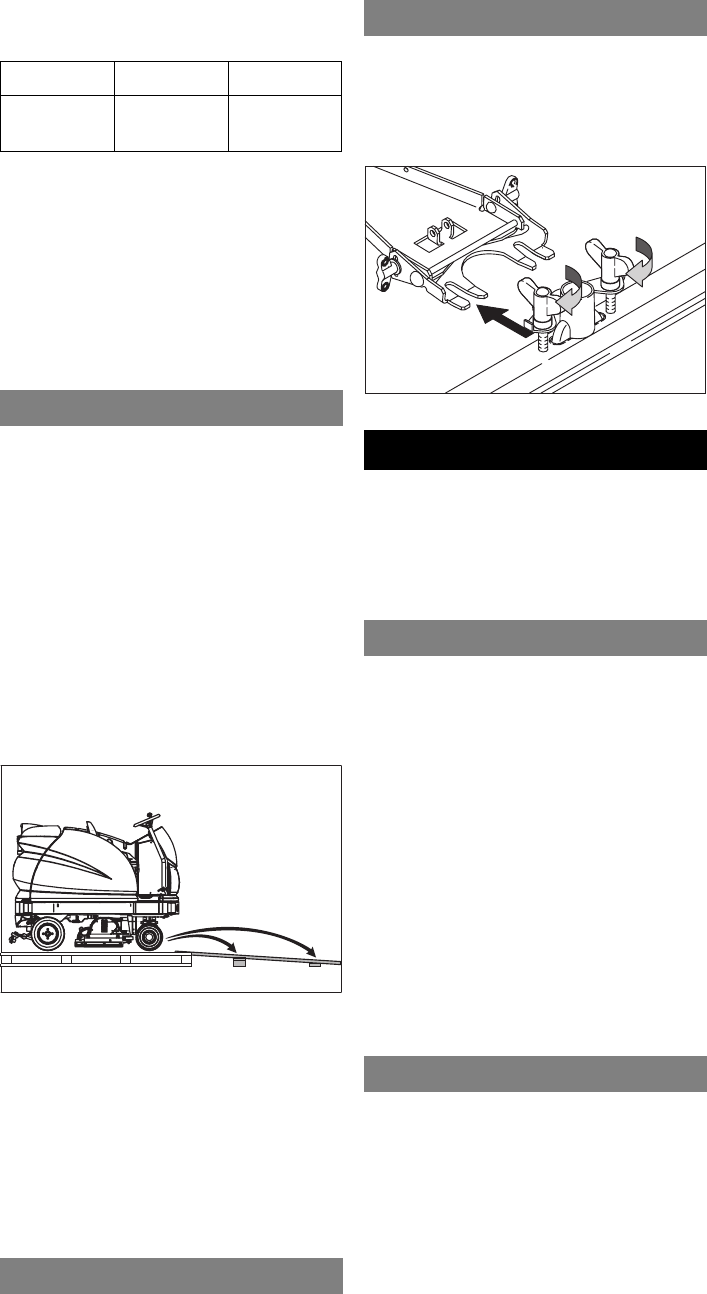
Î Insert the squeegee tool into the squee-
gee tool suspension in such a manner
that the profiled sheet is positioned
above the suspension.
Î Tighten the cross-handles.
Î Insert the suction hose.
Note
Pull the red battery plug to put all functions
out of operation immediately.
Carry out the initial trials in an open surface
so that you familiarise yourself with the ap-
pliance.
ƽ Danger
Danger of accident. The immobilizing brake
must always be checked first on an even
surface before starting the machine.
Î Take the seating position.
Î Set main switch to “1”.
Î Select direction of travel.
Î Gently depress drive pedal.
The brake must get released and you must
be able to hear it (the control lamp for im-
mobilizing brake on the console switches
off). The machine must roll slightly on a
plane surface. When the pedal is released,
the brake falls in in an audible manner.
Switch off the machine and call the after-
sales service if the above-mentioned
events do not occur.
ƽ Danger
Danger of accident. If the machine does not
brake, then proceed as follows:
Î If the machine does not come to a halt
on a ramp with a gradient of 2% when
you release the drive pedal, then pull
the battery plug in the sense of an emer-
gency-stop button for safety reasons
only if the mechanical functioning of the
immobilizing brake has been checked
properly before starting up the machine.
Î Always pull the battery plug on surfaces
below 2% inclination.
Î Switch off the machine only after it
comes to a complete halt (on an even
surface) and call up the aftersales ser-
vice!
– Further, follow all warning instructions
for braking.
After charging
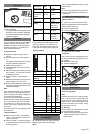
Maintenance-free batteries (wet batter-
ies)
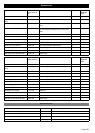
Maximum battery dimensions
Length Width Height
622 mm
(24.4 in)
353 mm
(13.8 in)
379 mm
(14.9 in)
Unloading
Installing the Brushes
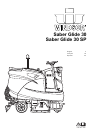
Saber Glide 30
Saber Glide 30 SP
Installing the Squeegee Tool
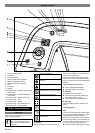
Operation
Check immobilizing brake
Brakes