


15
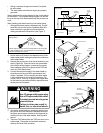
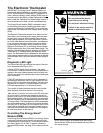
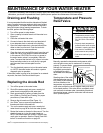
Manually operate the temperature and pressure relief
valve at least once a year to make sure it is working
properly. To prevent water
damage, the valve must
be properly connected to
a discharge line which
terminates at an adequate
drain.
Standing clear of the outlet
(discharged water may be
hot), slowly lift and release
the lever handle on the
temperature and pressure
relief valve to allow the valve to operate freely and return
to its closed position. If the valve fails to completely reset
and continues to release water, immediately disconnect
the electrical power, close the cold water inlet valve and
call a qualifi ed person.
MAINTENANCE OF YOUR WATER HEATER
Draining and Flushing
It is recommended that the tank be drained and fl ushed
every 6 months to remove sediment which may buildup
during operation. The water heater should be drained if
being shut down during freezing temperatures. To drain
the tank, perform the following steps:
1. T urn off the power to water heater.
2. Open a nearby hot water faucet until the water is no
longer hot.
3. Close the cold water inlet valve.
4. Connect a hose to the drain valve and terminate it
to an adequate drain or external to the building.
5. Open the water heater drain valve and allow all the
water to drain from the tank. Flush the tank with
water as needed to remove sediment.
6. Close the drain valve and refi ll the tank (open the cold
water inlet valve), and restart the heater as directed
in this manual. CAUTION: Do not turn on power to
the water heater unless it is completely fi lled with
water. To ensure that the tank is full, open a hot water
f aucet and allow water to run until the air is purged
and the water fl ows uninterrupted from the
faucet.
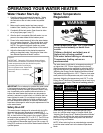
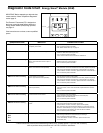
7. Turn the electrical power on to turn the water heater
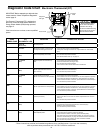
on. NOTE: the water heater will conduct a system
diagnostic prior to operation.
If the water heater is going to be shut down for an extend-
ed period, the drain valve should be left open.
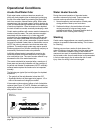
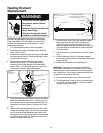
Replacing the Anode Rod
1. Turn off the power to the water heater.
2. Shut off the water supply and open a nearby hot
water faucet to depressurize the water tank.
3. Drain approximately 5 gallons of water from the
tank. (Refer to “Draining and Flushing” for proper
procedures.) Close drain valve.
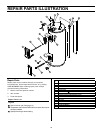
4. Remove the old anode rod (See Figure 11).
5. Use Tefl on
®
tape or approved pipe sealant on
threads and install new anode rod.
6. Turn on the water supply and open a nearby hot
water faucet to purge all air from the water system.
7. Restart the heater as directed in this manual. Turn the
electrical power on to turn the water heater on.
NOTE: the water heater will conduct a system diag-
nostic prior to operation. See the “Repair Parts Illus-
tration” for anode rod location on page 22.
Tefl on
®
is a registered trademark of E.I. Du Pont De Nemours and Company.
If you lack the necessary skills required to properly service this water heater or you have diffi culty following the
instructions, you should not proceed but have a qualifi ed person perform the maintenance of this water heater.
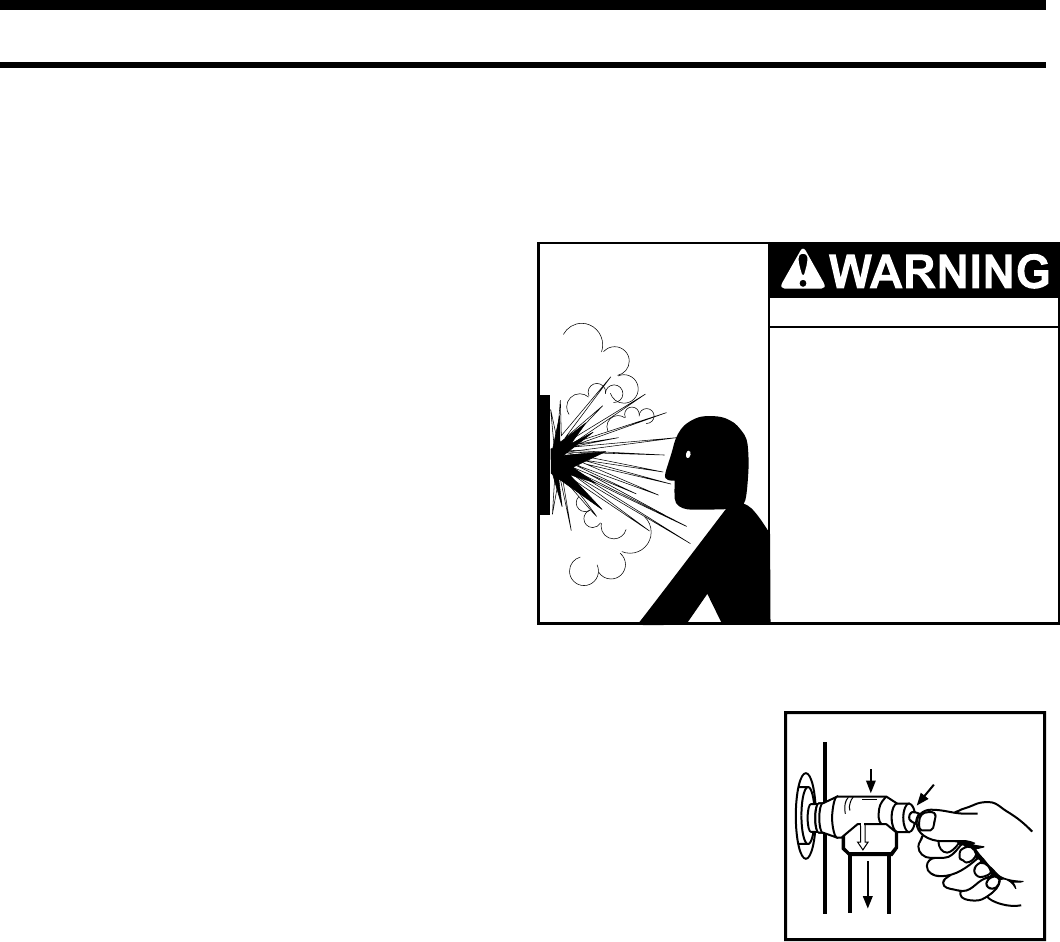
Temperature and Pressure
Relief Valve
Temperature and Pressure
Relief Valve
Figure 12
Manual Relief
Lever
Discharge line to drain
Explosion Hazard
• Temperature-pressure relief
valve must comply with ANSI
Z21.22-CSA 4.4 and ASME
code.
• Properly sized temperature-
pressure relief valve must be
installed in opening provided.
• Can result in overheating
and excessive tank pressure.
• Can cause serious injury or
death.