Part number 550-141-850/069916
GOLD GV Water boiler series 3 — manualGOLD GV Water boiler series 3 — manual
GOLD GV Water boiler series 3 — manualGOLD GV Water boiler series 3 — manual
GOLD GV Water boiler series 3 — manual
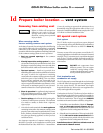
Prepare boiler — overview
❏ Leave the boiler on its skid until installation site is ready and boiler prep is
complete per this section.
❏ Install vent starter tee and condensate drain line.
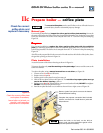
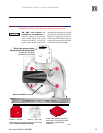
❏ Inspect gas/air orifice plate to verify model size and gas markings agree
with boiler and application. Install propane gas/air orifice for propane
installations.
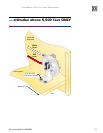
❏ Install high altitude kit for altitudes more than 5500 feet above sea level.
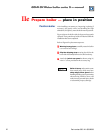
❏ Place boiler in position and install jacket rear panel.
❏ Plug openings and hydrostatically test boiler. Remove plugs.
Use only the vent starter tee of the same manufacturer as the
vent components
to be used. Do not mix components from different
systems. The vent system could fail, causing flue gas spillage, resulting in
severe personal injury or death.
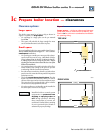
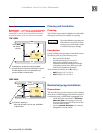
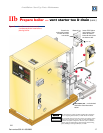
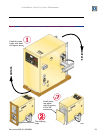
Install vent starter tee as shown in Figure 4.
1. Remove jacket access panel (item 1). You can rotate the plate out of the way, leaving the air
hose connected to the air intake fitting, or loosen the hose clamp (item 2) and pull the air hose
off of the fitting as shown in Figure 4.
2. Remove the hex nuts (item 5) from the vent starter tee studs at the boiler vent connection.
3. Remove the vent starter tee gasket (item 4) from the studs.
4. Clean the surface of the boiler flue connection to assure a good seal. Use emery cloth if
necessary to remove any accumulated rust.
5. Place the vent starter tee gasket (item 4) over the studs.
6. Slide the holes in the vent starter tee flange (item 3) over the studs.
7. Apply the (4) hex nuts (item 5), align the vent starter tee (item 3) and tighten the nuts
uniformly.
Install condensate trap hose as shown in Figure 4.
1. Loosen and slide a spring hose clamp (item 8) over each end of the condensate drain hose
(item 6).
2. Loosen the clamp and slide one end of the hose over the CPVC drain elbow (item 7). Slide
clamp into position and release.
3. Attach and clamp the other end of the hose to the drain connection on the bottom of the vent
starter tee (item 3).
Replace jacket access panel (item 1), reconnecting the air hose to the air intake fitting if necessary.
Install vent starter
tee and condensate
drain hose
Overview of this
section
IIa
Prepare boiler — vent starter tee & drainIIb


