


– 33 –
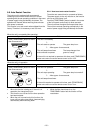
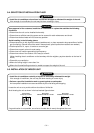
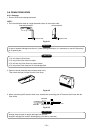
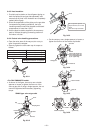
Axis of the
Front panel
Air inlet
grille arm
Rib
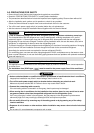
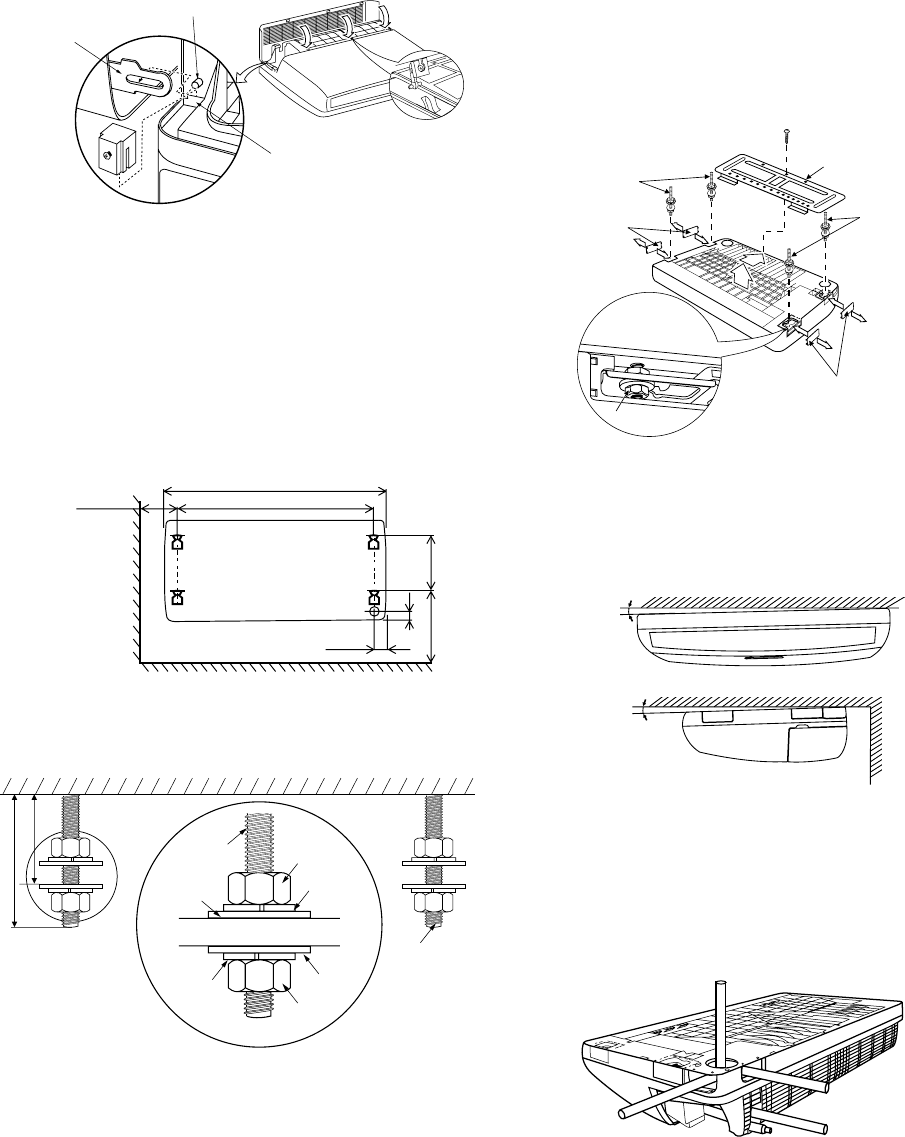
9-5-4. Under Ceiling Installation
For the installation of the indoor unit use the Paper
pattern, which is inside the package box cover.
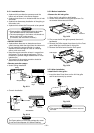
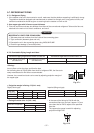
<Install the Suspension bolts>
• Install the Suspension bolts so that it can support
the indoor unit.
Fig. 9-5-7
• Adjust distance to ceiling before installation.
Fig. 9-5-8
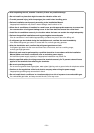
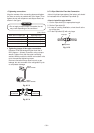
<Install the indoor unit>
1. Remove the Side covers and the Installation plate
1.
2. Insert the Suspension bolts into the metal fittings of
the indoor unit.
3. Set to nuts, spring washers and washers on both
sides of the metal fittings and then move the indoor
unit backward.
4. Secure it with the M10 Nuts. (4 pcs.)
5. Attach the Side covers to the unit.
Fig. 9-5-9
15 mm
240 mm or more
235 mm
or more
Suspension
bolt (M10)
Suspension
bolt
Nut (M10)
Washer
Spring
washer
Washer
Nut (M10)
Spring
washer
40~45 mm
25~30 mm
2
3
4
Side cover
Suspension bolt
Side cover
Nut (M10)
11
11
1 Installation plate
Suspension bolt
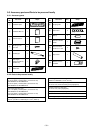
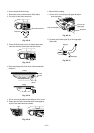
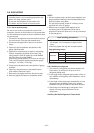
<Condition for Installation>
• The unit must not decline more than 15 mm in either
axis.
Fig. 9-5-10
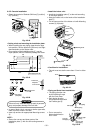
<Piping and Drain Hose Installation>
• The piping direction can be 4 ways as illustrated.
• The Drain hose is only one way.
Fig. 9-5-11
15 mm
Side piping
Upper piping
Rear upper piping
Rear piping Drain hose
140
330
1015
1093
60
2. Set the Air inlet grille arm to the axis of the Front
panel.
3. Insert the Grille stopper to the correct position and
fix it securely with screws.
4. Push the Air inlet grille to the correct position.
Fig. 9-5-6