


– 201 –
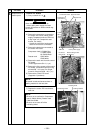
Piping panel (Front)
Piping panel (Rear)
Piping panel (Front)
Piping panel (Rear)
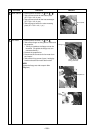
Pipe cover
TD sensor
Bundling band
(For thermal proof)
Compressor lead
Compressor case thermo.
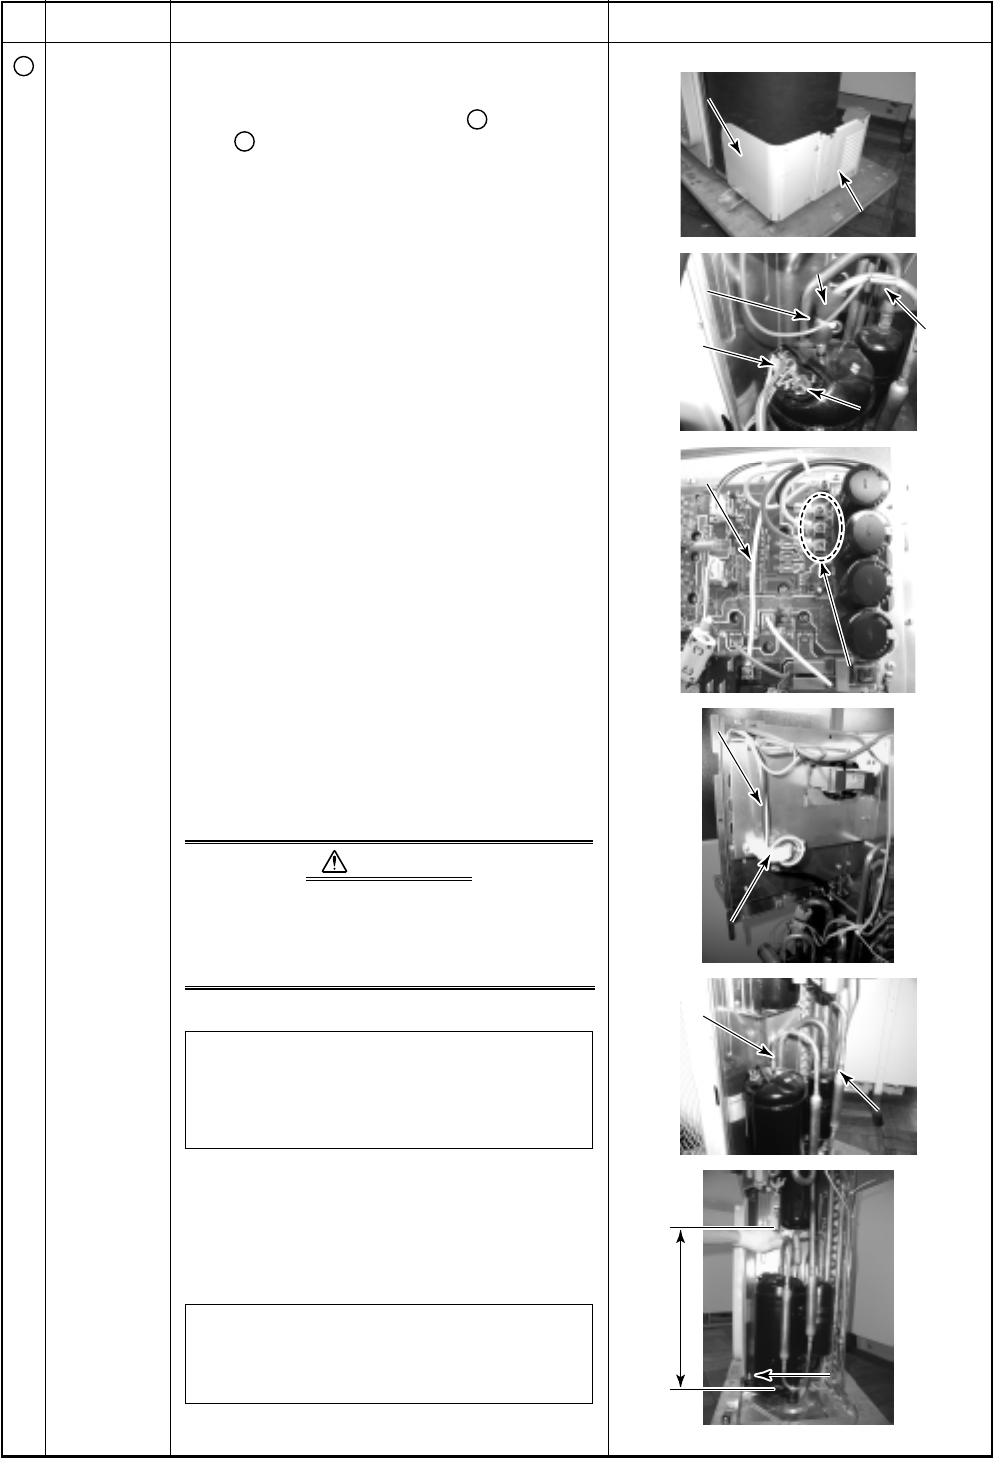
Control P.C. board
Compressor lead
Compressor lead
Ferrite core
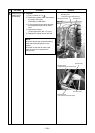
Remove
(Discharge pipe)
Remove
(Suction pipe)
Compressor nuts
(3 pcs.)
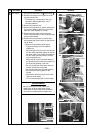
Pipe cover
TD sensor
Bundling band
(For thermal proof)
Compressor lead
Compressor case thermo.
Control P.C. board
Compressor lead
Compressor lead
Ferrite core
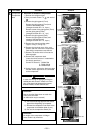
Remove
(Discharge pipe)
Remove
(Suction pipe)
Compressor nuts
(3 pcs.)
450
No.
6
Part name
Compressor
Compressor
lead
Procedure
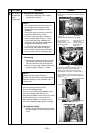
1. Removal of defective compressor
1) Recover the refrigerant gas.
2) Carry out work of item 1 of
1
and work of
3
.
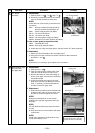
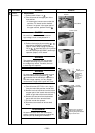
3) Remove the piping panel (Front).
Remove the piping panel (Front) and
screws of the bottom plate.
(Hexagonal screw Ø4 × 10, 2 pcs.)
Remove screw of the piping panel (Front)
and the piping panel (Rear).
(Hexagonal screw Ø4 × 10, 1 pc.)
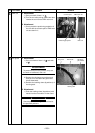
4) Remove the piping panel (Rear).
Remove the piping panel (Rear) and
screws of the bottom plate.
(Hexagonal screw Ø4 × 10, 2 pcs.)
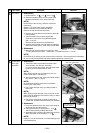
5) Remove the sound-insulation plate.
(Upper, rolling in, rolling out)
6) Remove the terminal cover of the com-
pressor and then remove the compressor
lead and the compressor case thermo.
7) Remove TD sensor which is fixed to the
discharge pipe.
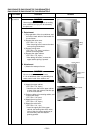
8) Remove the compressor lead.
(Leave the ferrite core as it is attached to
the electric parts box.)
Control P.C. board U : CN200 Red
V : CN201 White
W: CN202 Black
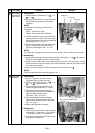
9) Using a burner, remove the discharge pipe
and the suction pipe which are connected
to the compressor.
X WARNINGX
In case of removing the piping by broiling the
welded part with a burner, if there is oil in the
pipe, it may burst into flames at the moment
that wax melted, so take sufficient care.
CAUTION :
Note so that the flame does not catch the
4-way valve and PMV.
(A malfunction may be caused.)
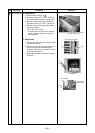
10) Pull off the discharge pipe and the suction
pipe of the refrigerating cycle upward.
11) Remove the compressor nuts which fix the
compressor to the bottom plate. (3 pcs.)
12) Pull out the compressor toward you.
CAUTION :
As weight of the compressor is 20kg or
more, handle it by 2 workers.
Remarks