


– 186 –
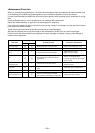
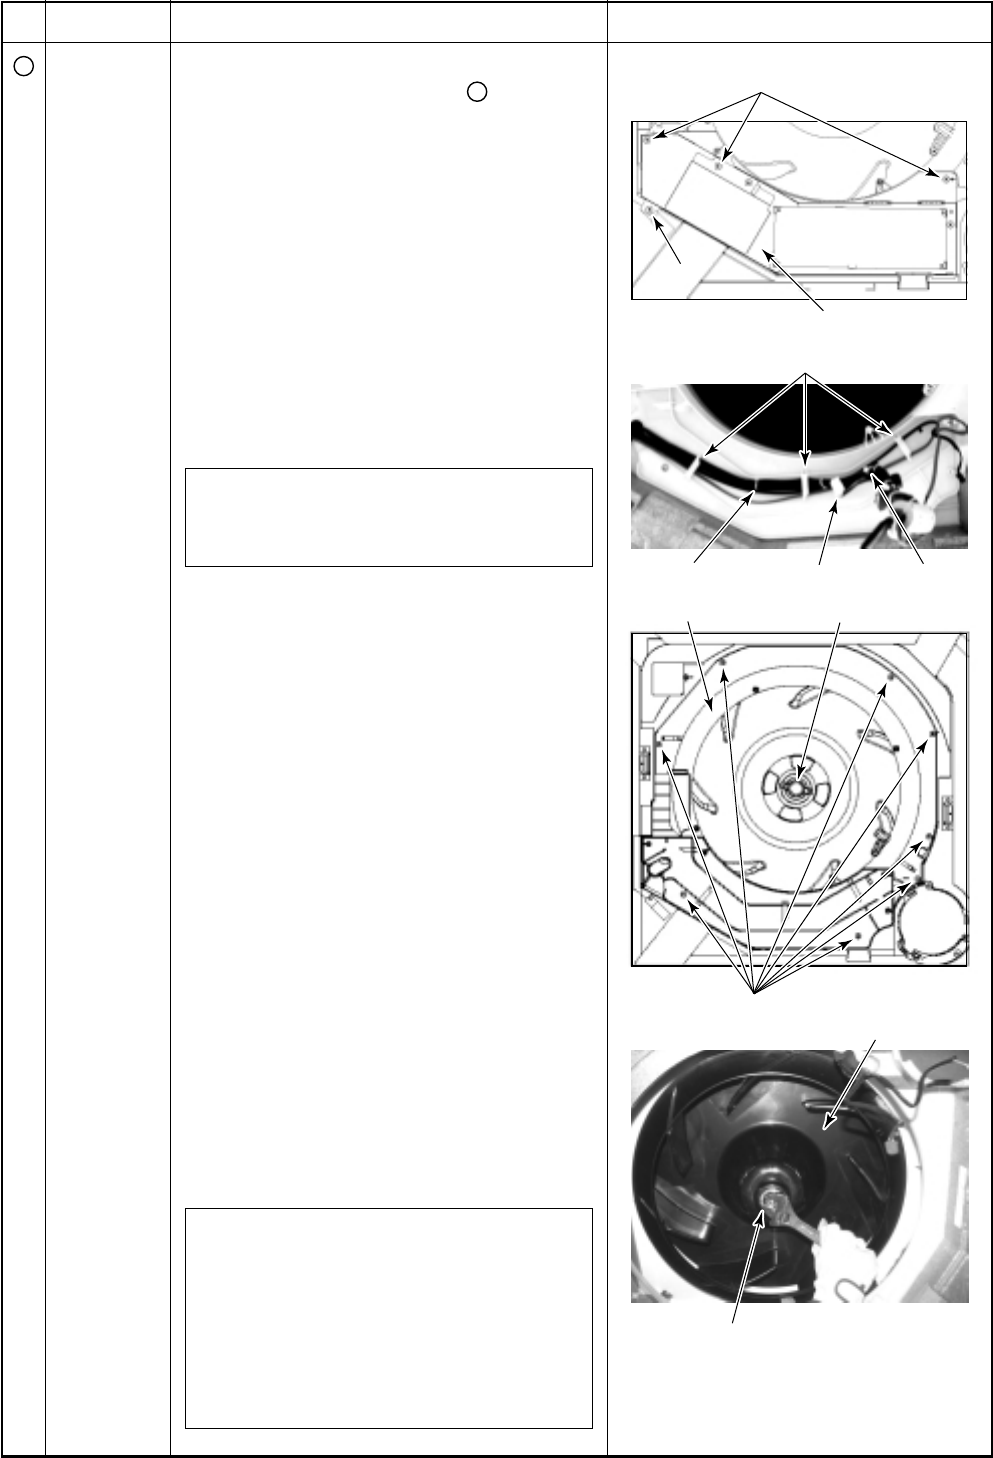
M8 nut with flange
Fixing screw A
Fixing screw
Turbo fan
Fixing scre
Fixing scre
w B
w B
Fixing screw B
Electric parts box
Clamp
TC sensor TCJ sensorFan motor lead
Bell mouth Nut cap
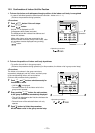
No.
7
Part name
Fan motor
Procedure
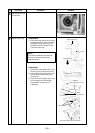
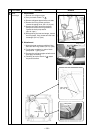
1. Detachment
1) Carry out work of item 1 of
2
.
2) Remove connectors which are connected
from the control P.C. board to the other
parts and then remove each wiring from
the clamp.
CN510 : Louver motor (20P, White)
CN34 :Float switch (3P, Red)
CN504 : Drain pump (2P, White)
CN101 : TC sensor (2P, Black)
CN102 : TCJ sensor (2P, Red)
CN104 : Room temp. Sensor (2P, Orange)
CN333 : Fan motor power supply
(5P, White)
CN334 : Fan motor position detection
(3P, White)
NOTE :
Unlock the lock of the housing part and then
remove the connector.
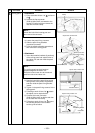
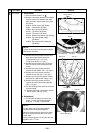
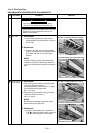
3) Remove the fixing screws A and B, and
then remove the electric parts box.
(Fixing screw A: Ø4 × 10, 3 pcs,
Fixing screw B: Ø4 × 8, 1 pc.)
4) Remove the fan motor lead, TC sensor
and TCJ sensor from clamp of the bell
mouth.
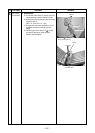
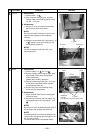
5) Remove the fixing screws and then
remove the bell mouth. (Ø4 × 10, 8 pcs.)
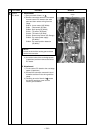
6) Remove the fixing screws and then
remove the nut cap. (Ø4 × 10, 2 pcs.)
7) Remove the fixing nut and then remove
the turbo fan. (M8 nut with flange, 1 pc.)
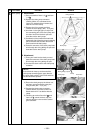
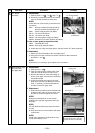
8) Remove the fixing screws and then
remove the motor lead holding bracket.
(Ø4 × 8, 2 pcs.)
9) Cut the bundling band and then remove it
from the clamp.
10) Remove the fixing nut and then remove
the fan motor. (Ø6 nut, 3 pcs.)
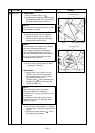
2. Attachment
1) Fix the parts as before in order of fan
motor → motor lead holding bracket →
turbo fan → nut cap → bell mouth.
NOTE :
Fix the motor lead to the clamp without
slack as before using bundling band.
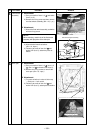
When fixing the turbo fan, be sure to match
the D-cut of the fan boss with D-cut of the
motor shaft.
Using a torque wrench, fix the turbo fan and
tighten it to 5.4
+0.5
Nm.
–0.2
Remarks