


8
NOTE: DIAGRAMS & ILLUSTRATIONS NOT TO SCALE.
WARNING: DO NOT REMOVE THE AC-
TUATOR ARM LOCKING SCREW UNLESS
THE COMPLETE OUTSIDE AIR VENT SYS-
TEM HAS BEEN INSTALLED IN ACCOR-
DANCE WITH THE DETAILED INSTRUC-
TIONS PROVIDED WITH THE KIT.
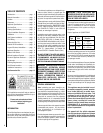
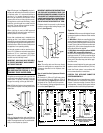
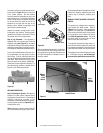
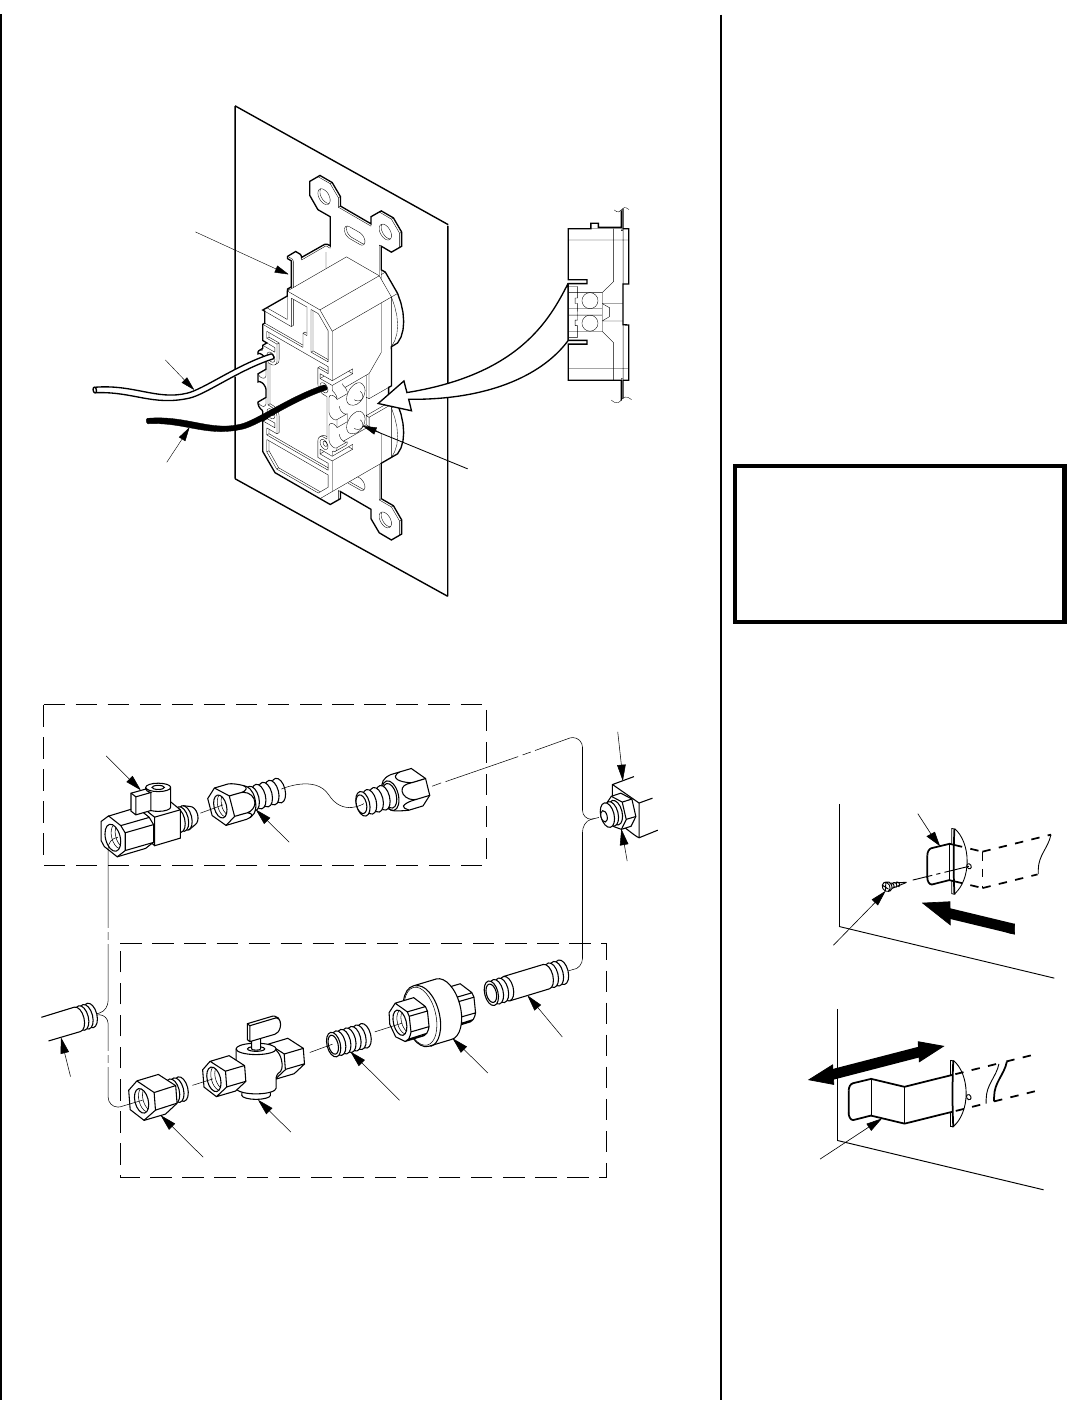
Figure 16
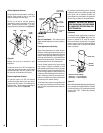
Note: Supply wires may be alternatively connected to the outlet using the screw terminals, however
the black supply wire must be wired to a terminal that is opposite (across the outlet) the point where
the white supply wire is connected.
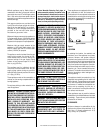
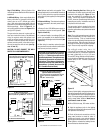
Figure 17
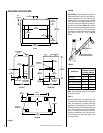
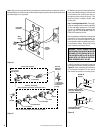
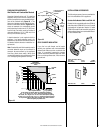
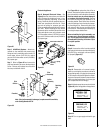
Figure 18
Locate the actuator arm along the right side
of the appliance firebox opening and refer to
Figure 18.
After completing the installation
of the Outside Combustion Air Kit remove
and discard the actuator arm locking screw.
D. When the gas lines are tested and leak free,
observe the individual tongues of flame on the
burner. Make sure all ports are open and pro-
ducing flame evenly across the burner. If any
ports are blocked, or partially blocked, clean
out the ports.
Step 7. Installing Outside Air Kit – These appli-
ances are equipped with an outside (make-up)
air door and integral actuator arm. If the appli-
ance is to be installed with an outside air vent
system, use only FireCraft Models FAOK-4 or
FAOK-4LD Combustion Air Kits.
After completing the installation of the optional
combustion air vent system the actuator arm
must be put in service and tested to ensure
proper operation before completing any enclo-
sure around the firebox. Failure to do so may
result in extensive and costly rework.
White
(Supply)
Black
(Supply)
Bipolar
Terminal
Screw
120 Vac
60 Hz
Ground Wire
Connection
³₈" Nipple
Gas Stub
¹₂" x ³₈" Flare
Shut-Off Valve
³₈" Flex Tubing
³₈" NPT Flare
Fitting (Remove
Before Hard
Piping)
³₈" Union
³₈" Close Nipple
³₈" Shut-Off Valve
¹₂" x ³₈" Reducer
Gas Valve
(Millivolt or
Electronic)
Gas Flex Line (provided)
Alternate “Hard Piping”
(may be required in some areas, consult local codes.)
Note: ¹₂" NPT At Inlet Of Gas Valve For Electronic Models.
Remove Locking Screw
and “Pop” Actuator to the
Left Before Initial Use
Outside Air
Actuator
Pull Forward to Open,
Push Back to Close