


18
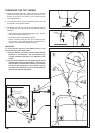
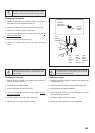
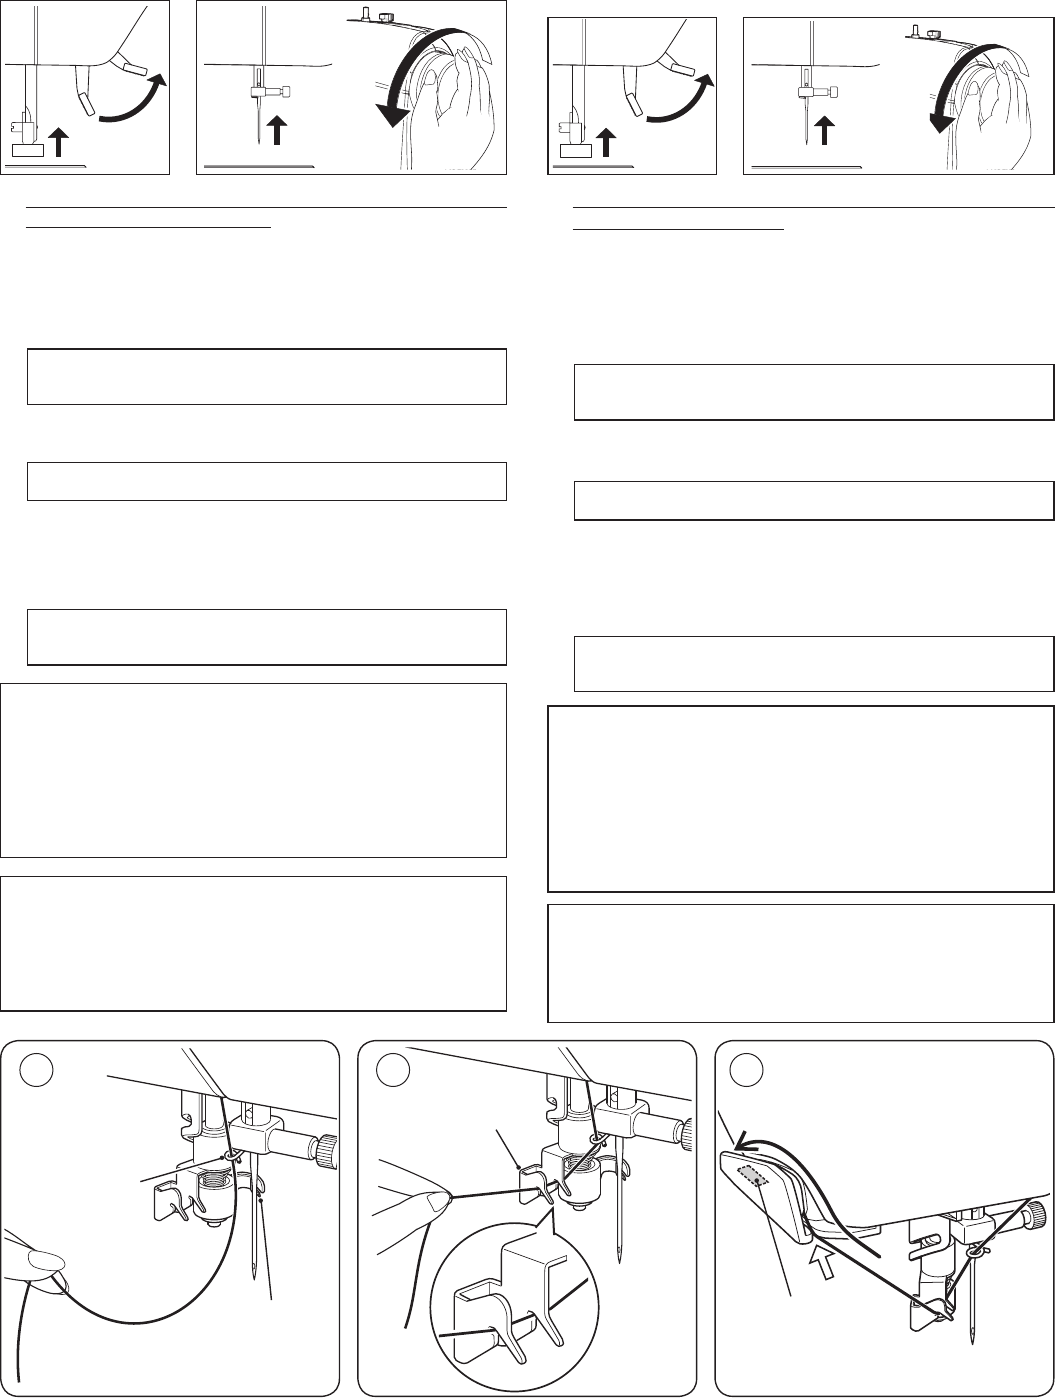
1. Enler la machine avec la main gauche tout en tenant le
l avec votre main droire. Faire passer le l dans le guide
fil situé sur la barre de l’aiguille et le tirer vers vous en
laissant dépasser environ 10cm (4’’).
2. Faire passer le l dans le guide l double (A et B).
3. Tirer le le doucement vers le coupe-l pour le couper et le
maintenir en place.
4. Appuyer sur la barre de l’enfileur jusqu’à ce qu’il soit à sa
position la plus basse et que le guide l double pivote et s’arrête.
5. Relâchez le levier de l’enfileur et l’aiguille sera
automatiquement enlée. S’il ne revient pas à sa position
initiale, relevez-le doucement à la main.
6. Éloignez la boucle de l en la tirant doucement vers l’arrière.
Ne pas tirer trop fort sur le fil car il pourrait se
désenler de l'aiguille.
S'assurer que le guide ne touche pas le tissu, etc.
Si l’aiguille n’a pas été correctement enfilée,
répéter l’opération depuis le niveau 1.
IMPORTANT : Si l’aiguille ne s’enfile pas avec l’enfile-
aiguille automatique due à la qualité du fil, où si le fil
est trop gros pour l’aiguille utilisée, enfiler l’aiguille
manuellement après avoir passé le l à travers le guide l
situé sur la barre d’aiguille.
NOTE :
Pour un meilleur enlage, il est recommandé de regler
la machine sur le point droit ( aiguille au centre) lors de
l'utilisation de l'enlage automatique de l'aiguille.
Un l epais ne peut pas être enlé dans une aiguille ne.
Ne pas abaisser la barre de l'enfileur lorsque la
machine est en marche car le crochet de l'enfileur
pourrait se casser.
3
2
1
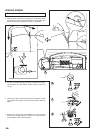
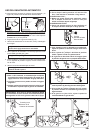
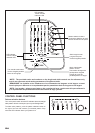
Twin thread guide
Guide-l double
Guía doble hilo
Threading hook
Crochet d’enlage
Gancho del ensartador
Thread cutter/holder
Coupe-l / support
Cortador de hilo
Thread guide
Guide-l
Guía hilo
B
A
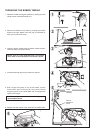
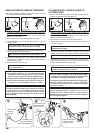
UTILISATION DE L’ENFILE-AIGUILLE
AUTOMATIQUE
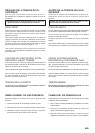
Veillez à relever le pied presseur et à lever l’aiguille dans sa
position la plus haute avant d'enler le l.
1. Thread the machine with your left hand while gripping the
thread with your right hand. Hook thread to the thread
guide on the needle bar and pull it toward you leaving
about 4” (10 cm) clear.
2. Hook thread into the twin thread guides (A and B).
3. Pull thread gently into the thread cutter/holder to cut and
hold it in place.
4. Pull down the threading lever to its lowest position until the
twin thread guide rotates and stops.
5. Release the threading lever and needle will be threaded
automatically. If it should not return to the original position,
raise it gently by hand.
6. Pull thread loop away from you.
USING AUTOMATIC NEEDLE THREADER
Be sure to raise the presser foot lifter and raise the needle
to its highest position before threading.
Don’t pull thread with strong force or thread may
be pulled off from needle hole after threading.
Make sure that the guide doesn’t touch fabric, etc.
If the needle has not been threaded correctly, re-
thread from STEP 1.
IMPORTANT: If the needle cannot be threaded with the
Automatic Needle Threader due to particular qualities
of the thread, or if the thread is too thick for the
needle being used, then manually thread the needle
after hooking the thread through the thread guide on
the needle bar.
NOTE:
For smooth threading, it is recommended that the
machine be set for straight stitch (in center needle
position) when using the automatic needle threader.
Heavy thread cannot be threaded through ne needle.
Don’t lower the threading lever while the machine is
in operation or the threading hook may be broken.