555970 MARK V – MOUNTED OVERARM PIN ROUTER
24
For most applications, we recommend
using a 3/8" diameter Guide Pin.
IMPORTANT: The distances between
your template segments must remain
exact, all the way around its perimeter.
Any variations here and your fixture
will not function properly.
4. Set up your Overarm Router for fix-
ture-making – For most projects, we rec-
ommend using a 3/8" Guide Pin and a
matching 3/8" carbide-tipped straight
router bit. Align the Pin and bit exactly
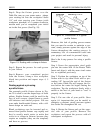
with one another as shown in Figure 8.
Adjust the Overarm Router’s Depth
Stop Rod to make a cut 7/16" deep
(remember.. .the Guide Pins are 3/8"
high). Lower your see-through Guard to
about 1/2" above the fixture surface. At-
tach your dust collection hose to the
port.
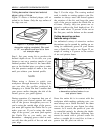
5. Cut the outside groove first – With the
router motor turned off, position your
fixture blank on the Overarm Router’s
Table...laminate side up and template
side down. Move the outside edge of
your template forward until it rests sol-
idly against the Guide Pin.
Turn on your router (and dust collec-
tor) and slowly lower the rotating bit
into the top of your fixture. Lock the
Depth Control Handle into position and
make an initial cut about 1/8" deep. Ro-
tate your workpiece slowly and cau-
tiously in a counter-clockwise direction
(Against the rotation of the bit) – being
careful to maintain a steady, even pres-
sure against the Table Pin at all times
– until you’ve completed the first 1/8"
deep pass.
Repeat the process above two more
times, until you’ve created a guide
groove in the laminate side of your fix-
ture that’s 7/16" deep.
6. Cut all remaining guide grooves – Fol-
low the same procedures outlined in
step #5 above. Remove the template
pieces from the particleboard side of the
fixture.
7. SCREW-DOWN FIXTURES – Drill
your mounting screw pilot holes
through the laminate side of your fix-
ture, being sure to countersink your
screw heads well below the surface.
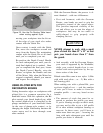
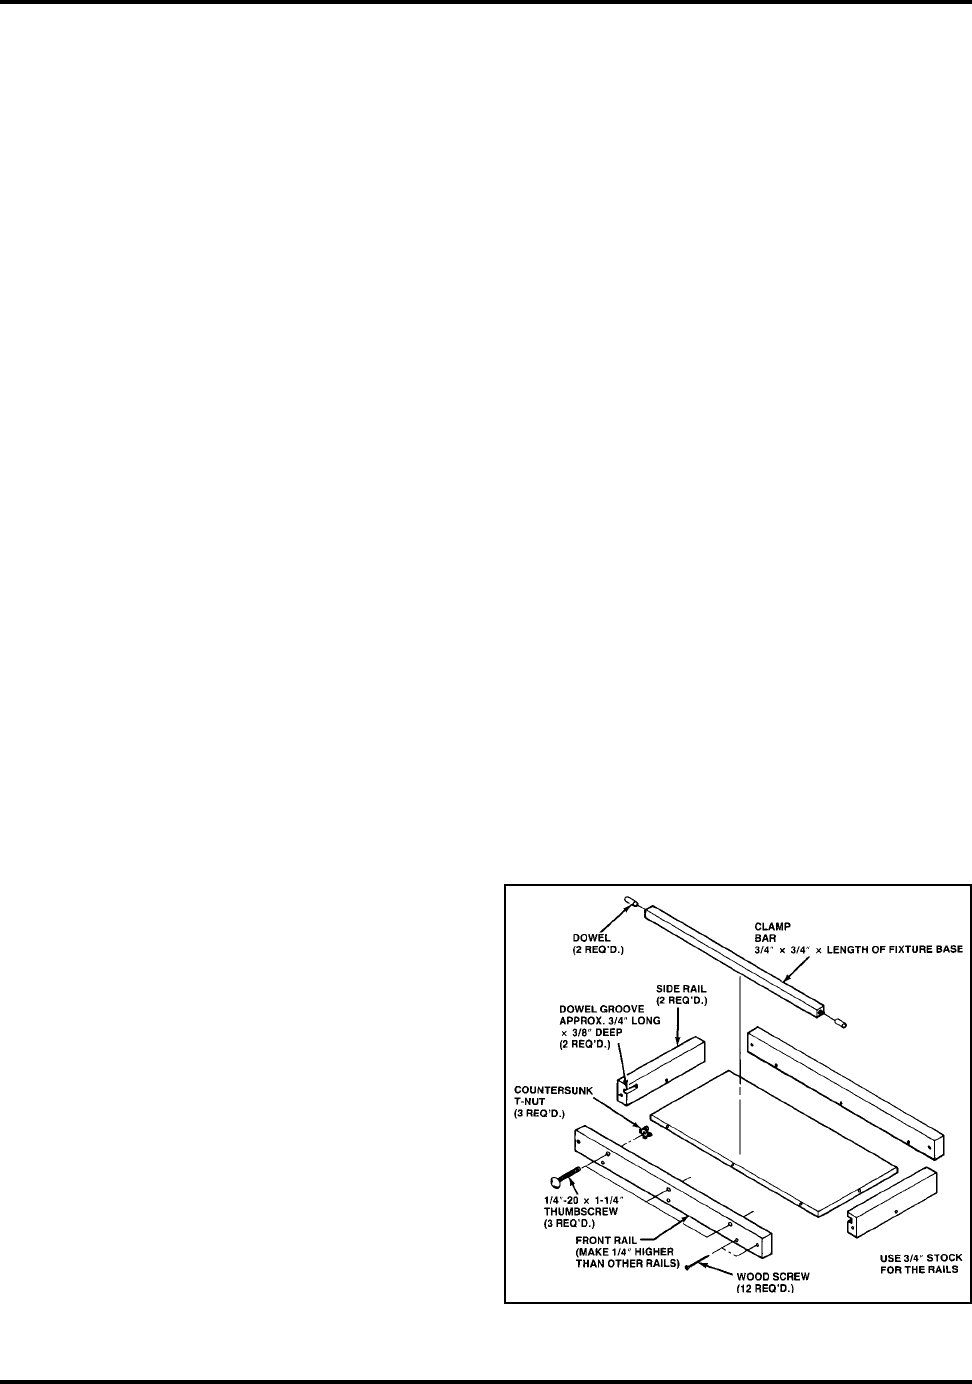
CLAMP-IN FIXTURES – Attach sides
around the perimeter of your fixture
(protruding above the surface of the fix-
ture, but not quite as high as your
workpieces will be thick). For durabil-
ity, use oak, maple or similar hard
woods for the sides and clamping bar.
Before attaching the side you select to
contain your clamp-down thumbscrews,
insert ordinary drive-in, threaded T-
Nuts from the INSIDE of your frame
piece. Cut a straight, wooden clamping
bar to fit inside the perimeter. Once as-
sembled, tightening the thumbscrews
will press the clamping bar against the
blank workpiece, holding it in position
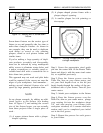
while you cut out your shape. See Fig-
ure 15.
Figure 15. Construction of a typical
clamp-in fixture


