


- HOW TO INSTALL YOUR HOME DRINKING WATER SYSTEM -
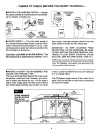
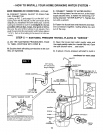
INSTALL THE DRAIN ADAPTER
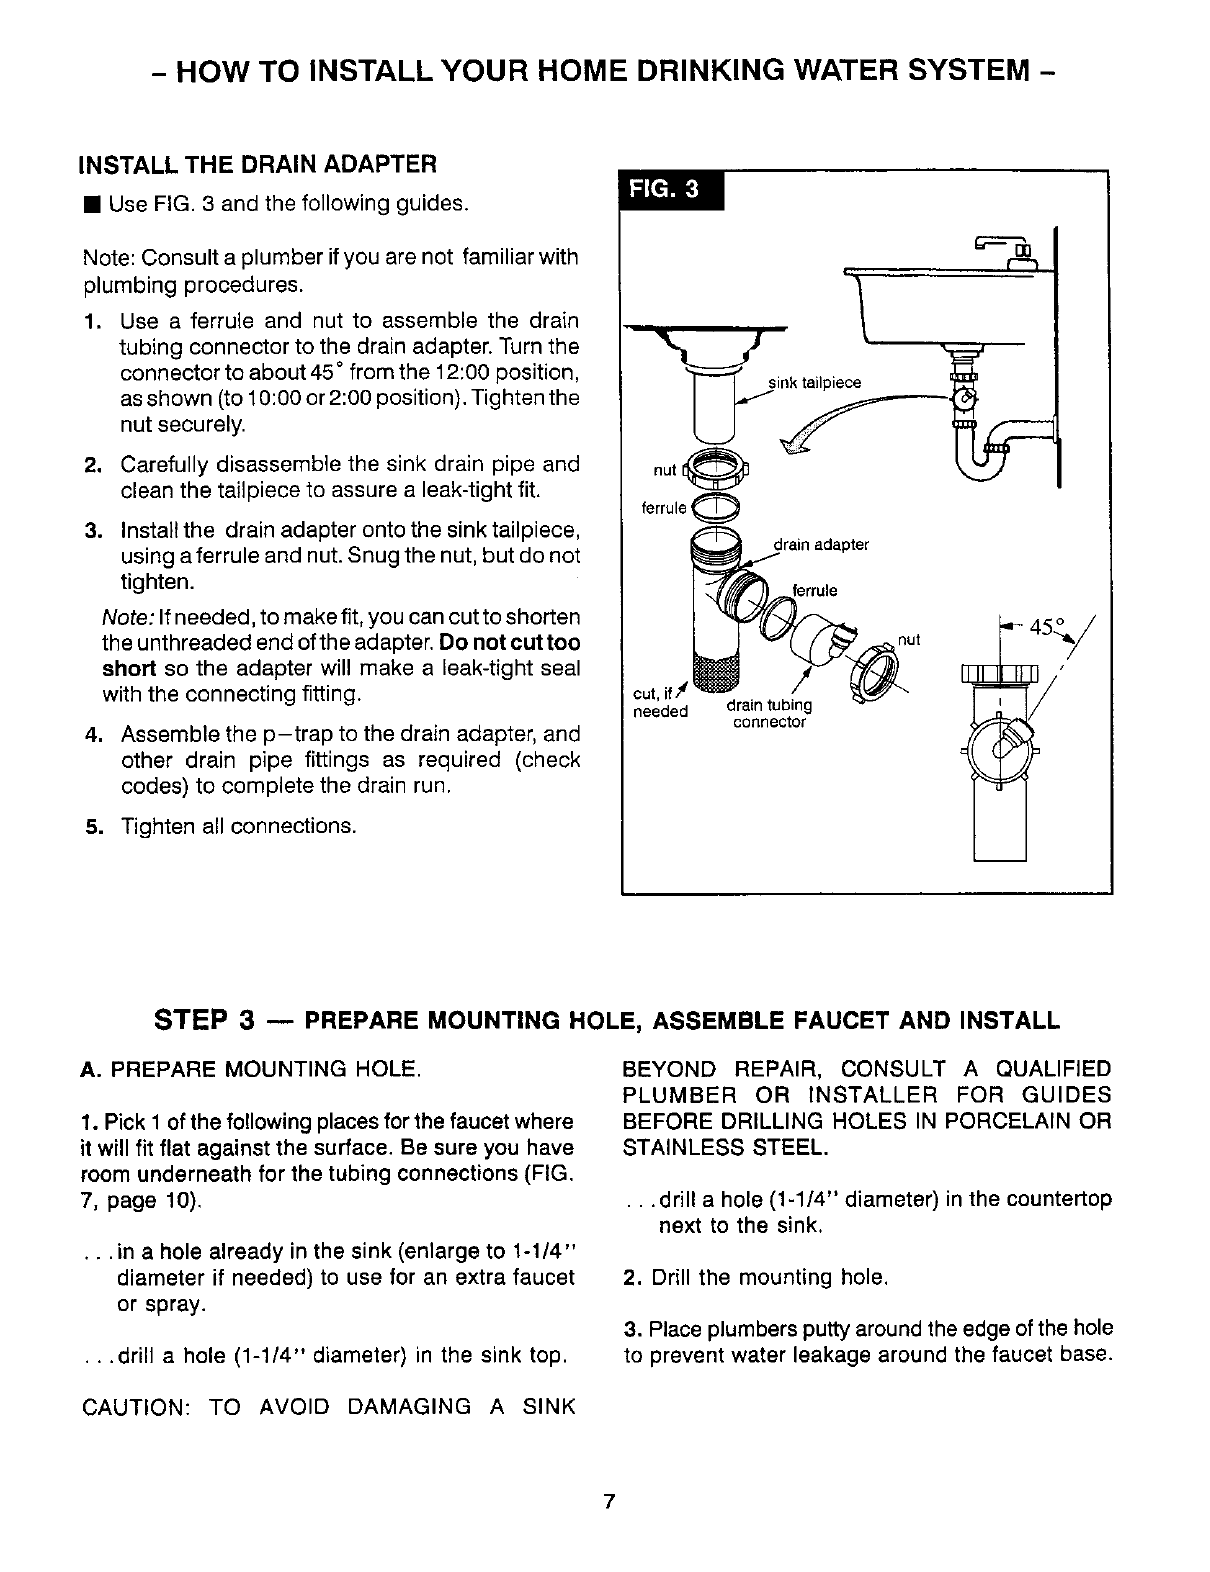
• Use FIG. 3 and the following guides.
Note: Consult a plumber if you are not familiar with
plumbing procedures•
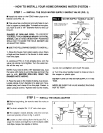
1. Use a ferrule and nut to assemble the drain
tubing connector to the drain adapter. Turn the
connector to about 45 ° from the 12:00 position,
as shown (to 10:00 or 2:00 position). Tighten the
nut securely.
2. Carefully disassemble the sink drain pipe and
clean the tailpiece to assure a leak-tight fit•
3. Install the drain adapter onto the sink tailpiece,
using a ferrule and nut. Snug the nut, but do not
tighten.
Note: If needed, to make fit, you can cut to shorten
the unthreaded end of the adapter. Do not cut too
short so the adapter will make a leak-tight seal
with the connecting fitting.
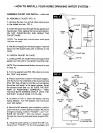
4. Assemble the p-trap to the drain adapter, and
other drain pipe fittings as required (check
codes) to complete the drain run.
5. Tighten all connections.
ferrule O
drain adapter
ferrule
cut, if2t _
needed drain tubing
connector
nut
I
_ o
45 //
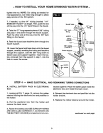
STEP 3 u PREPARE MOUNTING HOLE, ASSEMBLE FAUCET AND INSTALL
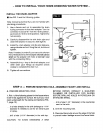
A. PREPARE MOUNTING HOLE.
1. Pick 1 of the following places for the faucet where
it will fit flat against the surface. Be sure you have
room underneath for the tubing connections (FIG.
7, page 10).
•..in a hole already in the sink (enlarge to 1-1/4"
diameter if needed) to use for an extra faucet
or spray.
...drill a hole (1-1/4" diameter) in the sink top.
BEYOND REPAIR, CONSULT A QUALIFIED
PLUMBER OR INSTALLER FOR GUIDES
BEFORE DRILLING HOLES IN PORCELAIN OR
STAINLESS STEEL.
•.. drill a hole (1-1/4" diameter) in the countertop
next to the sink.
2. Drill the mounting hole.
3. Place plumbers putty around the edge of the hole
to prevent water leakage around the faucet base.
CAUTION: TO AVOID DAMAGING A SINK
7