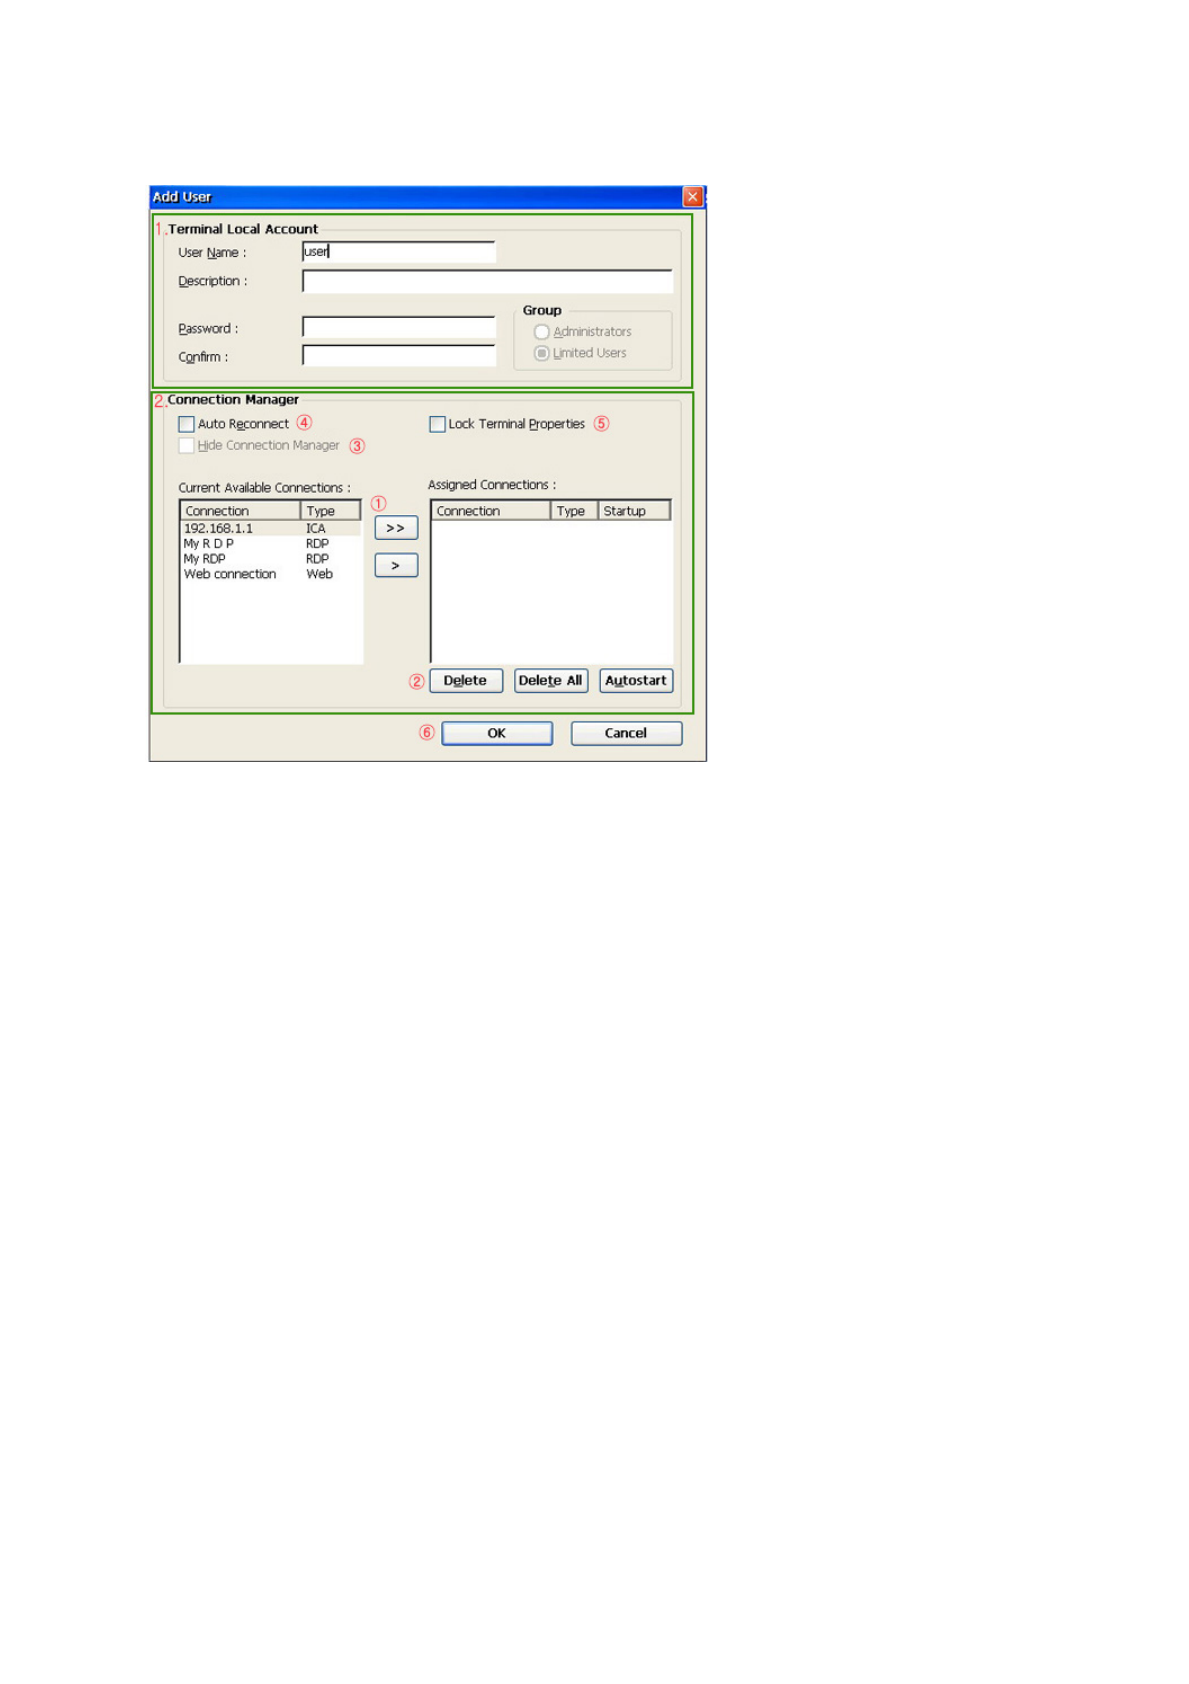
1. You can enter basic information using the Terminal Local Account group. The
user name is the required item to create a new account.
(You cannot use symbolic characters and you can use up to 20 characters. If
you want to set a password for an account, set a password within 20 characters
long and make sure to confirm your password.)
2. You can allocate connections and configure options using the Connection
Manager group.
z If you click Privileges on the Security dialog, the window as shown below is displayed.
You can specify Control Panel items a limited user account can use. When logged in
as a limited user account, only the specified items are displayed in Control Panel.
①
To allocate a connection to your terminal, select the connection you
want to use from the available connections list and click the [ >] button
or double-click the connection. Use the [>>] button to allocate all
available connections to your terminal.
②
Use the Remove and Remove All buttons to cancel an allocation. The
Auto Start button changes the state of the selected allocated
connection to 'Auto Start' or 'Default' (toggling).
③
If you set an allocated connection to Auto Start, the Hide Connection
Manager check box is activated. If you check this check box, when the
Thin Client Shell logs on to the server with the specified account, the
connection whose state you set to Auto Start is executed instead the
Connection Manager being displayed.
④
If you want to reconnect automatically when a connection fails or
finishes, check the Auto Restart check box. However, this check box
cannot be checked with the Hide Connection Manager check box at
the same time.
⑤
Check the Lock terminal properties check box if you want to open
terminal properties only if password authentication is passed
successfully,
⑥
Click OK to add or modify the account. If you want to delete an
account, use the Remove button on the Security dialog.


