


Installation & Servicing Instructions Rinnai E-Series
50
12 Commissioning
Work on the boiler must be carried out by a competent person, using
correctly calibrated instruments with current test certication.
These installation instructions are intended for professional installers, who
have the necessary knowledge and are approved for working on heating and
gas systems.
Before the boiler is red, ensure that the boiler and the system are well de-aerated
and free of air. Purge the gas line between the gas meter and the boiler.
The boiler and its individual shut off valve must be disconnected from the
gas supply piping system during any pressure testing of that system at test
pressures in excess of 1/2 PSI (3.5kPa).
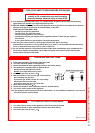
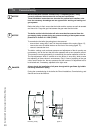
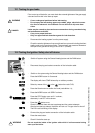
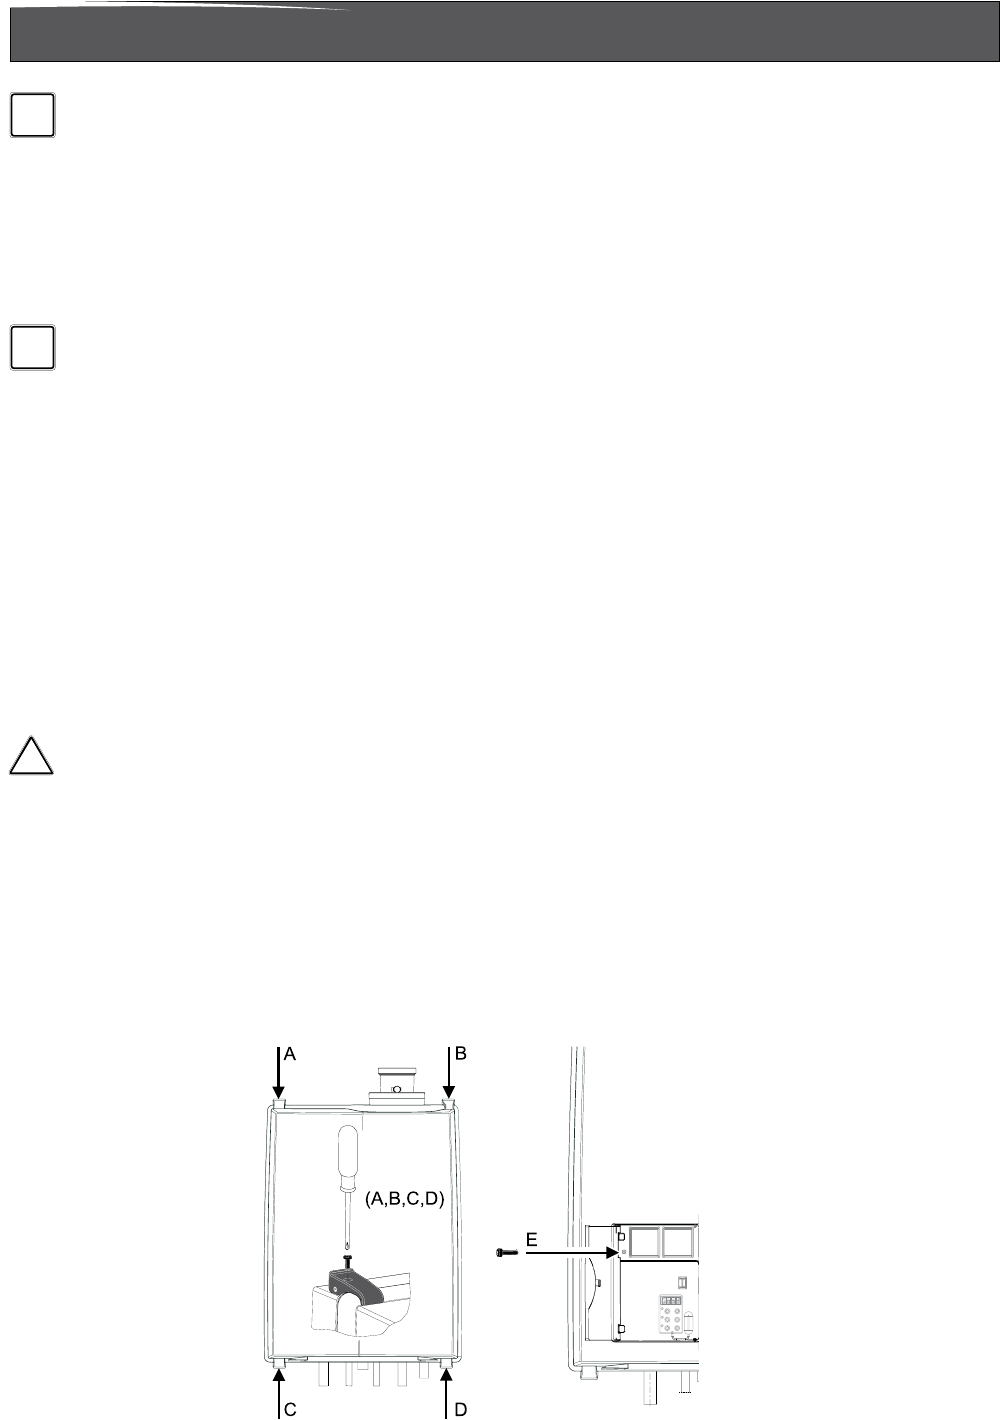
To commission the boiler the casing has to be removed.
-
remove the 4 screws A,B,C and D in the quick releases of the casing (gure 17);
- remove the screw E behind the door on the front of the casing (gure 17);
- remove it towards the front.
The boiler settings, such as burner pressure and adjustment of the air quantity are
unnecessary, due to the fact that the boiler operates with a zero pressure control.
This means the correct gas quantity is controlled by the suction operation of the fan.
The ne adjustment which is carried out at the factory is once-only, which means
that adjusting of these values is unnecessary. Only in case of replacing of the gas
valve, venturi and/or fan, the zero pressure and the incorrect O
2
adjustment has to
be checked and, if necessary, adjusted at the right value.
Always check the installation of all parts through which gas ows (by bubble
test using leak-search spray)
During the commissioning of the boiler the Rinnai Installation, Commissioning, and
Service card must be lled out.
Removing casing figure 17
!
DANGER
NOTICE
i
NOTICE
i