


Greenfi re Pellet Stove and Insert Technical Manual 19
INSTALLATION
PLATED DOOR INSTALLATION
TO AVOID PERSONAL INJURY DO NOT REMOVE OR REPLACE
COVER WHEN PELLET STOVE IS HOT!
TOOLS REQUIRED:
a) 11/32" socket
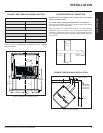
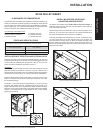
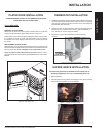
REMOVAL OF DOOR COVER:
When stove is off and cool, open the door. Remove the four (4) #8 hex
nuts around the inside of the glass retainer shown in Figure 37.
Remove door cover from door by gently sliding the studs out of the holes.
If it is diffi cult to remove the cover, the glass retainer may be pinching
the threads on the studs. Slightly loosen the four (4) screws (by each of
the studs).
REPLACEMENT OF DOOR COVER:
Slide new door cover into place and hand tighten the four (4) #8 hex nuts
around the inside of the glass retainer. Ensure the four screws are also hand
tight and close door. Do not overtighten or you may break screws.
Clean all plated surfaces before starting the stove. Refer to "Clean-
ing Plated Surfaces in Routine Cleaning and Maintenance in the Owner's
Manual.
Figure 37: Inner side of door.
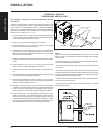
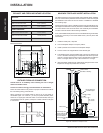
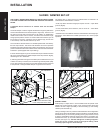
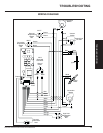
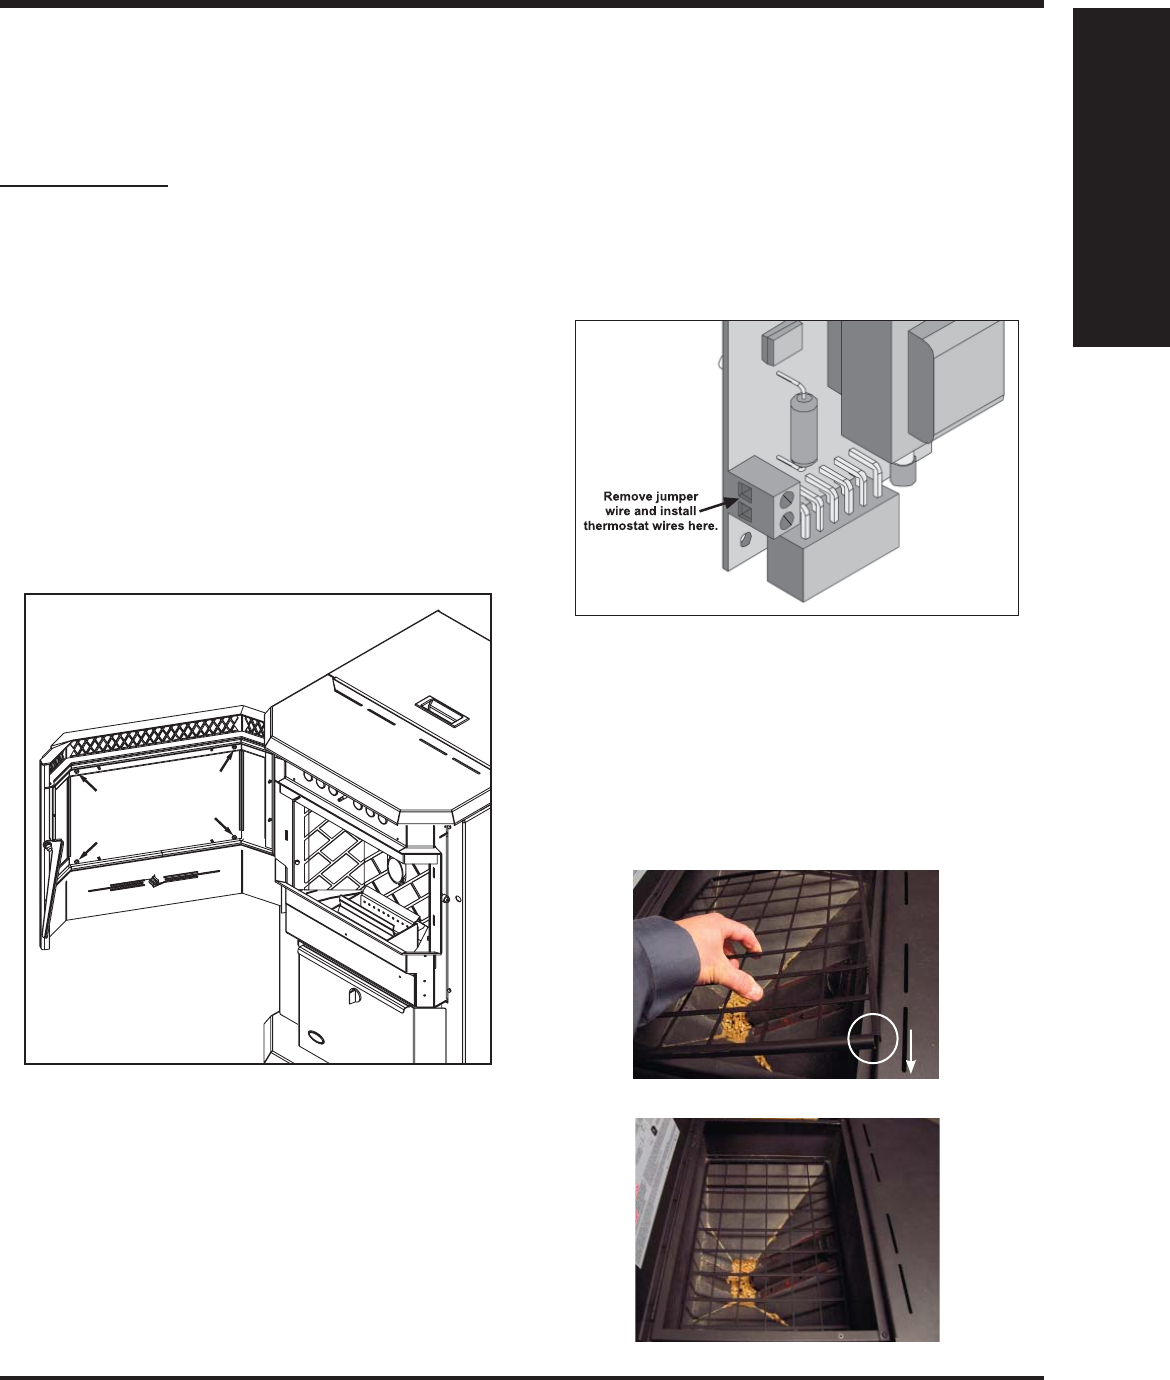
THERMOSTAT INSTALLATION
1. Install the thermostat by connecting a low voltage millivolt thermostat to
the circuit board jumper location shown below. Connect 2 x 18 gauge
wires from the connection points on the back of the control board to
the thermostat (see fi gure 38).
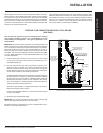
2. Choose a location for the thermostat, which will effectively heat the
desired area. Do not install close to the unit, typical installation is
10ft - 20ft away in an open area (not hidden).
3. Review each of the three control switch positions with the
consumer.
Figure 38: Thermostat wire placement.
INSTALLATION
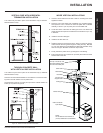
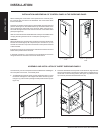
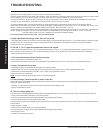
HOPPER GRATE INSTALLATION
Important: This grate must be installed into the hopper prior to
operating this appliance. For use on freestanding units only.
1. Open hopper door
2. Install the grate ensuring that the four fl anges on the grate is pointing
downwards into the hopper as per the diagram.
Figure 1. Flanges must face down
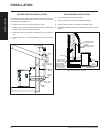
Figure 2. Grate installed