


Greenfi re Pellet Stove and Insert Technical Manual 17
INSTALLATION
When installing the insert into a masonry fi replace DO NOT remove any
bricks or masonry, with the following exception; masonry or steel, including
the damper plate, may be removed from the smoke shelf and adjacent
damper frame if necessary to accommodate a chimney liner. Provided that
their removal will not weaken the structure of the fi replace and chimney,
and will not reduce protection for combustible materials to less than that
required by the national building code.
POSITIVE FLUE CONNECTION WITHOUT A FULL RELINE
(USA ONLY)
This unit does not require a full reline (in USA only) when installing
into a masonry fi replace, however, it is recommended to ensure
proper drafting of the appliance. This type of application is not
recommended.
IMPORTANT: Ensure the chimney and fi rebox are cleaned and free of all
debris, including soot and ashes, before proceeding with this installation.
If it is not clean soot maybe blown into the room through the unit’s blower.
Ensure the fi replace and chimney have not deteriorated in any way. If
there is any sign of corrosion or damage in the chimney the unit can not
be installed. This unit can be installing in a masonry fi replace built to (UBC
37 or ULC S628 standards) or a factory built fi replace (built to UL 127 or
ULC S610 standards).
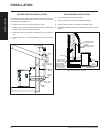
1. Install the hearth pad. The fl oor 6” (150 mm) in front of the unit and
6” (150 mm) to each side of the unit must be protected with a non-
combustible hearth pad.
2. The vent connector from the insert must extend a minimum of 18”
above the chimney seal plate. The chimney seal plate area must be
sealed to prevent the exhaust from the chimney from coming back
into the fi replace and prevent air from the fi replace from entering the
chimney which will affect proper drafting of appliance.
A qualifi ed installer should evaluate the existing fi replace to determine
the best method for achieving a positive fl ue connection between
the vent pipe or liner and the chimney. Whatever method used must
effectively seal the area to prevent room air passage to the chimney
cavity of the fi replace. A couple examples of Approved Methods of
Achieving a Positive Flue Connection are:
a) Secure a seal-off plate (i.e. 22-gage sheet steel) in the masonry
fi replace throat using masonry screws.
b) Pack non-combustible material (i.e. rockwool) around the vent pipe
or using a fl ue adapter.
3. Set leveling leg to approximate height.
IMPORTANT: The chimney seal plate must be removed for the annually
chimney cleaning as ash will build up on top of the plate.
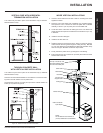
Be aware that this type of application may have a negative effect on per-
formance not covered under warranty.
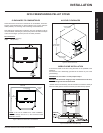
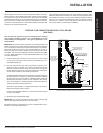
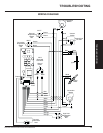
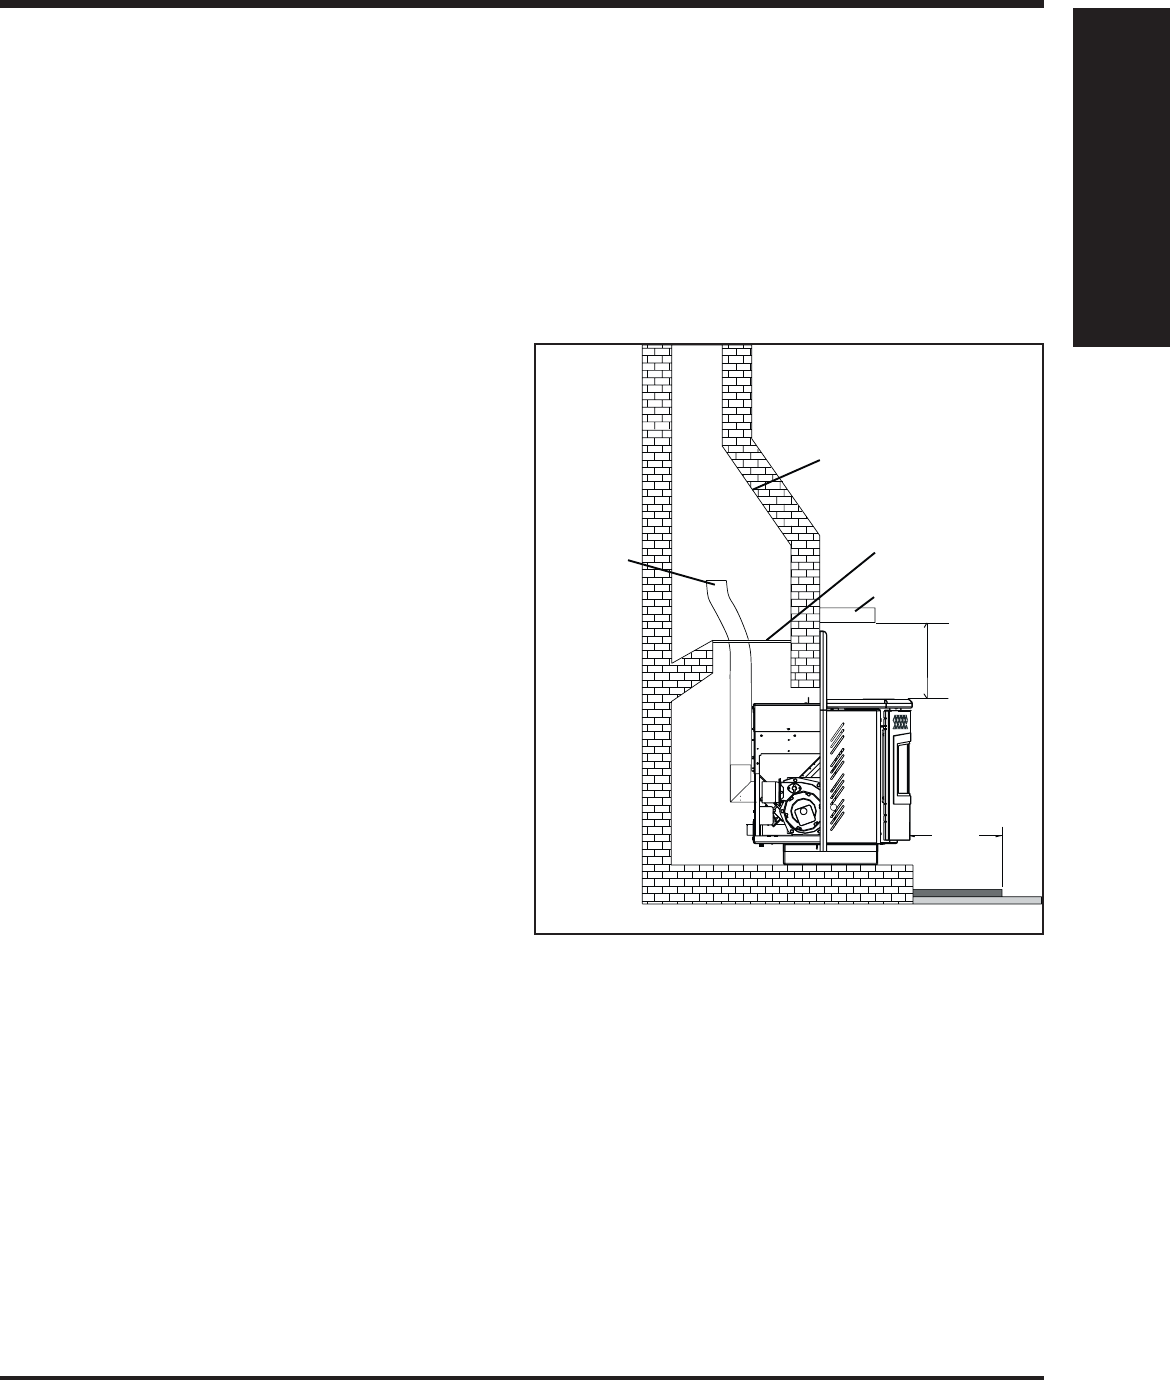
Floor Protection
Combustible Floor
Masonry Fireplace
Chimney must be completely
sealed with a non-combustible
material and maybe removed
annually for cleaning.
Top of vent pipe
must be 18"
(45.7cm) minimum
above the chimney
seal plate.
The existing chimney can
not be corroded or
damaged in any way.
Mantel (8" deep)
Min. 8" from
top of stove
Min. 6"
Figure 29: Masonry fi replace positive fl ue installation.
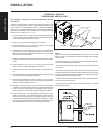
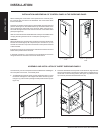
INSTALLATION
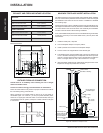
When installing the fi replace insert into a zero clearance fi replace, where
allowed by local codes, DO NOT cut or modify any factory fi rebox parts.
If the fi replace insert does not fi t into a zero clearance fi replace we recom-
mend you use an Greenfi re freestanding model and install as a hearth
mounted unit. Install a 3” (76 mm) fl ex pipe from the stove to the top of
the chimney. Refer to "Hearth Mount Installation".