


23
W415-0607 / A / 01.18.08
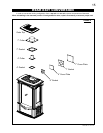
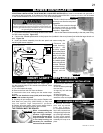
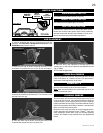
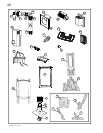
1. Place the rear log as shown, ensuring the holes on the
underside are placed onto the 2 pins of the log support.
In order to assemble the log set, the glass door must be
removed, see Glass Door Installation and Removal in the
FINISHING section of this manual.
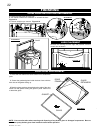
LOG PLACEMENT
BRACKET
FIGURE 45a-d
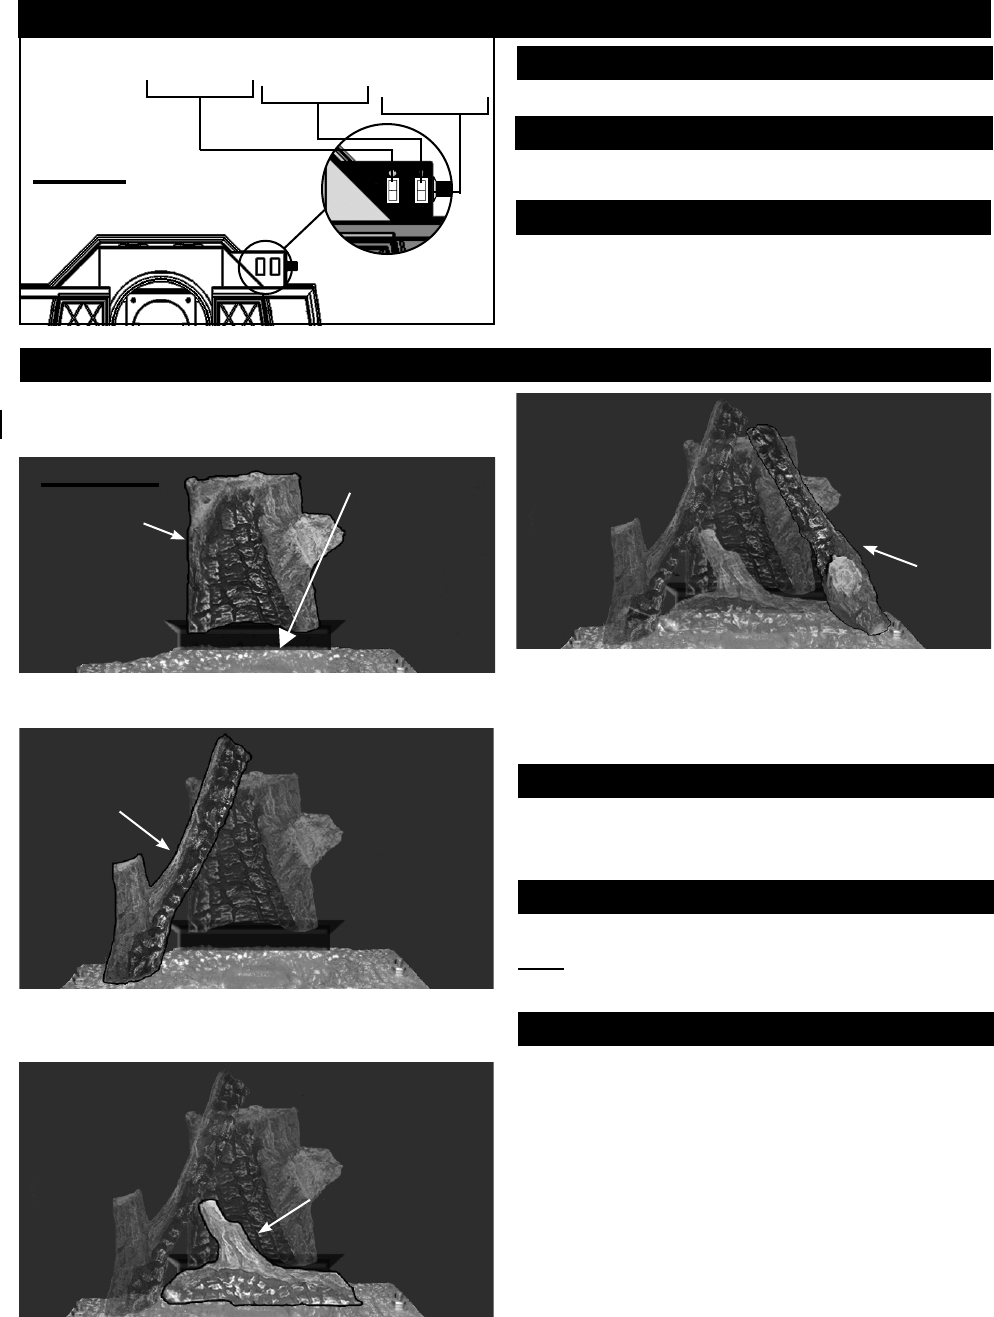
3. Place the center log as shown, ensuring the holes on the
underside are placed onto the two center pins.
4. Place the hole in the underside of the right log onto the
locating pin, on the burner base and rests against the rear
log as shown.
5. Re-install the glass door.
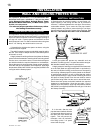
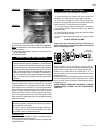
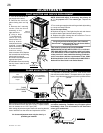
Randomly place the charcoal embers along the front and
sides of the burner in a realistic manner. Fine dust found in
the bottom of the bag should not be used.
Sprinkle vermiculite around the charcoal embers.
Note: Both charcoal embers and vermiculite are not to be
placed on the burner ports.
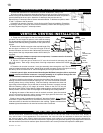
Tear the embers into pieces and place along the burner ports
covering all of the burner. Care should be taken to shred the
embers into thin, small irregular pieces as only the exposed
edges of the fi bre hairs will glow. The ember material will only
glow when exposed to direct fl ame; however, care should be
taken to not block the burner ports.
Blocked burner ports can cause an incorrect fl ame pattern,
carbon deposits and delayed ignition. Phazer
TM
logs glow
when exposed to direct fl ame. Use only certifi ed "glowing
embers" and Phazer
TM
logs available from your Napoleon®
dealer.
CHARCOAL EMBERS
GLOWING EMBERS
VERMICULITE
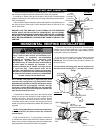
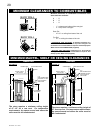
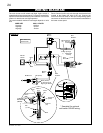
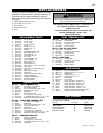
MAIN BURNER SWITCH
NIGHT LIGHT
TM
SWITCH
FAN CONTROL OPTION
This switch turns the Main Burner on and off.
This switch turns the Night Light
TM
on and off.
If installed this switch will turn on and off the power to the
blower and control the fan speed. There is also a thermally
activated switch that will only let the blower come on once
the unit has reached a comfortable temperature.
SWITCH FUNCTIONS
MAIN
BURNER
SWITCH
NIGHT
LIGHT
TM
SWITCH
FAN
CONTROL
OPTION
FIGURE 44
TOP VIEW
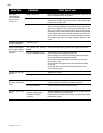
2. Place the left log as shown, ensuring the hole on the
underside is placed onto the burner pin. This will rest on the
left side of the rear log.