


Net Safety Monitoring Inc
MLP-A/AR/AD-ST1400-25 12
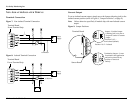
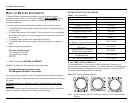
Magnetic Reed Switch
The Magnetic Reed Switch is provided to avoid opening the Housing in an
environment where gas may be present. The Magnetic Reed Switch functions in
the same manner as the Calibration Button but in a non-intrusive manner. Refer
to Figure 12, "Controller Functionality", on page 10 for more information.
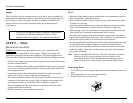
Attached to the side of the Controller is a magnet:
• Place and hold the magnet to the Controller’s Housing (10 o’clock position)
to Calibrate and access Main Menu.
• Briefly place the magnet to the Controller’s Housing (10 o’clock position) to
make a selection (select
YES? ).
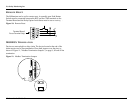
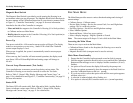
Power Up
Turn power switch On. A 90 second warm-up routine will begin. The display
reads
Start Delay Millennium Net Safety
, Status LED is Red Slow Flash and
current output displays 3.0 mA.
When power is applied, the system is automatically tested to ensure proper
functionality.
After warm-up, the Controller will enter normal operation, the display reads
%O2, Status LED will Green Blip/blink and analog output will change to
4.0 mA.
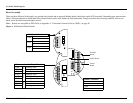
Current Loop Measurement (Test Jacks)
Use a standard meter to measure current loop during various states. The
Controller’s Housing cover must be removed to access the Test Jacks.
Refer to Table 2, “Status LEDs, Display Messages and Current Loop,” on
page 11 for a detailed list and Figure 12, "Controller Functionality", on page 10
for more information.
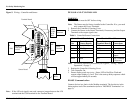
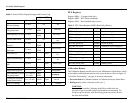
Status LED
The Status LED will remain solid, flash, blip and/or blink, in either Red or
Green, to indicate various states. Refer to Table 2, “Status LEDs, Display
Messages and Current Loop,” on page 11 for a detailed list.
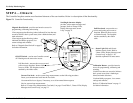
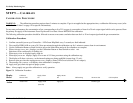
THE MAIN MENU
The Main Menu provides access to various functional settings and viewing of
current settings.
• Calibrate Sensor - Calibrate sensor.
• Review Relay Settings - Review the current Fault, Low and High alarm
settings. This is a read only section.
• Set Relay Options - Set the Low and High alarm settings.
• Select Modbus Options.
• Restricted Menu - Select low power options.
• Select a display language - English, Spanish or French.
Note: The current output will drop to 3.0 mA while in the Main Menu.
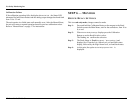
Accessing the Main Menu
There are two ways to activate the Main Menu:
• Calibration Button found on the faceplate (the Housing cover must be
removed to access)
• Magnetic Reed Switch (a magnet must be used to activate)
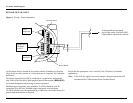
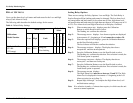
Main Menu Functionality
1. Ensure that the Controller has been turned on and no fault is present.
2. Hold the magnet against the Reed Switch or press and hold the Calibration
Button until the message
Switch On displays and the countdown (10 to 0)
finishes.
3. An option will scroll across the display followed by the prompt
YES? .
4. To select an option, momentarily place the magnet to the Reed Switch or
press the Calibration Button at the
YES? prompt.
5. If you do not wish to select that option wait until the next option appears
and then select
YES? .
6. A selection is acknowledged with a flashing
YES .
7. If no option is selected, the Controller returns to
0 (normal operation).