


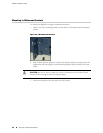


6. Type the default user name (root) and password (abc123).
7. Click ACM to start the ACM wizard. Complete the wizard steps as described in
the online Help.
Related Topics ■ Performing the Initial Configuration on page 27
Installing the Product License Key
IDP 4.1 and later releases require you to install a permanent license key.
To install the permanent license key:
1. Open a Web browser and navigate to the Juniper Networks License Management
System Tool (LMS tool):
https://www.juniper.net/lcrs/license.do
2. Authenticate with your Juniper Networks customer username and password.
3. Use the LMS tool to generate a new license.
You must provide the device serial number. You can locate the serial number in
the following ways:
■ In ACM, the serial number is displayed in the lower-left hand corner of the
home page.
■ From the CLI, run the scio getsystem command to display system
information, including the serial number.
Save the license as a text file named lic.txt.
4. Connect to the IDP command-line interface:
■ Use SSH to connect to the IP address or hostname for the management
interface. Log in as admin and enter su – to switch to root.
■ If you prefer, make a connection through the serial port and log in as root.
5. Use SCP or FTP to copy the license file to the IDP appliance. The IDP appliance
does not run an FTP server, so you have to initiate the FTP session from the IDP
appliance.
6. Change directory to the temporary directory:
[root@localhost ~] cd /tmp
7. Change permissions on the file to enable read, write, and execute:
[root@localhost ~] chmod 777 lic.txt
8. Run the following scio command to add the license key:
32 ■ Installing the Product License Key
IDP250 Installation Guide