


19
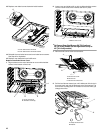
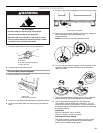
Replace Oven Bake Burner Cover
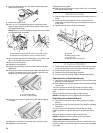
1. Align rear shoulder screw mounting holes (keyholes) on the
oven bake burner cover with shoulder screws in the bottom
of the oven.
2. Drop cover and slide to left or right to slide shoulder screws
into narrow ends of keyholes and lock in place.
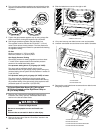
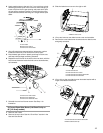
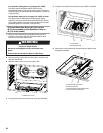
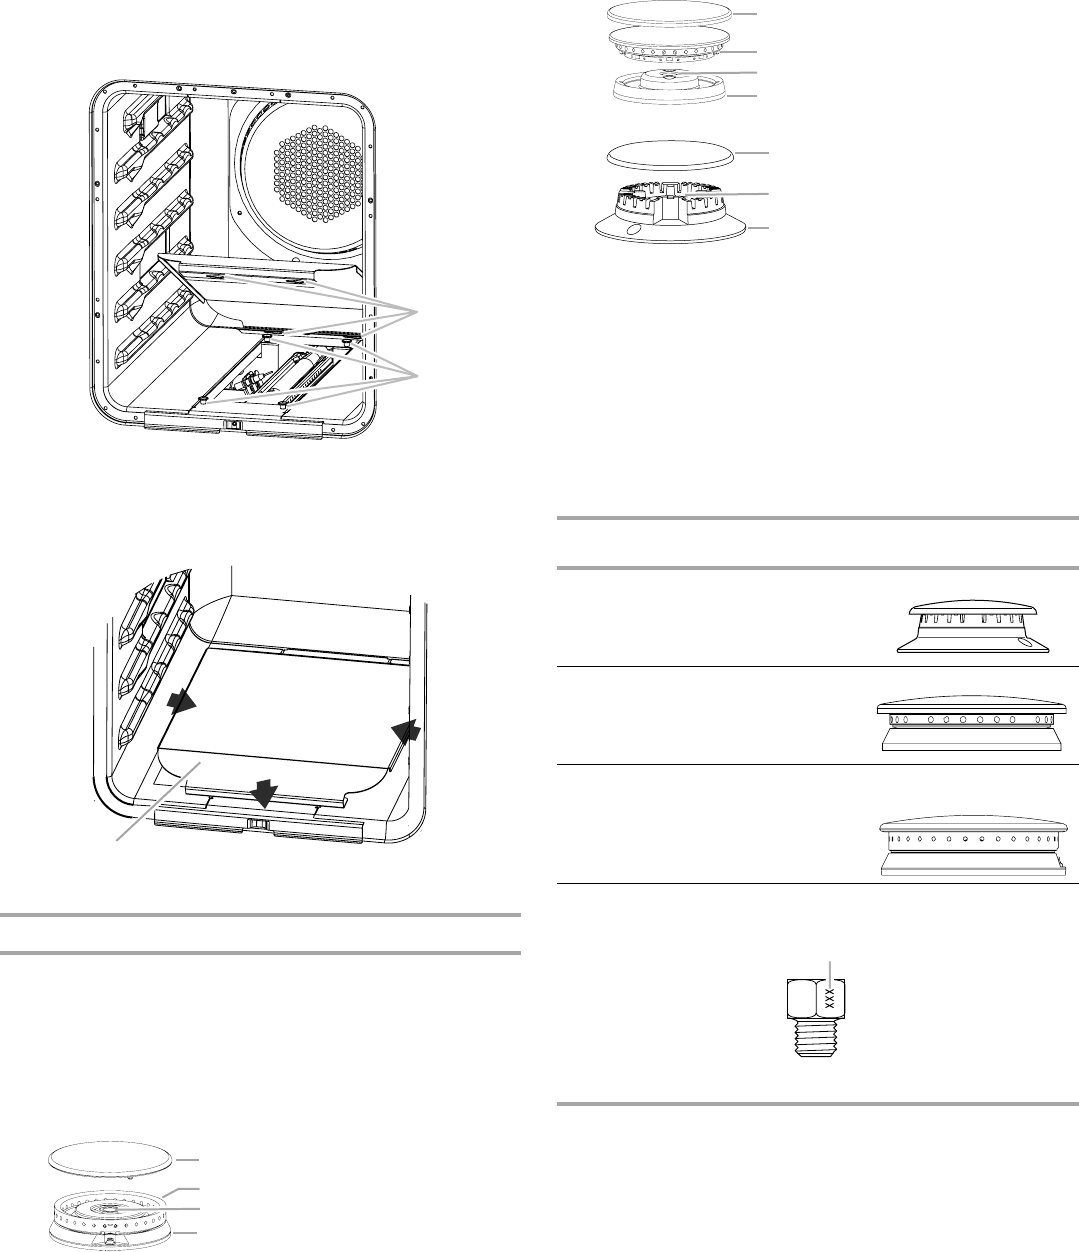
To Convert Surface Burners
1. If installed, remove the burner grates.
2. Remove burner cap.
3. Remove the burner head.
NOTE: A ⁷⁄₈" socket must be used to remove the burner head
of the large dual burners.
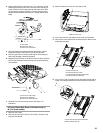
4. Using a T15 Torx
®
screwdriver, remove the burner base.
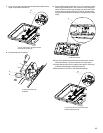
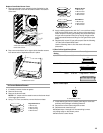
5. Apply masking tape to the end of a 7 mm nut driver to help
hold the gas orifice spud in the nut driver while changing it.
Insert nut driver into the gas opening and press down onto
the gas orifice spud and remove by turning the gas orifice
spud counterclockwise and lifting out. Set gas orifice spud
aside.
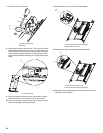
6. Replace with correct LP gas orifice spud. See the following
“LP Gas Orifice Spud/Hood Chart.”
Use the following chart to find the exact orifice spud
placement.
LP Gas Orifice Spud/Hood Chart
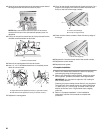
7. Place Natural gas orifice in plastic parts bag for future use
and keep with package containing literature.
8. Replace the burner base using both screws.
9. Replace burner head and cap.
10. Repeat steps 2 through 9 for the remaining burners.
11. Unplug range or disconnect power.
12. Remove the control knobs.
A. Shoulder screw mounting holes (keyholes)
B. Shoulder screws
A.Bake burner cover
Large Dual Burner
A. Burner cap
B.Burner head
C.Gas opening
D.Burner base
B
A
A
A
C
D
B
Medium Burner
A. Burner cap
B.Burner head
C.Gas opening
D.Burner base
Small Burner
A. Burner cap
B.Gas opening
C.Burner base
Burner
Rating
Color Size Burner Style
3,000 BTU Blue 0.55 mm Small burners
12,500 BTU Brass 1.04 mm Medium burners
15,500 BTU Yellow
Green
1.05 mm
0.45 mm
Large burner - main
Large burner - simmer
Burner orifice spud
A. Size stamp or color
A
C
D
B
A
C
B
A