


MV100 ELECTRIC CONTROLLERS T100, T200 THERMOSTATIC CONTROLLERS AND V2000 RADIATOR VALVES
13 62-3048—2
PRESSURIZED VALVE CARTRIDGE
REPLACEMENT
The VA8200A001 Valve Cartridge Changing Tool enables the
user to remove, and clean or replace the valve cartridge while
the valve remains pressurized. Boiler shutdown is not required.
WARNING
Severe Scalding Hazard.
Contact with hot liquid can lead to severe injury or
cause death.
Exercise extreme caution when working with hot liquid.
CAUTION
Hazardous Splashing Fluids.
Can injure, burn, or blind.
Wear eye protection to prevent injury.
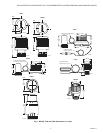
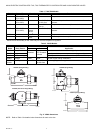
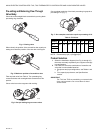
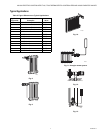
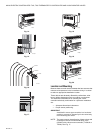
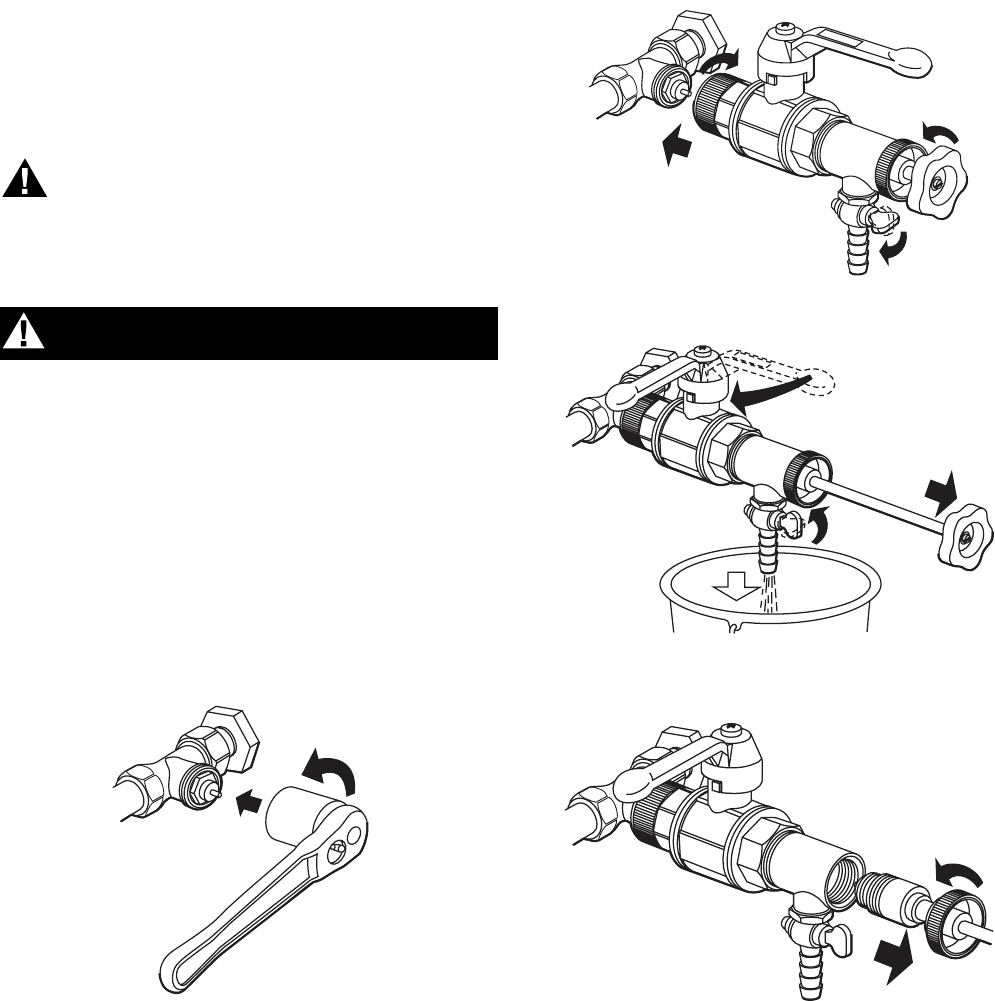
To remove the cartridge, perform the following:
1. Remove controller and loosen valve cartridge slightly
using a 19mm socket wrench (A,B). See Fig. 20.
2. Tighten VA8200A Cartridge Changer to valve body
(A,B), close drain cock (C), and turn tool handle ccw to
unscrew cartridge (D). See Fig. 21.
3. Pull handle out to clear VA8200A ball valve (A), close
ball valve (B), and open drain cock to remove excess
water and steam from chamber (C). See Fig. 22.
4. Unscrew end cap (A) and remove cartridge from
chamber (B). See Fig. 23.
5. Clean or replace cartridge.
Fig. 24. Loosening valve cartridge.
Fig. 25. Attaching VA8200A001 to valve.
Fig. 26. Disconnecting valve cartridge
and draining chamber.
Fig. 27. Removing valve cartridge.
To reinstall cartridge into the valve, use the same process and
figures. Perform steps in reverse order. All figure arrows are
backwards (except Fig. 20, arrow A). Proceed as follows:
1. Replace cartridge into chamber (B) and screw end cap
onto VA8200A (A). See Fig. 23.
2. Close drain cock (C), open ball valve (B), and push
handle in (A). See Fig. 22.
3. Turn tool handle cw to screw in cartridge (D), open drain
cock to drain chamber of remaining water and steam (C),
and loosen VA8200A Cartridge Changer from valve body
(B,A). See Fig. 21.
4. Tighten valve cartridge using a 19mm socket wrench
(A,B) and replace controller. See Fig. 20.
M16274
A
B
M16273
A
B
C
D
M16275
A
B
C
M16276
A
B