


Heatilator • Evolution • 4065-114 Rev. o • 11/11 39
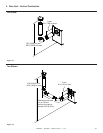
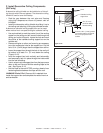
B. Rear Vent
NOTICE: Once appliance is set up for top or rear venting,
it CANNOT be changed at a later time.
Figure 9.6
Figure 9.8
Figure 9.7
Figure 9.10
Figure 9.9
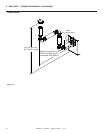
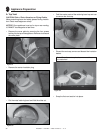
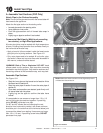
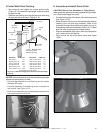
• Fold the tabs toward the center of the vent cap (90º) and
remove the insulation gasket.
• Cut the metal retaining band and fold the sides out.
• Fold the center parts of the retaining band out and use
to remove the vent cap.
• Discard the vent cap, remove and discard the insulation
basket.
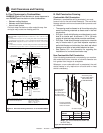
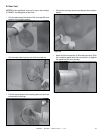
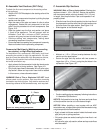
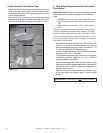
• Attach the fi rst vent section (it will snap into place). Slide
the insulation gasket onto the vent section, up against
the appliance and over the tabs.