


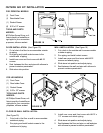

18
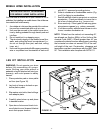
1. Remove ash removal system top and
bottom cover plates by loosening nuts
under stove.
2. Discard both plates.
3. Place protective pad or stove pallet on
floor.
4. Lay body of stove on its back on protec-
tive pad or pallet.
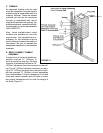
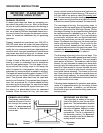
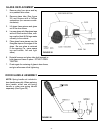
5. Line up holes in ash removal system with
holes in adapter on bottom of stove (see
Figure 22).
6. Screw ash removal system in place.
7. Carefully stand stove up and place in
desired location.
8. Open door of stove and check to insure
firebricks and kaowool blanket are in their
proper locations.
9. Insert ash removal system grate into
opening in firebox floor.
FIGURE 22
ASH REMOVAL SYSTEM INSTALLATION
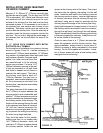
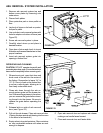
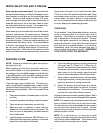
FIGURE 23
OPERATING AND CLEANING
CAUTION: DO NOT operate stove with ash
removal system door open. Ensure that embers
have cooled completely before removing ash.
1. When stove is cool, open front door and
brush most of the ash into the center of
the firebox. Remember to leave 1/4 to
1/2 (6-13mm) of ash on the firebox floor
to act as a natural grate, allowing air to
flow freely underneath wood .
2. Clean ash down through the ash re-
moval system grate into the drawer be-
low. If there are large pieces in the ashes,
you can remove the grate before clean-
ing the ash into the drawer. Be sure to
replace the grate before operating the
stove.
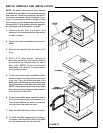
3. Release latch on side of ash removal
door (see Figure 23).
4. Pull out the ash drawer. Close ash removal door.
(Closing this door avoids ash blowing into the room
in the event of a downdraft.)
5. Empty ashes into metal container. Store container
on non-combustible surface until ashes are cool
enough to dispose.
6. Open ash removal door and replace ash drawer,
making sure handle faces forward.
7. Close ash removal door and fasten latch.