


14
Heat & Glo • 6000TRSI-AUC • 2078-900 Rev. G • 12/06
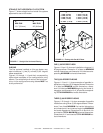
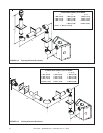
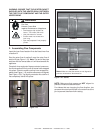
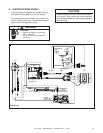
1. Attach the Flue Component to the Starting Collars
To attach the first flue component to the starting collars
of the fireplace:
• Make sure that the heater gasket supplied with the
heater seals between the first flue component and
the outer heater wrap (see Figure 1.16).
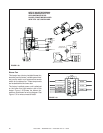
• Slide the male end of the inner flue of the pipe sec-
tion over the inner collar on the heater. At the same
time, slide the outer flue over the outer collar on the
heater. Push the flue section into the appliance col-
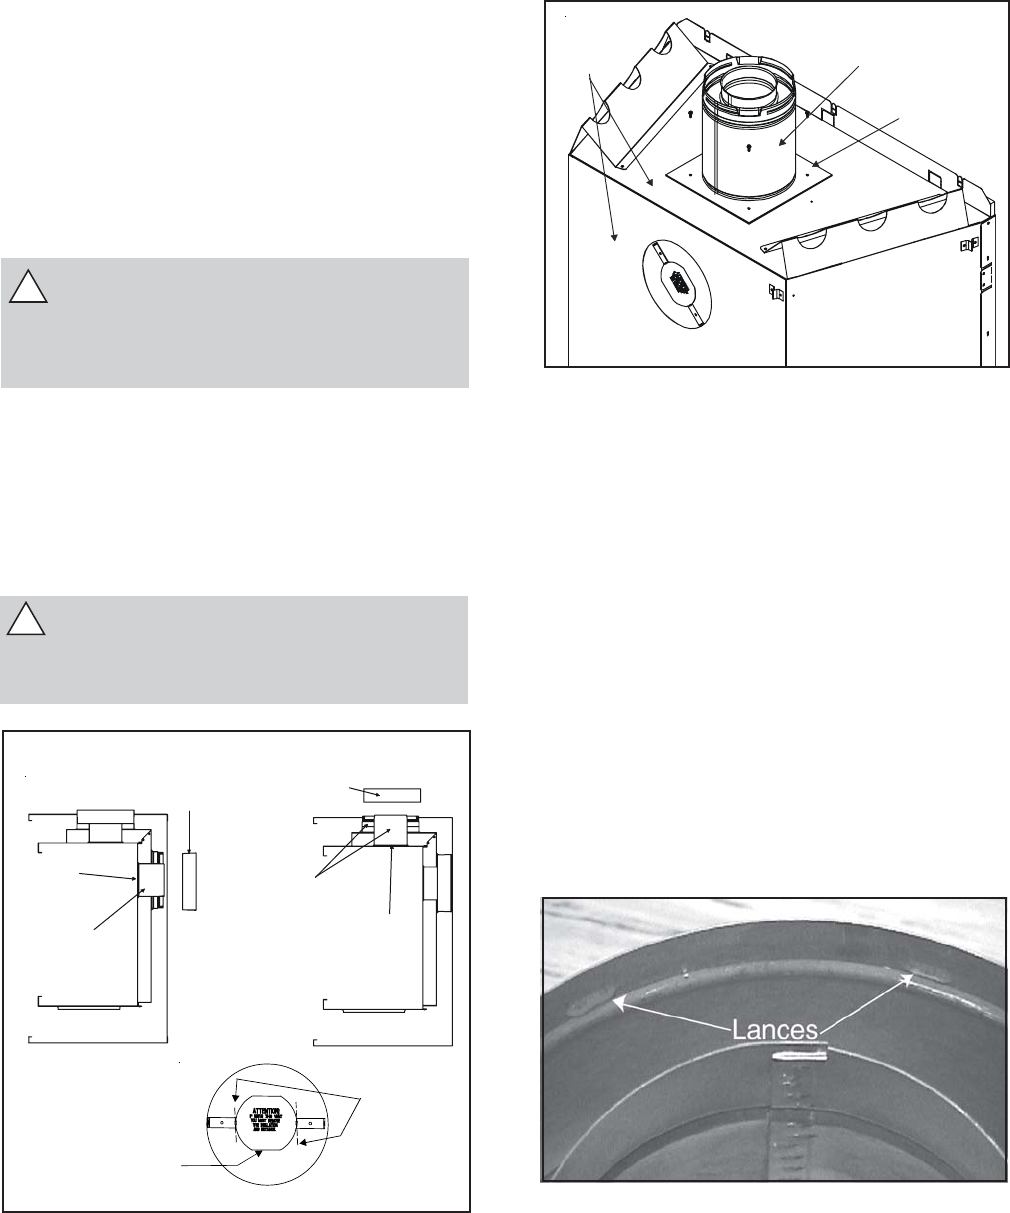
lar until all the lances (see Figure 1.17) have
snapped in place. Tug slightly on the flue to confirm
that it has completely locked into place.
• The first 90° elbow installed in the flue system of a
rear flueing heater MUST BE in a vertical position.
FIGURE 1.17
Figure 1.16 Fiberglass Gasket
FIRST VENT
COMPONENT
FIBERGLASS
GASKET
OUTER
WRAP
!
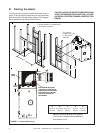
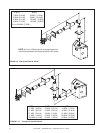
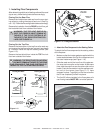
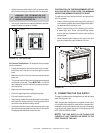
1. Installing Flue Components
After determining which set of starting collars will be used
(top or rear), follow flueing instructions accordingly.
Flueing Out the Rear Flue
Remove the installed rear seal cap from the rear start-
ing collars by cutting the strap at each end. (See Fig-
ure 1.15). Follow the flue configuration tables accordingly.
Remove the insulation from the REAR five inch flue, pull
the heat shield out from outside of the firebox.
WARNING: THE TOP HEAT SHIELD (IN-
SIDE THE FIREBOX) MUST REMAIN AT-
TACHED IF THE FLUE SYSTEM IS AT-
TACHED TO THE REAR STARTING COL-
LARS. SEE FIGURE 14.
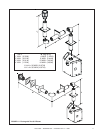
Flueing Out the Top Flue
Remove the two screws in the top flue collar seal cap
and remove the top flue collar seal cap and two pieces
of insulation inside the top two starting collars (See
Figure 1.15).
Remove the heat shield from inside the TOP five inch
flue from outside of the firebox.
WARNING: THE REAR FLUE COLLAR SEAL
CAP MUST REMAIN ATTACHED TO THE REAR
FLUE COLLARS IF THE FLUE SYSTEM IS AT-
TACHED TO THE TOP STARTING COLLARS.
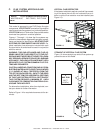
Figure 1.15
CUT
HERE
Flueing Out Rear
Flueing Out Top
HEAT
SHIELD
DISCARD
INSULATION
and
HEAT SHIELD
HEAT
SHIELD
INSULATION
DISCARD BOTH
PIECES and
HEAT SHIELD
SEAL
CAP
SEAL
CAP
Cut the seal cap
strap and remove white
gasket material.
!