


Page 11
5100-I ACT WOOD INSERT
R
438-0380D
September 1, 2008
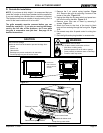
NOTE: If your home is fairly airtight, it is recommend that you
install the outside air that comes standard with the appliance.
If you are installing into a Mobile Home, outside air is required.
The replace must have an outside air supply coming into it in
order for the insert outside air kit to be used.
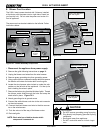
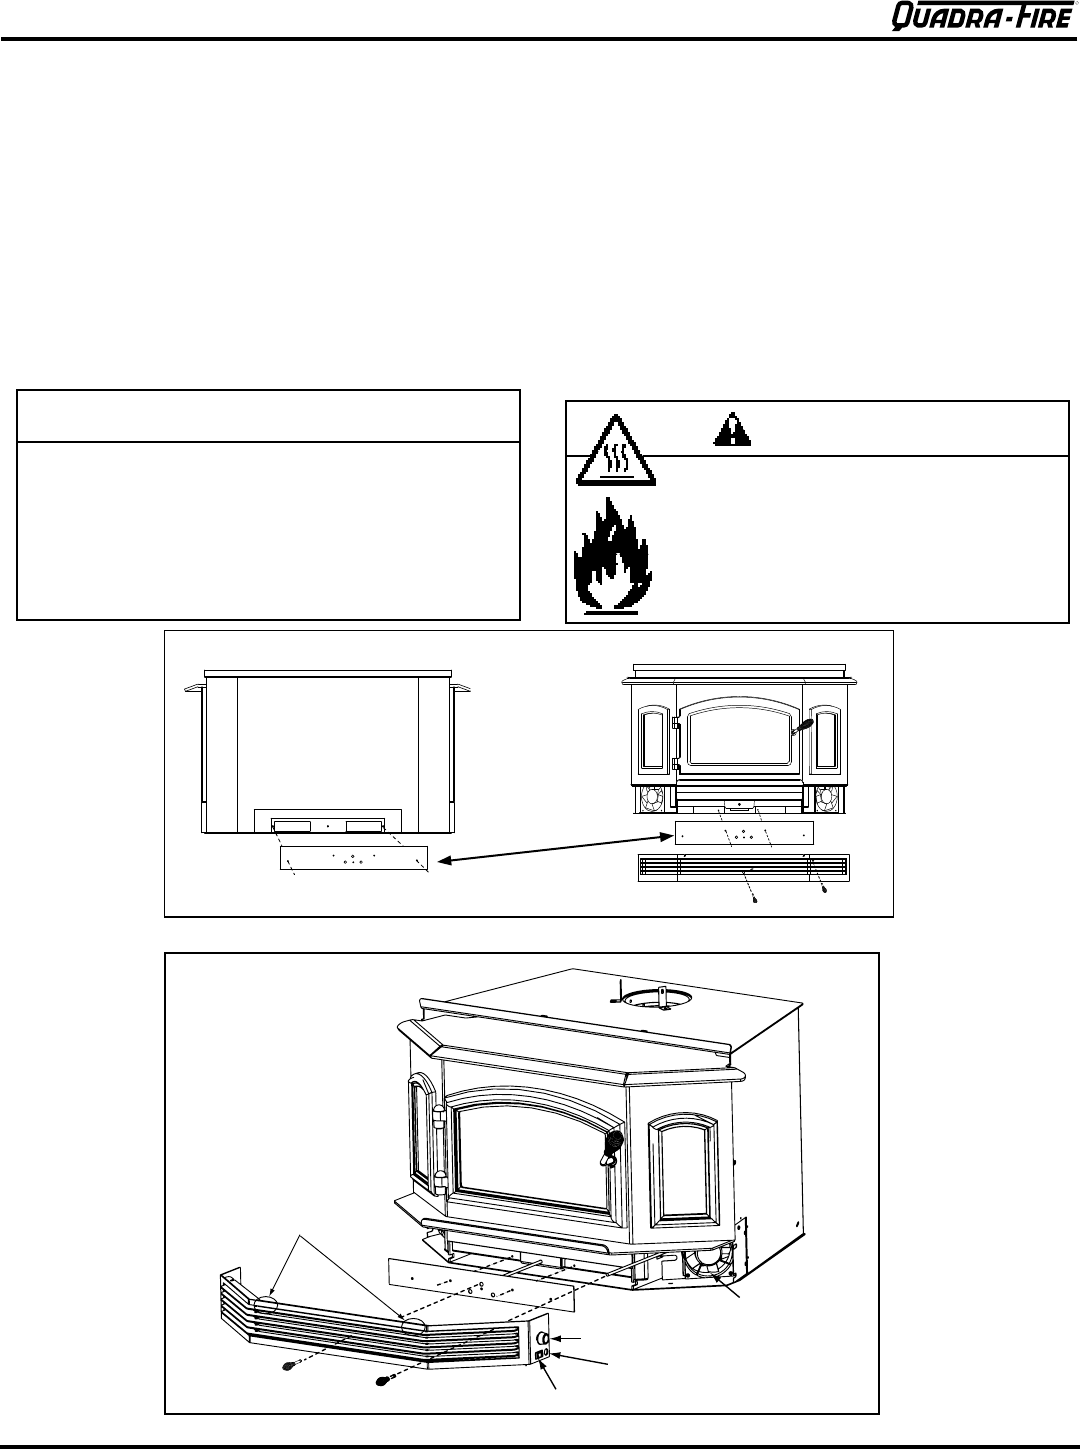
The grille assembly must be removed before you can
install the outside air. If you plan on moving the blower
cord to the left side of the appliance, do it now while
the grille is removed to save you time. See page 12 for
detailed instructions.
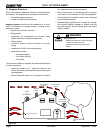
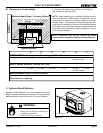
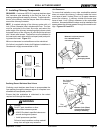
1. Remove the 2 air control spring handles.
Figure
11.1. Remove the grille by removing 2 screws in the
center of the grille. Figure 11.2
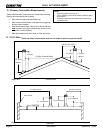
. Unplug the snap disc by-pass switch and speed con-
trol from the wiring harness. Figure 11.2
4. Remove cover from rear of insert by removing 2
screws. Figure 11.1
5. Attach the cover to the front of the insert to block
room air from entering through the front grille. Figure
11.2.
6.
Re-connect snap disc & speed control to wiring har-
ness.
7.
Re-install grille and spring handles in reverse order.
D. Outside Air Installation
Cover from
rear of insert is
secured to front
of insert
Remove 2 screws
Remove both spring handles
Snap disc by-pass switch
Speed control knob
Hole for blower cord
Blower
Figure 11.1
Figure 11.2
CAUTION
Risk of Smoke Spillage
Outside air inlet must be located to prevent blockage from:
• Leaves
• Snow or ice
• Other debris
• Blockage may cause combustion air starvation
• Smoke spillage may set off smoke alarms
WARNING
Asphyxiation and Fire Risk
Do not draw outside combustion air from:
• Wall, oor or ceiling cavity
• Enclosed space such as an attic or garage
• Close proximity to exhaust vents or chimneys
• Fumes or odor may result.