


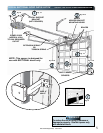
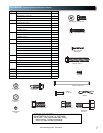
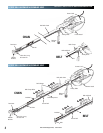


POWER HEAD & RAIL ASSEMBLY
Assembly for CHAIN DRIVE OPENER
NOTE: Handle carefully! Drive chain can slide out
of rail.
NOTE: For power head and rail assembly locate
Bag 1 from Box 1.
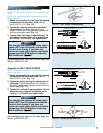
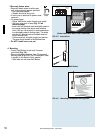
1. Attach rail assembly to power head by aligning
the sprocket onto the motor shaft. Use (3)
bolts, 5/16"-18 x 1/2" (Fig. 1-5).
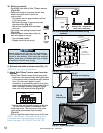
2. Tighten the chain by turning the adjustment
nut clockwise. The chain adjustment nut is
located in the Chain Pulley Bracket (opposite rail
end from the power head) (Fig. 1-6).
3. Tighten chain until chain is approximately 1/8
inch above the base of the rail at midpoint on
the rail (Fig. 1-6). Do NOT over tighten chain.
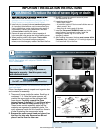
Set assembled power head and rail aside. Begin with
Section 2 INSTALLATION.
PN# 36420Supplement, 10/27/2008
11
FIG. 1-6 Chain adjustment.
FIG. 1-5 Rail - Power head assembly.
Chain Pulley Bracket (at wall end of rail)
Chain
T-Rail at center of rail assembly
1/8"
T-Rail
Chain
Tighten nut to move pulley this direction
Use 1/2" socket
on adjustment nut
Use
5/16"-18 x 1/2"
Bolts
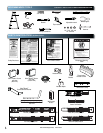
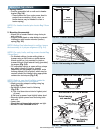
FIG. 1-8 Disable garage door lock.
Remove
Remove
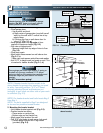
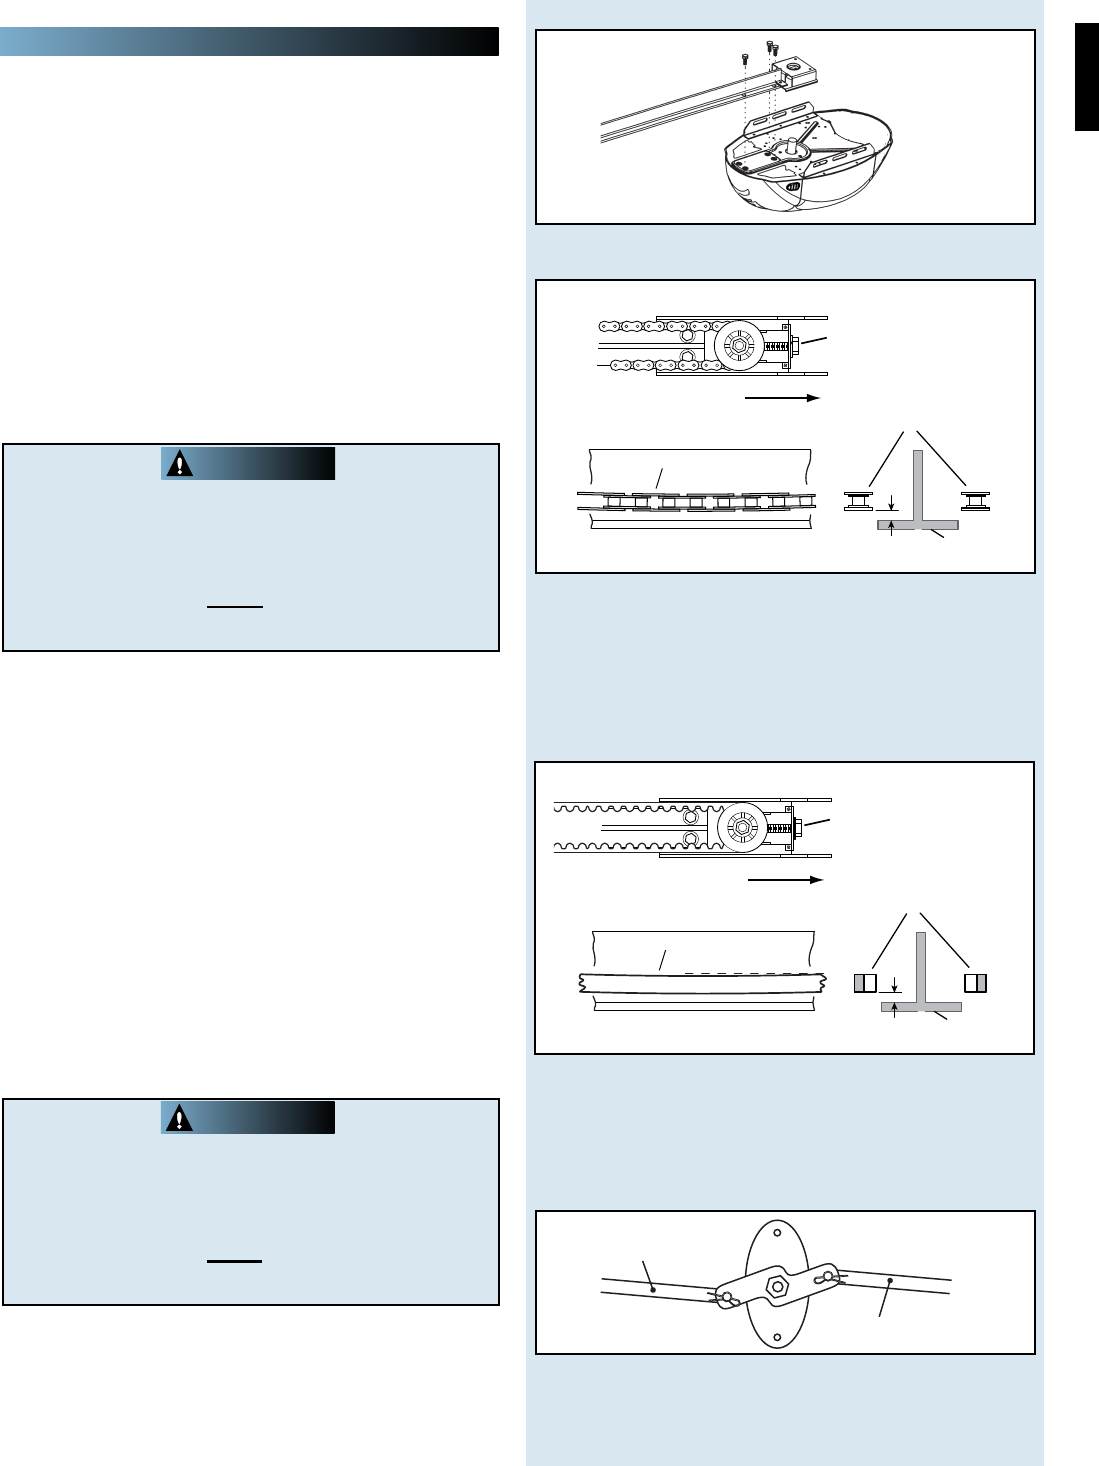
FIG. 1-7 Belt adjustment.
Belt Pulley Bracket (at wall end of rail)
Belt
T-Rail at center of rail assembly
1/8"
T-Rail
Belt
Tighten nut to move pulley this direction
Use 1/2" socket
on adjustment nut
Assembly for BELT DRIVE OPENER
NOTE: For power head and rail assembly locate
Bag 1 from Box 1.
1. Attach rail assembly to power head by aligning
the sprocket onto the motor shaft. Use (3)
bolts, 5/16"-18 x 1/2" (Fig. 1-5).
2. Tighten the belt by turning the adjustment nut
clockwise. The belt adjustment nut is located in
the Belt Pulley Bracket (opposite rail end from the
power head) (Fig. 1-7).
3. Tighten belt until belt is approximately 1/8 inch
above the base of the rail at midpoint on the
rail (Fig. 1-7). Do NOT over tighten belt.
Set assembled power head and rail aside. Begin with
Section 2 INSTALLATION.
You should have removed all ropes and/or
cables (NOT door lift cables) and disabled
the door lock already. If you have not,
remove all ropes and/or cables and disable
garage door lock NOW before continuing
with installation (Fig. 1-8).
CAUTION
You should have removed all ropes and/or
cables (NOT door lift cables) and disabled
the door lock already. If you have not,
remove all ropes and/or cables and disable
garage door lock NOW before continuing
with installation (Fig. 1-8).
CAUTION