


15
Troubleshooting tips…
www.GEAppliances.com
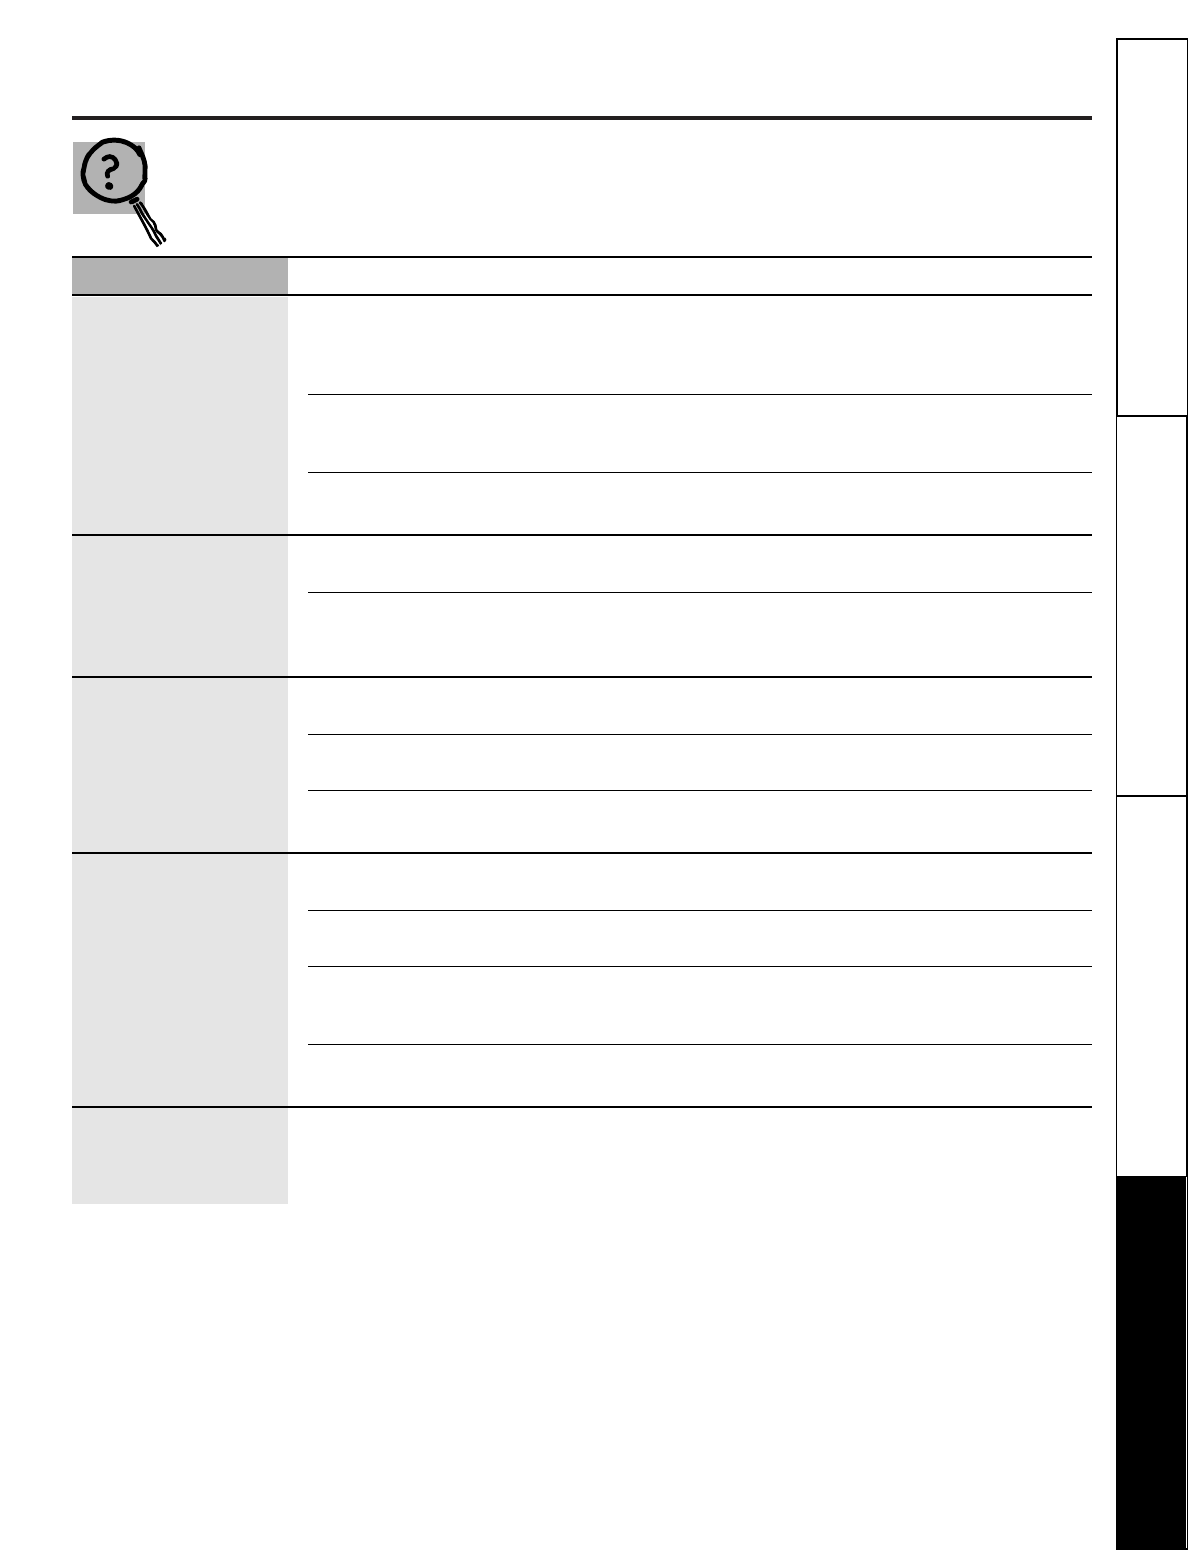
Save time and money! Review the chart on this page first
and you may not need to call for service.
Problem Possible Causes What To Do
No display/faint display
Supply voltage not correct. • Using a voltmeter, check the supply voltage to the
thermostat. Voltage operating range for the thermostat
is 18-30 VAC/VDC. If measured voltage is out of this
range, troubleshoot the supply voltage to the unit.
Thermostat is damaged. • Replace with a new thermostat. Check the supply voltage
to the unit before connecting second thermostat (see
above).
Power wiring to unit is incorrect. • Refer to Figures 1 & 2 in the
Installation Instructions
for
correct wiring.
Keypad buttons do
No power to the unit. • Make sure the display is working correctly. If not,
not work.
follow step one above.
Thermostat is damaged. • Replace with a new thermostat. Check the supply
voltage to the unit before connecting second
thermostat (see above).
Thermostat will not
Thermostat setpoint is satisfied. • Raise the temperature setpoint more than 2° above
call for heat.
current temperature.
Unit wiring is incorrect. • Refer to Figures 1 & 2 in the
Installation Instructions
for
correct wiring.
Unit is ‘OFF.’ •Make sure the
FLAME
icon is displayed and blinking.
If not, push the
MODE
button until it is displayed.
Thermostat will not
Thermostat setpoint is satisfied. • Lower the temperature setpoint more than 2°
call for cooling.
below current temperature.
Unit wiring is incorrect. • Refer to Figures 1 & 2 in the
Installation Instructions
for
correct wiring.
Unit is ‘OFF.’ •Make sure the
SNOWFLAKE
icon is displayed and
blinking. If not, push the
MODE
button until it
is displayed.
Short cycle delay still active. • Wait 4 minutes. The unit’s short cycle timer is in
operation.
Fan does not turn on
Fan failure. • Place a jumper between the R and G terminals.
with the system.
The fan should come on. If it does, replace the
thermostat.
Troubleshooting Tips
Operating Instructions
Safety Instructions Installation Instructions