


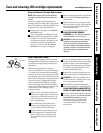
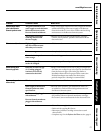
UP
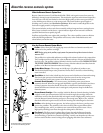
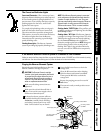
Automatic shutoff assembly
Postfilter
Product water tubing
(goes to faucet)
Red tank
shutoff valve
Clamp
sections (2)
Reverse Osmosis
housing
Top end “This
Side Up”
Flow
control
Cone screen
Reverse Osmosis cap
Green
protective cap
Vacuum
relief valve
Postfilter
line
Prefilter
cartridge
Reverse Osmosis cartridge
End with o-ring seals
downward
Clamp
retainers (2)
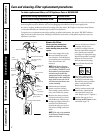
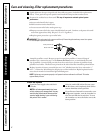
Care and cleaning–Filter replacement procedures.
To obtain replacement filters, call GE Appliance Parts at 800-626-2002.
You must replace the prefilter cartridge at least every six months to protect the Reverse Osmosis membrane
from being destroyed by chlorine and/or from plugging with sediments in the water supply valve.
It is time to replace the Reverse Osmosis cartridge when the amber “RO” light, on the faucet base, flashes
continually while Reverse Osmosis water is taken from the faucet.
To signal correct replacement interval for prefilter, postfilter and batteries, the amber “FILTER” indicator
light, on the electronic faucet base, will begin to flash after six months, or 900 gallons of product water use,
whichever occurs first.
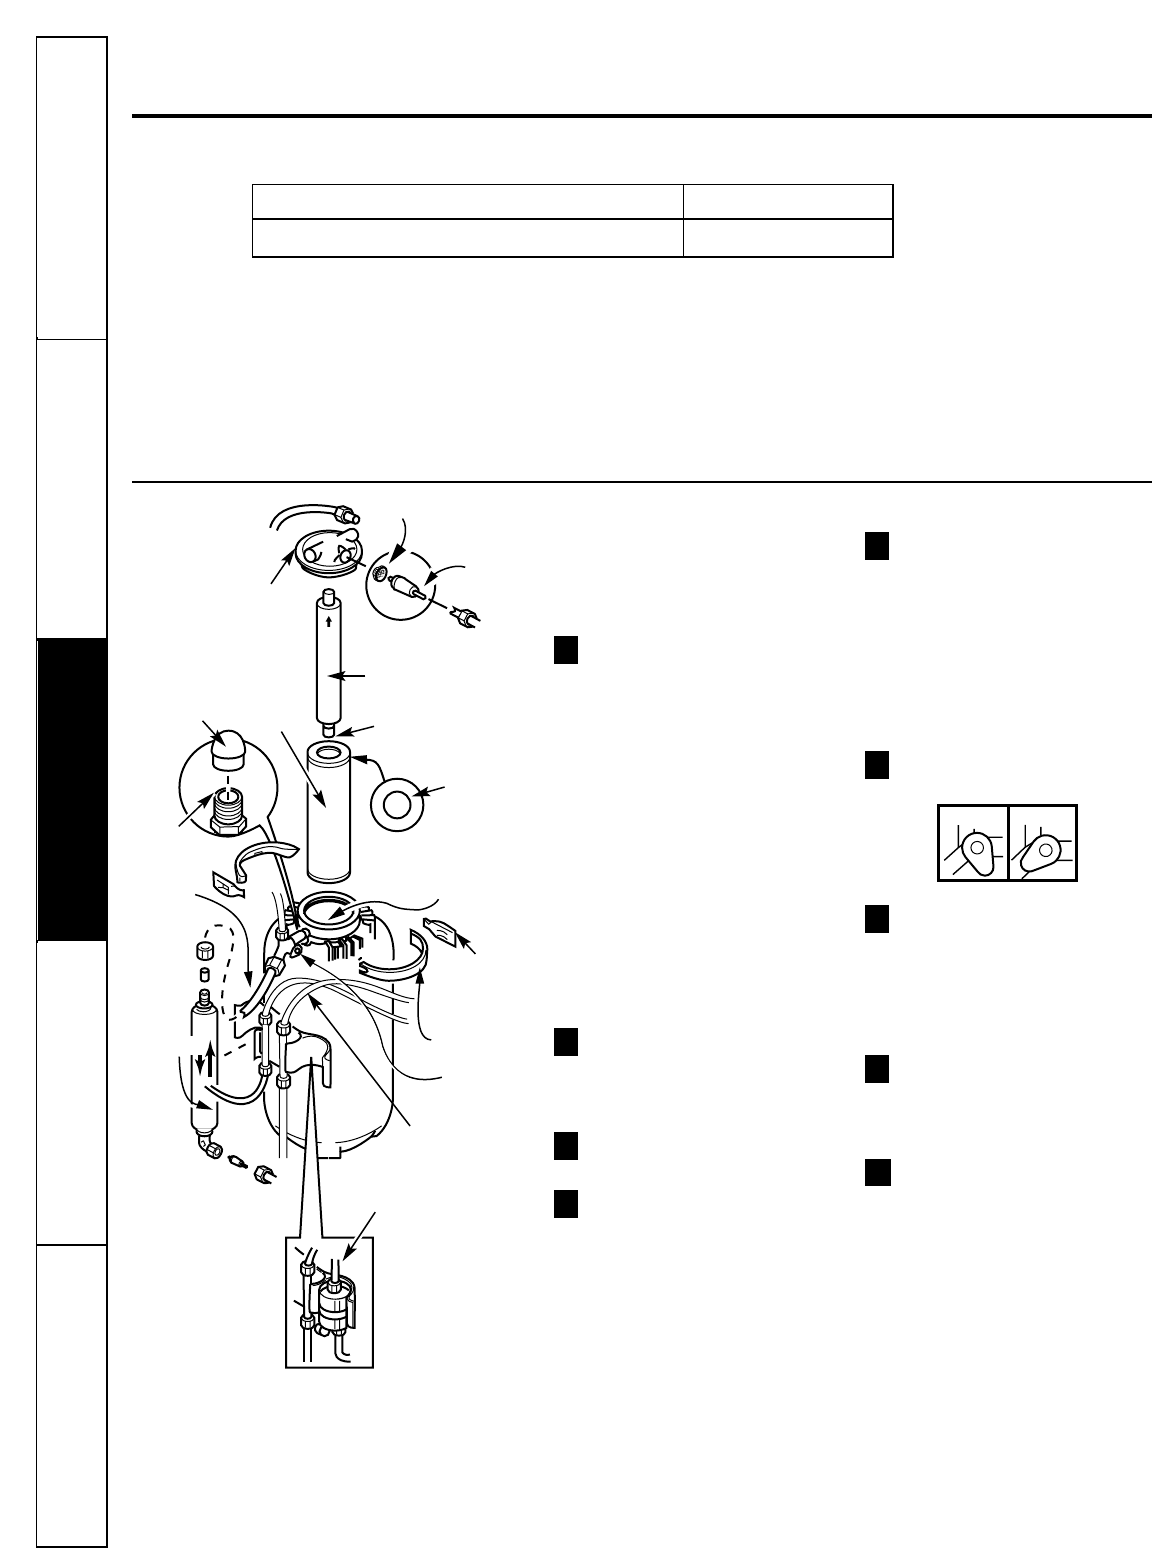
Remove the Filters
Be sure you have cleaned your
hands with anti-bacterial soap
before handling inner parts of the
system.
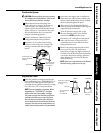
Turn water supply valve to the
Reverse Osmosis system off;
turn clockwise. Turn RO faucet
on and allow tank to completely
drain (this will take a few
minutes).
NOTE: If the Reverse Osmosis
Filtration System is connected to
your icemaker, YOU MUST turn off
the icemaker by raising the feeler
arm before servicing the filter,
changing the filters or purging the
filtration system. After completing
work, allow four hours for unit to
refill, then lower the feeler arm to
resume icemaking.
Pull the Reverse Osmosis
system away from cabinet;
leave tubing connected. Place
a dry towel under the system.
Remove the clamp retainers
and sections from top of unit.
Lift the Reverse Osmosis cap
straight up (slight resistance is
normal) from the Reverse
Osmosis housing (no need to
disconnect tubing) and move
aside.
NOTE: If the cap o-ring remained
in the Reverse Osmosis housing,
replace it on the cap.
Remove the Reverse Osmosis
cartridge and the outer
prefilter cartridge from the
Reverse Osmosis housing and
place the Reverse Osmosis
cartridge in a clean plastic bag.
Discard the prefilter cartridge.
Dispose of water from the
Reverse Osmosis housing.
Turn off tank shutoff valve
(red color).
Disconnect tubing at both
ends of postfilter. Remove
postfilter from holder and
discard. Disconnect postfilter
tube at tank shutoff valve.
Retain postfilter tube.
Hold a container under tank
shutoff valve. Open shutoff
valve and drain water from
tank. (Expect up to 1/2 gallon.)
Sanitize the system. Go to
Sanitizing the RO System
section
and follow steps 1–8.
9
8
7
6
5
4
3
2
1
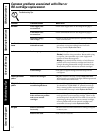
6
CLOSED OPEN
Operating Instructions
Safety InstructionsCare and CleaningTroubleshooting TipsConsumer Support
Pre/Post Filter Cartridge Replacements FX18P Activated Carbon
Reverse Osmosis Cartridge Replacement FX18M Thin Film Polyamide