


5
Consumer Support
Operating InstructionsSafety Instructions
Care and Cleaning Troubleshooting Tips
www.GEAppliances.com
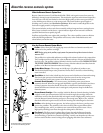
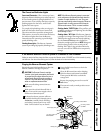
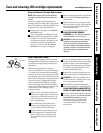
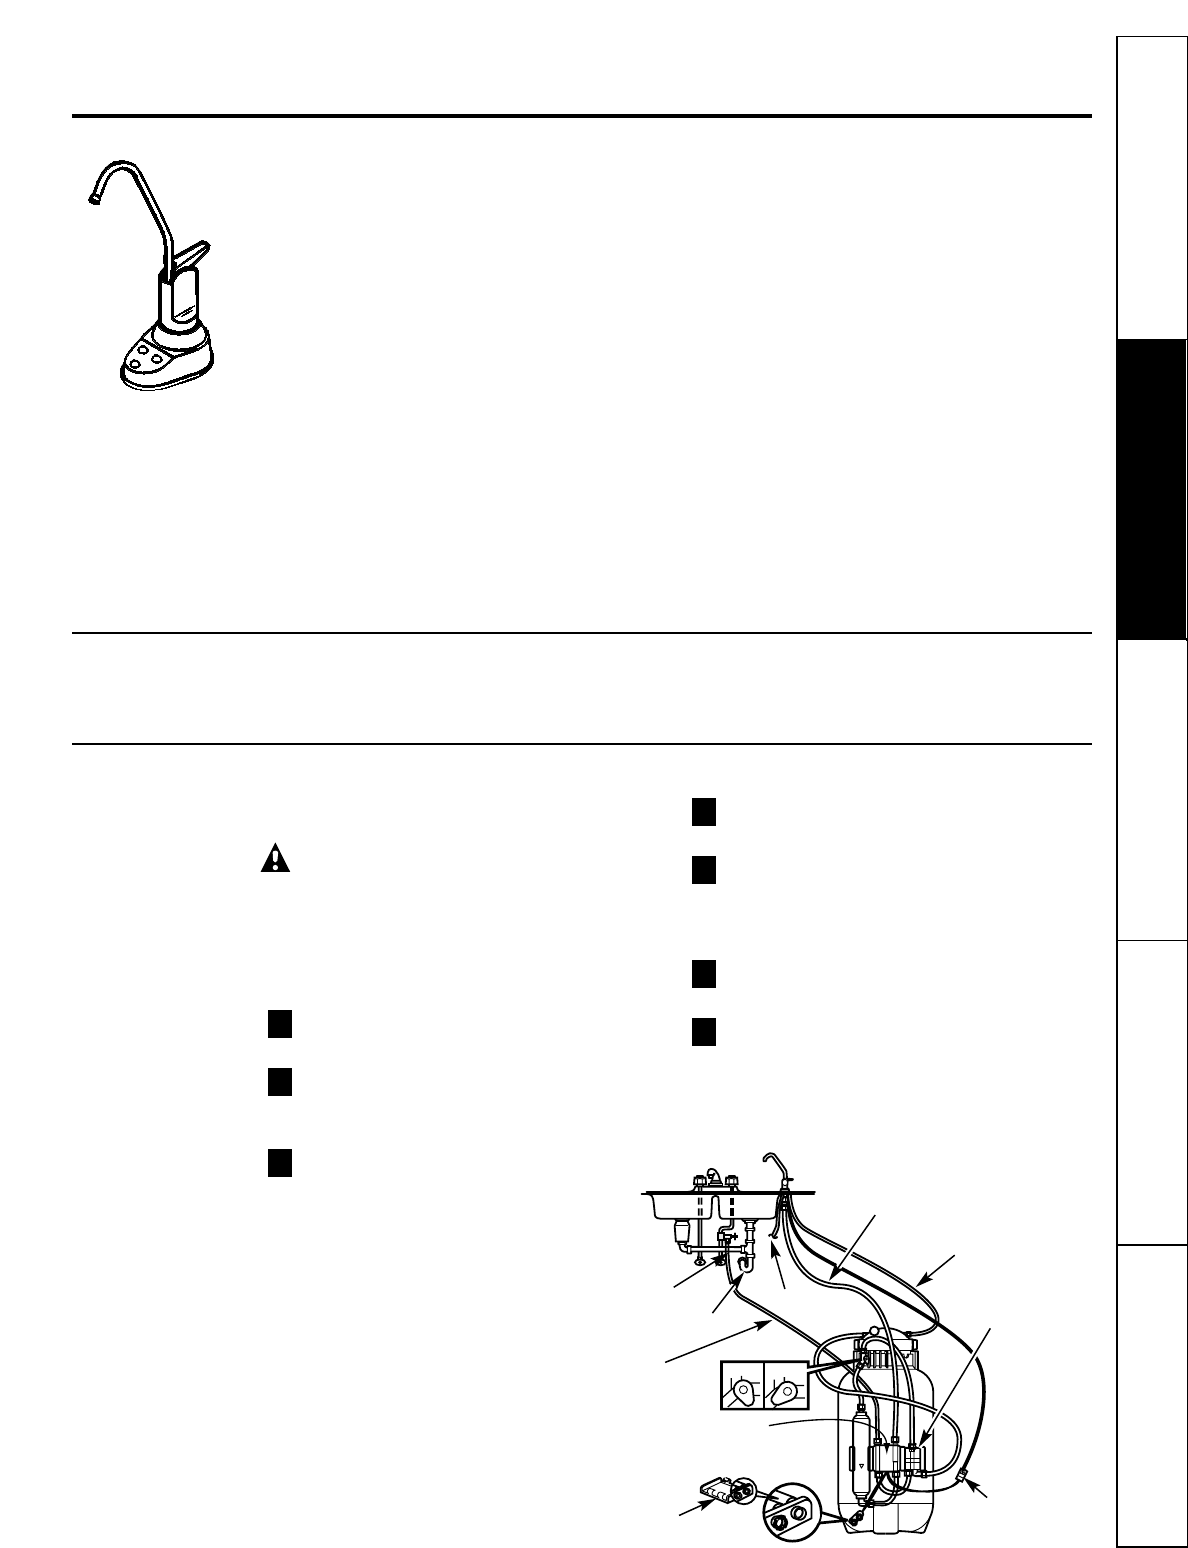
The Faucet and Indicator Lights
Faucet and Electronics—
The countertop faucet
dispenses filtered drinking water when opened.
It has a hand-operated, spring-loaded lever to
prevent waste. You can keep the faucet open by
pushing upward on the lever, until it locks
against the faucet spout.
To comply with plumbing codes, an air gap is
built into the faucet drain water connection.
The electronic faucet provides an integrated
TDS monitor. As water is taken from the faucet,
the indicator lights show how the Reverse
Osmosis system is operating to provide high
quality drinking water.
Flashing Green Light—
The Reverse Osmosis
system is providing high quality drinking water.
NOTE: If the Reverse Osmosis system is connected
to the refrigerator, this light will also flash when the
icemaker or water dispenser is in use.
The green
light may stop flashing when the supply of Reverse
Osmosis water is nearly gone and flow from the
RO faucet decreases. This is a normal condition.
Flashing Amber “FILTER” Light—
The prefilter and
postfilter cartridges need replacing. See the
Care
and Cleaning
section.
Flashing Amber “RO” Light—
The Reverse Osmosis
cartridge is no longer removing at least 75% of the
TDS from the supply water and needs replacing.
See the
Care and Cleaning
section for Reverse
Osmosis cartridge replacement.
NOTE:
Disregard
initial or short periods (a few seconds) of the
flashing “RO” light. Long periods of limited or
non use can cause the TDS levels to temporarily
change.
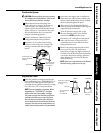
If the Reverse Osmosis Filtration System Is Connected to Your Icemaker
Before you service the filter, change the filters, or purge the Filtration system, YOU MUST turn off the icemaker by raising
the feeler arm. Four hours after servicing your unit, lower the feeler arm to resume icemaking.
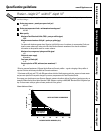
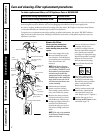
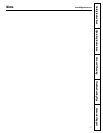
Purging the Reverse Osmosis System
FLOW
RO product
water faucet
3/8″ tubing, marked FAUCET
Sink p-trap
Drain line
1/4″ tubing, marked
WATER SUPPLY
Electronics box
Tank shutoff valve
Water supply valve
Leadwires
Battery pack
1/4″ tubing, marked
1/4″ BARB
Automatic shutoff
assembly
Required upon initial installation or after the
Reverse Osmosis cartridge is replaced.
CAUTION: The Reverse Osmosis cartridge
contains a food grade preservative that should
be purged from the system before first use or
whenever the Reverse Osmosis cartridge is
replaced. The preservative will give product
water an unpleasant taste and odor.
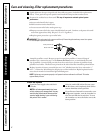
Make sure all tubing connections are
tightened.
Make sure the red tank shutoff valve is
open. Turn on the water supply valve to
the Reverse Osmosis system.
In about four hours, pressure will start
to build in the Reverse
Osmosis system.
At that time,
carefully check all fittings
and tubing connections for any water
leaks. Correct leaks if any are found.
Open the RO water faucet to drain the
storage tank.
Close the RO water faucet after draining.
Wait four hours until system has refilled.
Then open the RO faucet to drain the
storage tank.
Repeat the purging process for a total of
four times.
The system is ready to make product water
for your use.
7
6
5
4
3
2
1
CLOSED
OPEN