


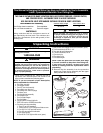

11
U.L. Model No.: CF230
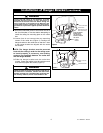
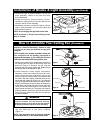
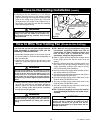
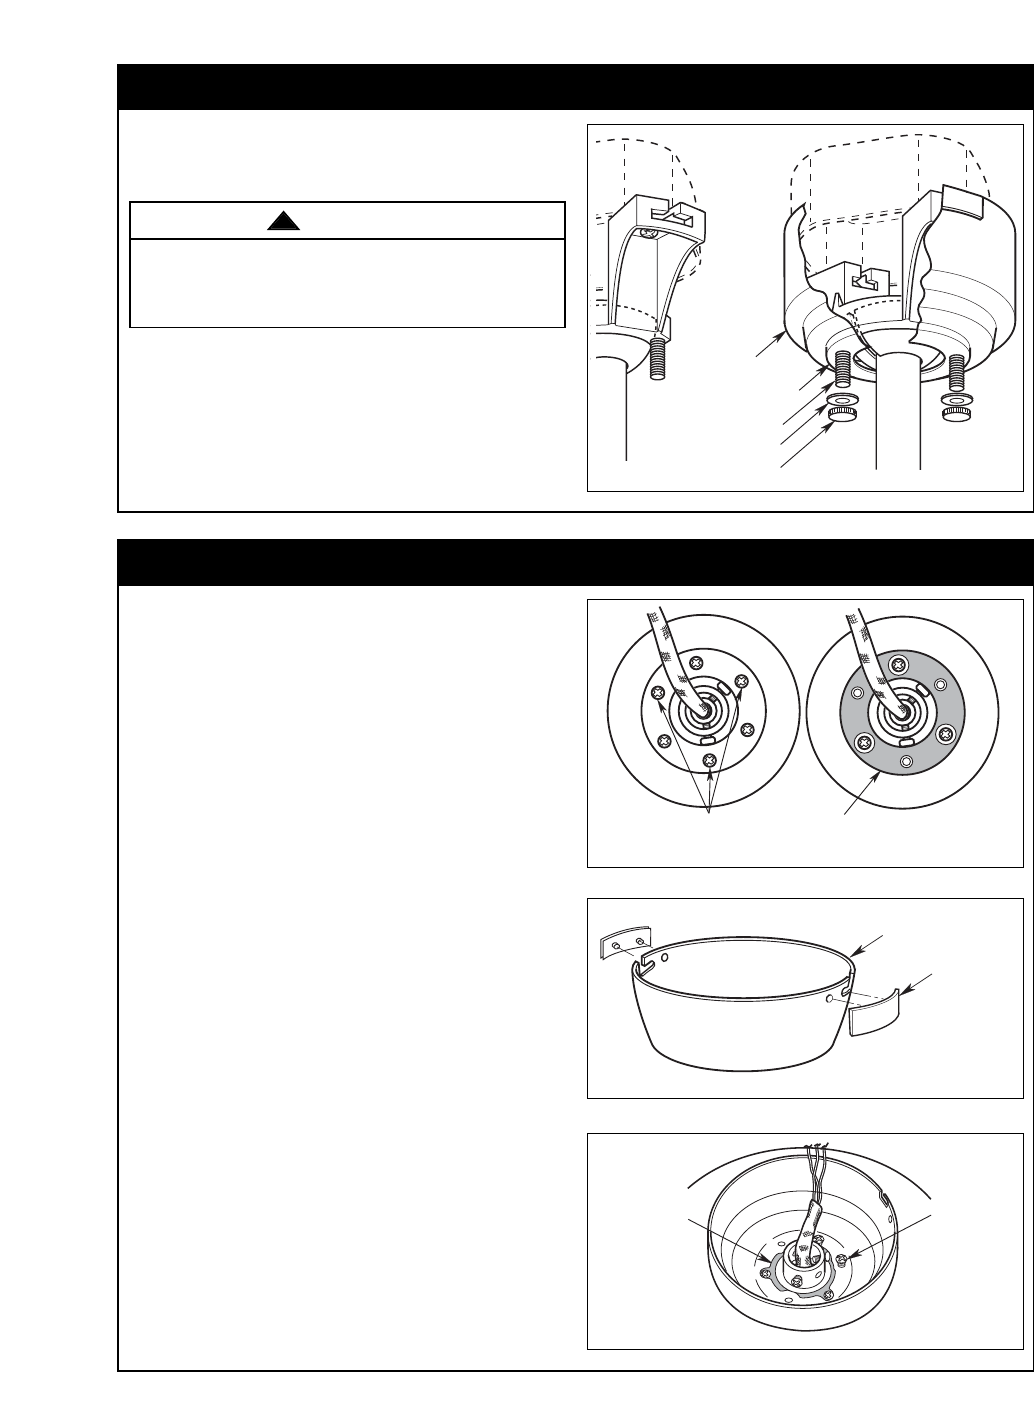
Installation of Ceiling Cover (Standard)
1. Lift the ceiling cover up to the threaded studs and
turn until the studs protrude through the holes in
the ceiling cover (Figure 18).
2. Position the lower ceiling cover trim ring onto the
threaded studs and secure both the ceiling cover
and ring in place by sliding lockwashers (supplied)
over the threaded studs and installing the two
knurled knobs (supplied). (Figure 18). Tighten the
knurled knobs securely until the ceiling cover fits
snugly against the ceiling.
CEILING
COVER
CEILING COVER
TRIM RING
THREADED STUD (2)
LOCKWASHER (2)
KNURLED KNOB (2)
Figure 18
To avoid possible fire or shock, make sure that the
electrical wires are completely inside the outlet box
and not pinched between the ceiling cover and the
ceiling.
WARNING
!
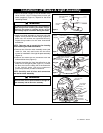
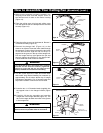
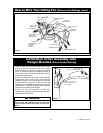
Close-to-the-Ceiling Installation
REMOVE SCREWS (3)
INSTALL RUBBER GASKET
Installing The Ceiling Cover On The
Fan Motor Housing
1. Remove and retain three screws from the top of
the motor housing (Figure 19A).
2. Position the rubber gasket (supplied in parts bag)
on the motor housing (small holes in gasket
centered over the screw holes in the housing)
(Figure 19B).
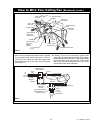
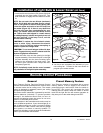
3. Remove the ceiling cover trim plugs pre-installed
to the ceiling cover (Figure 20).
4. Align the holes in the ceiling cover with the holes in
the motor housing and secure using the three
screws (Figure 21).
5. The fan comes with blue, black and white leads
that are 80” long. Measure up approximately 6 to
9-inches above the motor coupling. Cut off excess
leads and strip back insulation 1/2-inch from ends
of leads.
Figure 19A
SCREW (3)
RUBBER
GASKET
Figure 21
Figure 19B
CEILING COVER
TRIM PLUG (2)
CEILING COVER
Figure 20