


www.desatech.com
124183-01B 9
HEARTH KIT ASSEMBLY AND
INSTALLATION
Only
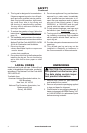
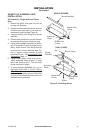
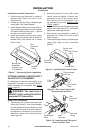
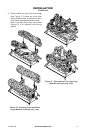
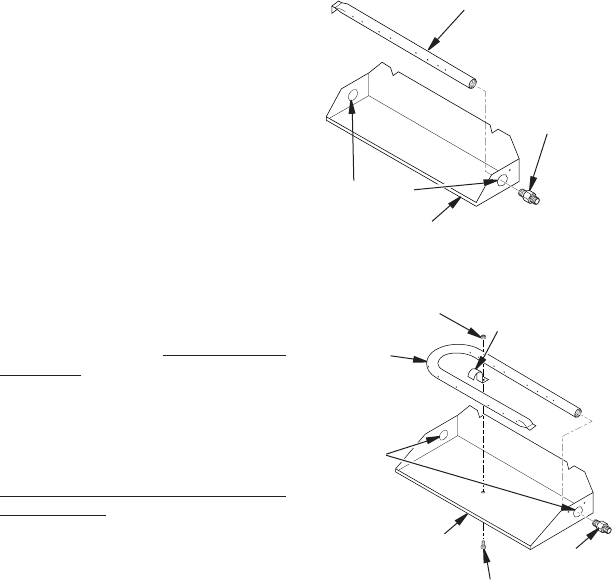
1. Determine which side gas line will be
coming into replace.
2. Using a hammer and screw driver, remove
knockout plug from side of pan that cor-
responds to gas line (see Figure 6).
3. Unscrew burner inlet tting from burner
manifold.
4. Place burner manifold in pan with thread-
ed opening facing open knockout plug.
5. Using thread sealant (resistant to the ac-
tion of propane/LP gas) on larger end of
tting, screw burner inlet tting through
hole and into burner manifold (see Fig-
ure 6). Tighten using a wrench. If using
propane/LP gas, see Propane/LP Gas
Conversion, page 11.
6. Using burner clamp, screw, and nut pro-
vided, assemble clamp to pan (“U” style
and triple burners only). This will hold
burner manifold in place.
7. If using optional GA9050A-1 kit, go to
Optional GA9050A-1 On/Off Safety
Valve/Pilot Kit , page 10, for installation
instructions. If using optional GA9150A
kit, follow instructions included with kit for
installation and operation.
INSTALLATION
Continued
Burner Inlet
Fitting
Screw
Nut
Burner Clamp
Burner Pan
(Front)
Burner Manifold
Knockout
Plugs
Burner Pan
(Front)
Knockout
Plugs
Burner Inlet
Fitting
SINGLE-BURNER
DUAL-FLAME
Burner
Manifold
Figure 6 - Installing Burner