


www.desatech.com
9901053-01J
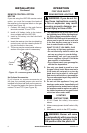
O
F
F
P
I
L
O
T
O
N
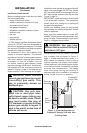
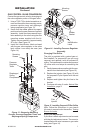
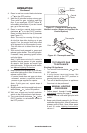
Figure 17 - Control Knob and Ignitor
Button Location (Shown as Supplied, No
Control Options)
Control
Knob
Ignitor
Button
4. Press in and turn control knob clockwise
to the OFF position.
5. Wait ve (5) minutes to clear out any gas.
Then smell for gas, including near the
oor. If you smell gas, STOP! Follow “B”
in the safety information. If you don’t smell
gas, go to the next step.
6. Press in and turn control knob counter-
clockwise
to the PILOT position.
Press in control knob for ve (5) seconds
(see Figure 17).
Note: You may be running this log set
for the rst time after hooking up to gas
supply. If so, the control knob may need
to be pressed in for 30 seconds or more.
This will allow air to bleed from the gas
system.
7. With control knob pressed in, press and
release ignitor button. This will light pilot.
If needed, keep pressing ignitor button
until pilot lights.
Note: If pilot does not stay lit, contact a
qualied service person or gas supplier
for repairs. Until repairs are made, light
pilot with match. To light pilot with match,
see Manual Lighting Procedure.
8. Keep control knob pressed in for 30 sec-
onds after lighting pilot. After 30 seconds,
release control knob.
• If control knob does not pop out when
released, contact a qualified service
person or gas supplier for repairs.
Note: If pilot goes out, repeat steps 4
through 8.
9. Slightly push in and turn control knob coun-
terclockwise
to the ON position.
10. Wait one minute and switch selector
switch to the ON position to light burner.
11. Turn control knob clockwise
to the
PILOT position, or set selector switch in
the OFF position.
OPERATION
Continued
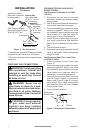
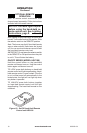
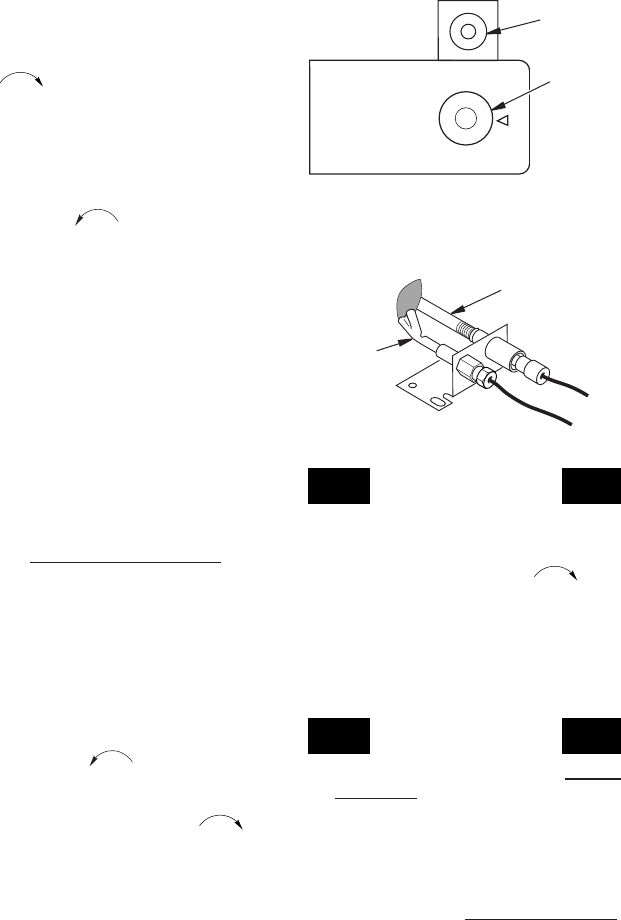
Figure 18 - Thermopile and Pilot
Pilot
Thermopile
TO APPLIANCE
1. Turn control knob clockwise
to the
OFF position.
2.
If Using Optional Hand-Held Remote: Set
selector switch in the OFF position to
prevent draining battery.
3. Turn off all electrical power to appliance
if service is to be performed.
MANUAL LIGHTING
PROCEDURE
1. Follow steps 1 through 6 under Lighting
Instructions, starting on page 8.
2. Depress control knob and light pilot with
match.
3. Keep control knob pressed in for 30 sec-
onds after lighting pilot. After 30 seconds,
release control knob. Now follow steps
9 and 10, under Lighting Instructions,
column 1