


6
Fig. 9
Fig. 10
Fig. 11
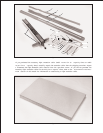
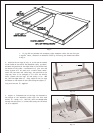
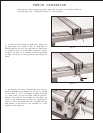
8. Position the two legs (H) Fig. 10, at the two far corners
of the inside of one end of the extension t able, as shown,
and mark the position of the eight holes to be drilled into
the bottom of the t able. IMPORTANT:If your saw and
fence system will be used with a mobile base under-
neath the saw base and table legs, the position of the
legs may have to be changed to fit onto the mobile
base. Remove the two legs (H) and using a 1/16 drill
bit, drill the eight holes 1/2 deep. Replace the two legs
and fasten to the bottom of the t able using the eight 3/4
long wood screws (I) supplied.
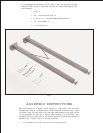
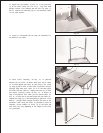
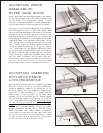
9. Figure 11 illustrates one of the legs (H) fastened to
the bottom of the extension table with the four wood
screws (I). Using a 1/4 drill bit, drill two through holes
through the end piece (J) of the table using the two holes
(K) as a template.
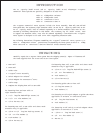
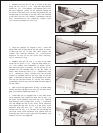
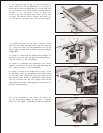
7. If you did not purchase the accessory right extension table for use with your
T-Square
fi
fence, construct an extension table by following the dimensions shown
in Fig. 9.
H
H
I
I
H
K
K
I
M
J