


30
O
O
PERATION
PERATION
—
—
P
P
ERFORMANCE
ERFORMANCE
E
E
NHANCEMENTS
NHANCEMENTS
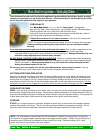
A HIGH QUALITY FIRE should burn with a brisk, vibrant, yellow to white color flame. When watching the fuel burn
in the grate, you should see a slight movement. The fuel should not be just setting there, doing nothing, like couch
potatoes. At the same time you should not see most the fuel being blown out of the burn grate, commonly know as “Pop
Corning”.
Another way to confirm a proper air and fuel mixture is to view the amount the glowing embers off to the left and right
of the burn grate. If there are no or little embers, the appliance requires more air. If there are a large amount of embers
and they continue to glow for over 15 to 30 seconds, the appliance requires less air.
The proper setting will give you some embers, and these embers will last no longer then 15 seconds.
A flame exhibiting a lazy, orange or sooty characteristic is a poor quality and inefficient flame. A poor flame produces less
heat, increases sooting and may cause a smoky exhaust. If a poor flame exists for any period of time, clean your stove
and exhaust system.
NOTE: It is a good practice to check the quality of your burn every time you start on a new skid of
pellets. Because of handling, tree quality, season, transportation, etc., fuel may not be
consistent from ton to ton or even bag to bag.
GIVING YOUR APPLIANCE A “TUNE-UP”
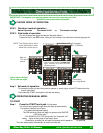
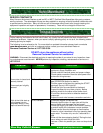
START APPLIANCE AS PER LIGHTING INSTRUCTIONS,
Let the appliance go through the entire START-UP procedure. When the
FEED RATE LED stays solid, turn the feed rate to the # 4 setting (or High).
Allow the appliance to run on HIGH for 10 minutes before you begin to make adjustments.
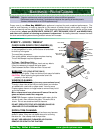
Adjust the AIR INLET DAMPER. This will have to be set, as the factory can
not send the units out with the damper pre-set. This is done to accommodate a wide
range of installations, elevations and fuel type and quality.
Slide the damper closed ( pushed in all the way)
Now open (pull out) the damp approximately 1/8”. Watch the fire.
Check for the characteristics of a good fire, see above for details.
If not happy, pull out the damper another 1/8”, again check the fire.
Continue opening the air inlet damper as needed to obtain a fire that is
brisk enough to carry ash out of the grate, but not so brisk that it
carries full sized pellets out as well (known as “Pop corning”).
Mark the Adjusted AIR INLET DAMPER.
Once the damper is adjusted correctly, simple take a
screwdriver and scrape the paint off the rod, right at the rubber
grummet. This will help in finding the right location again if the damper
gets moved or adjusted accidently.
NOTE: The best way and only way to set the Air Inlet Damper is
at the FUEL SETTING #4.
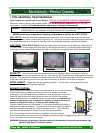
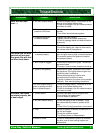
Confirm Low (1) Feed Setting and burn, only after
performing the Air Inlet Damper setting. Check for the
characteristics of a good fire, (see above for details, the flame
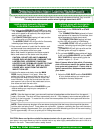
height will not be as tall). If you need to adjust the amount of air going
through the burn grate, you can adjust the FAN TRIM pot. Using a small
screwdriver, carefully, adjust the FAN TRIM, either up or down (see diagram) to give you
the optimum burn and heat desired.
IT IS CRITICAL FOR THE CORRECT OPERATION OF YOUR STOVE THAT THE BURN
GRATE, AIR INLET DAMPER, FAN TRIM AND 1 & 4 FUEL RATE BE SET CORRECTLY!
Before performing a “Tune-Up”, ensure the burn grate, burn pot and glass window are clean and free of debris.
If log option is purchased, do not install until fine tuning is complete.
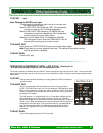
FEED RATE
START
FEED RATE
1
2
3
4
Glow Boy Pellet & Biomass www.glowboystoves.com 30
FINE TUNE ADJUSTMENTS
14
FAN
Increase
Decrease