CONAIR
05-15-96 79 17
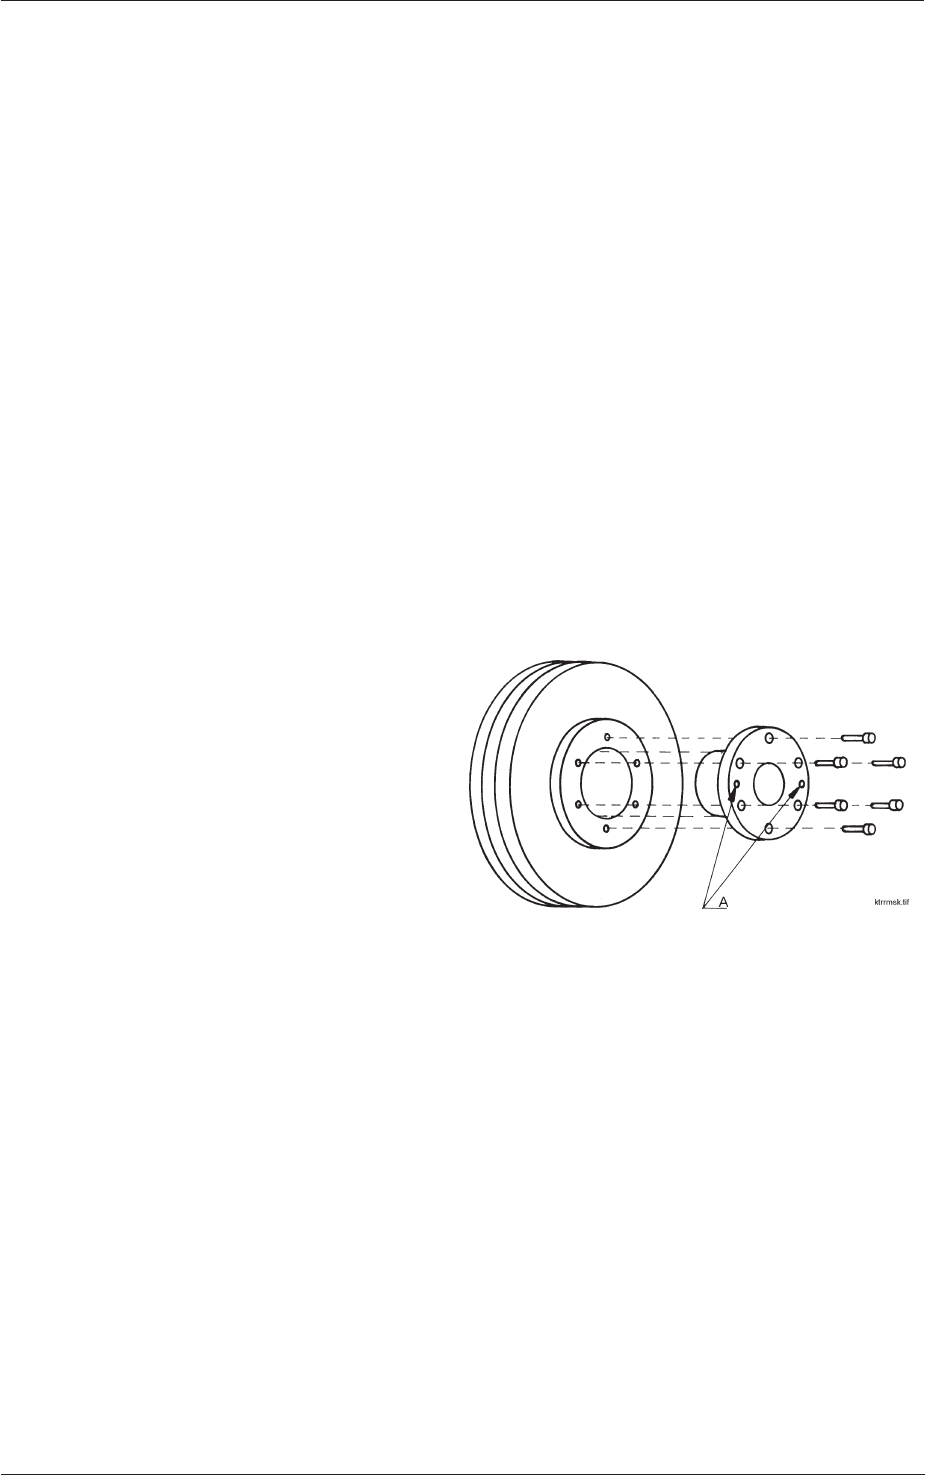
7.5 Rotor pulley, assembling/disassembling
7.5.1 Rotor pulley
Disassembling
1. Loosen all screws a few turns.
2. Unscrew two of the screws.
3. Lubricate both screws and screw them into the disassembling holes (A).
4. Tighten both disassembling screws alternately until the flange bushing comes
loose from the hub and the unit sits freely on the axle.
5. Lift the whole unit from the axle.
Assembling
1. Clean and degrease the contact surfaces carefully.
2. Place the "flange bushing" in the hub so that the bolt holes line up with each
other.
3. Lubricate the screws. Mount all screws without tightening them completely.
4. If a key is used, it should be
placed in the key way
before the "flange bushing"
is fitted in. Check that there
is sufficient play over the
key.
5. Fit the hub with the "flange
bushing" on the axle.
6. Tighten the screws
alternately until
approximately half the torque has been reached (49/2=24.5Nm).
7. Tap lightly between the axle and the bolts on the "flange bushing". Use a
block of wood or plastic to protect against damage.
8. Continue to alternately bolt and tighten the screws once or twice until the
correct torque has been reached, i.e. 49 Nm.


