


Installation Step 6
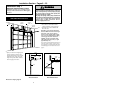
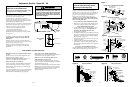
Hang the Opener
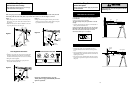
Two representative installations are shown. Yours may
be different. Hanging brackets should be angled, Figure
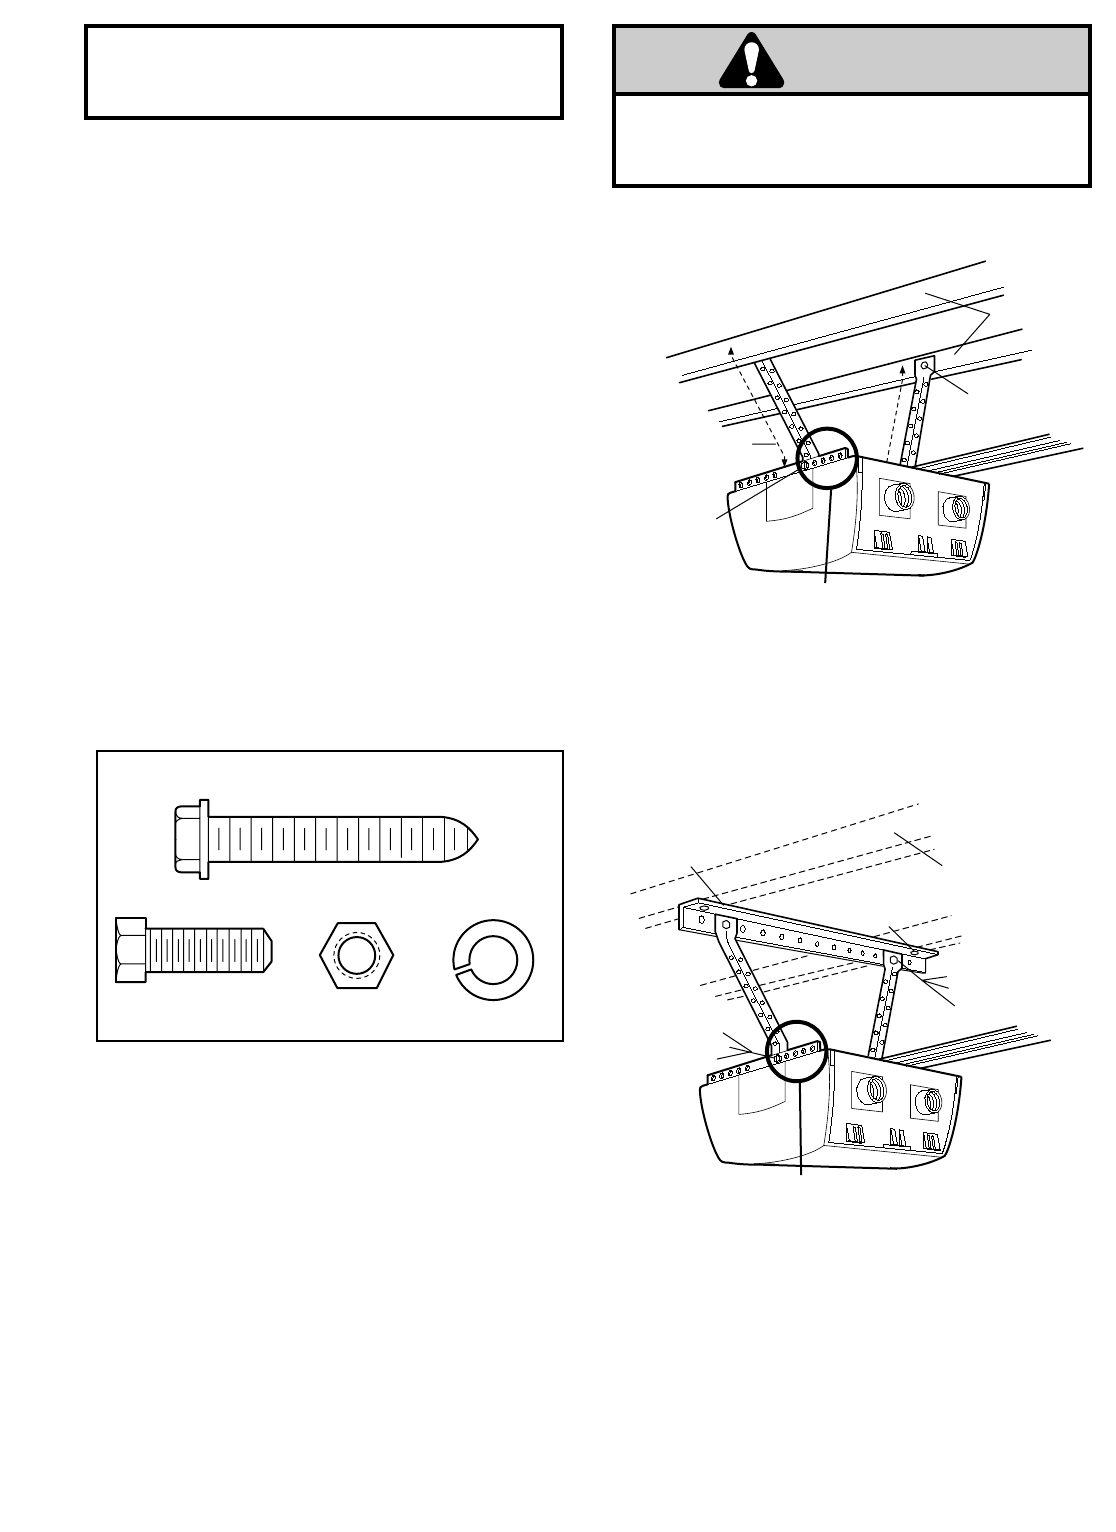
1, to provide rigid support. On finished ceilings, Figure 2,
attach a sturdy metal bracket to structural supports before
installing the opener. The bracket and fastening hardware
are not supplied.
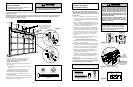
• Measure the distance from each side of the opener to
the structural support.
• Cut both pieces of the hanging bracket to required
lengths.
• Drill 3/16" pilot holes in the structural supports.
• Attach one end of each bracket to a support with
5/16" - 18x1-7/8" lag screws.
• Fasten the opener to the hanging brackets with
5/16" - 18x7/8" screws, lock washers and nuts.
• Check to make sure the rail is centered over the door
(or in line with the header bracket if the bracket is not
centered above the door).
• Remove the 2x4. Operate the door manually. If the door
hits the rail, raise the header bracket.
Measure
Distance
Lag Screws
5/16"-18x1-7/8"
Bracket
(Not Supplied)
Lag Screws
5/16"-18x1-7/8"
(Not Supplied)
5/16"-18x7/8" Screw
5/16" Lock Washer
5/16"-18 Nut
— FINISHED CEILING —
5/16"-18x7/8"
Hex Screws
/
16" Lock Washers
5/16"-18 Nuts
Hidden
Support
6"-18x7/8" Screw
1
6" Lock Washer
5/16"-18 Nut
Structural
Supports
CONTROL
CENTER
CONTROL
CENTER
Preferred Range of
Bracket Placement
Preferred Range of
Bracket Placement
16
The opener could fall and injure someone if it is not
properly secured. Fasten the opener securely to
structural supports of the garage.
Figure 1
Figure 2
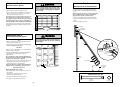
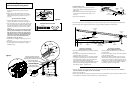
Lag Screw
5/16"-18 x 1-7/8"
Hex Screw
5/16"- 18 x 7/8"
Nut 5/16" - 18
Lockwasher 5/16"
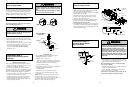
Hardware Shown Actual Size
WARNING
CAUTION
WARNING
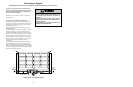
For a door with no
exposed framing or for
the optional installation,
use 5/16"x1-1/2" lag
screws (not supplied)
to fasten door bracket.
Door
Bracket
Top of Door
(Inside Garage)
Carriage Bolt
5/16"-18x2-1/2"
Optional
Placement
Lock Washer
5/16"
Nut
5/16"-18
Top Edge
of Door
Horizontal and vertical
reinforcement is needed for
lightweight garage doors
(fiberglass, aluminum, steel,
door with glass panel, etc.).
Header Wall
Vertical
Centerline of
Garage Door
Finished Ceiling
Optional
Placement
of Door
Bracket
Header
Bracket
Door
Bracket
2x4 Support
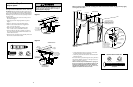
All ONE-PIECE Door Installation Procedure
• Center the bracket on the top of the door, in line with
the header bracket as shown. Mark holes.
• Drill 5/16" pilot holes and fasten the door bracket with
hardware supplied.
If the door has no exposed framing, drill 3/16" pilot holes
and fasten the bracket with 5/16"x1-1/2" lag screws (not
supplied) to the top of the door.
The door bracket may be installed on the top edge of
the door if required for your installation. (Refer to the
dotted line optional placement drawing.) Drill 3/16"
pilot holes and substitute 5/16"x1-1/2" lag screws (not
supplied) to fasten the bracket to the door.
21
Please read and comply with the warnings and reinforcement instructions on page 20. They apply
to one-piece doors also.
Carriage Bolt
5/16"-18 x 2-1/2"
Nut 5/16" - 18
Lockwasher 5/16"
Hardware Shown Actual Size