


Lag Screws
5/16"x9x1-5/8"
Highest
Point of Travel
(of Garage Door)
Vertical
Center
Line
Header
Wall
Garage
Door
UP
CEILING MOUNT ONLY
Wall
Mounting Holes
Optional
Wall Mounting
Holes
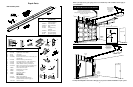
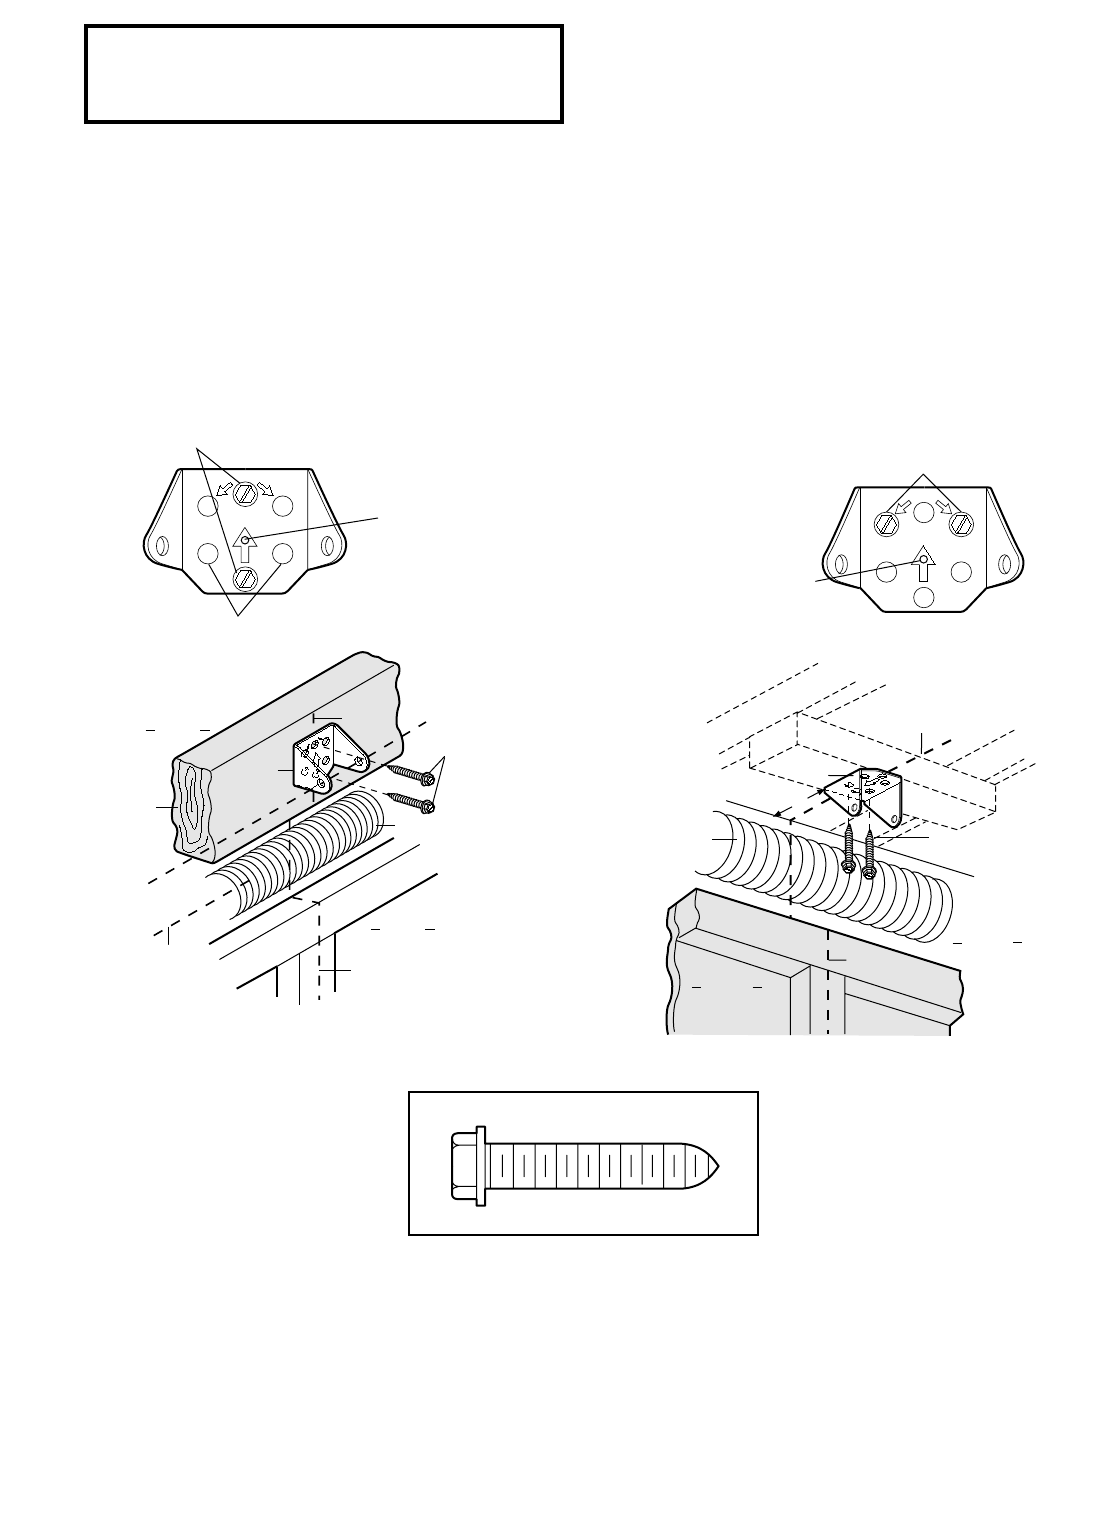
The nail hole is for
positioning only.
You must use lag screws
to mount the header bracket.
UP
C
E
IL
IN
G
M
O
U
N
T
O
N
L
Y
Door
Spring
Header
Bracket
2x4
Structural
Support
Vertical
Center
Line
10
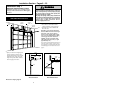
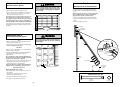
You can attach the header bracket either to the wall
above the garage door, or to the ceiling. Follow the
instructions which will work best for your particular
requirements.
Fastening the Header Bracket to the Wall
• Center the bracket on the vertical guideline with the
bottom edge of the bracket on the horizontal line as
shown (with the arrow pointing toward the ceiling).
• Mark either set of bracket holes (do not use the holes
designated for ceiling mount). Drill 3/16" pilot holes
and fasten the bracket securely to a structural support
with the hardware provided.
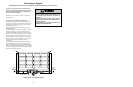
• Extend the vertical guideline onto the ceiling as shown.
• Center the bracket on the vertical mark, no more than 6"
from the wall. Make sure the arrow is pointing toward
the wall. The bracket can be mounted flush against the
ceiling when clearance is minimal.
• Mark holes designated for ceiling mount only. Drill
3/16" pilot holes and fasten bracket securely to a
structural support with the hardware provided.
Fastening the Header Bracket to the Ceiling
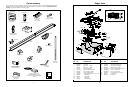
Installation Step 2
Install the Header Bracket
UP
CEILING MOUNT ONLY
Ceiling Mounting Holes
The nail hole is for
positioning only.
You must use lag screws
to mount the header bracket.
U
P
Lag Screws
5/16"x9x1-5/8"
Garage
Door
Vertical
Center Line
Header
Wall
– Finished Ceiling –
Header
Bracket
6"
Maximum
Vertical
Center Line
Door
Spring
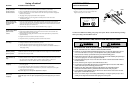
Lag Screw
5/16"-9 x 1-5/8"
Hardware Shown Actual Size
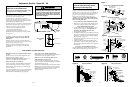
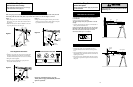
The Remote Control Transmitter
The opener must learn the code of any new remote
control. Page 29 explains how to program your receiver
and how to erase all codes if required. Self service of
your receiver and remote controls is not recommended. If
service is needed, call the toll-free number listed on the
back page.
The Transmitter Battery
The green test light will glow and the opener will operate
when the remote control is activated, as long as there is
adequate battery power.
If the power indicator light is dim or off, replace the
battery. Also check the test light if transmission range
decreases.
The 12 volt battery should produce power for at least a
year.
Dispose of your old battery properly.
Once a Month
Manually operate door. If it is unbalanced or binding,
call for professional garage door service.
Check to be sure door opens & closes fully. Adjust
limits and/or force if necessary. (See pages 24 & 25.)
Repeat the safety reverse test. Make any necessary
adjustments (See page 26).
Once a Year
Oil door rollers, bearings and hinges. The opener does
not require additional lubrication. Do not grease the door
tracks.
Weather conditions may cause some minor changes in
door operation requiring some re-adjustments,
particularly during the first year of operation.
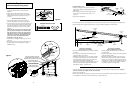
Pages 24 and 25 refer to the limit and force adjustments.
Only a screwdriver is required. Follow the instructions
carefully.
Repeat the safety reverse test (page 26) after any
adjustment of limits or force.
Care of Your Opener
27
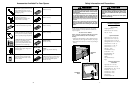
IMPORTANT SAFETY INSTRUCTIONS
To reduce the risk of severe injury or death to persons:
1. READ AND FOLLOW ALL INSTRUCTIONS.
2. Do not permit children either to operate or to play with the opener. Keep remote control in a location
inaccessible to children.
3. Operate opener only when the door is in full view and free from any obstruction. Keep the door in sight
until it is completely closed. NO ONE SHOULD CROSS THE PATH OF THE MOVING DOOR.
4. Check safety reversal system monthly. See page 26. The garage door MUST reverse on contact with a one
inch object (or a 2x4 board laid flat) placed on the floor. If an adjustment is made to one of the controls
(either force or limits of travel), the other control may need to be adjusted also, and the safety reversal
system must be checked. Failure to properly adjust the opener may result in severe injury or death.
5. If possible, use the manual release only when the door is in a closed position. Caution should be taken
whenever the disconnect cord is actuated with the door open. Weak or broken springs may cause the door to
fall rapidly, causing injury or death to persons.
6. KEEP GARAGE DOORS PROPERLY BALANCED. See page 3. An improperly balanced door may not
reverse when required, and could result in severe injury or death. Repairs to cables, spring assemblies and
other hardware must be made by a professional garage door person.
7. Disconnect the electric power to the garage door opener before making any repairs or removing the covers.
SAVE THESE INSTRUCTIONS
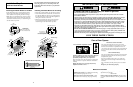
FORCE CONTROLS
Kg
Kg
1
3
8
7
5
1
3
8
7
5
LIMIT CONTROLS
+
+
WARNING
CAUTION
WARNING
WARNING
CAUTION
WARNING
Force and Limit Adjustment Controls
Maintenance Schedule