


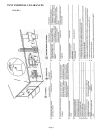
8. Plan your installation. Set the appliance in place and survey how best to vent the appliance. Se-
lect the appropriate termination kit for the installation. Read the vent pipe manufacturers in-
structions and the appliance manufacturers instruction manual before either. After vent configu-
ration has been decided, stretch the flex components out, then trim off what will not be needed.
A temporary fit up will determine this. Once the vent length has been determined and the neces-
sary parts are obtained for the installation you can begin installing the venting system.
• Follow the Installation Instructions provided with the Magnaflex DV4-F venting kit.
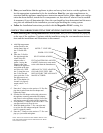
CONNECTING OR RECONNECTING THE VENTING SYSTEM TO THE Model DV1000
∗ After following the venting manufactures instructions, and you have installed the piping up
to the area of the appliance. Continue with the installation using the vent manufactures instruc-
tions and the instructions and illustrations in this manual.
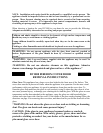
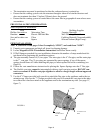
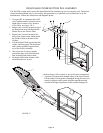
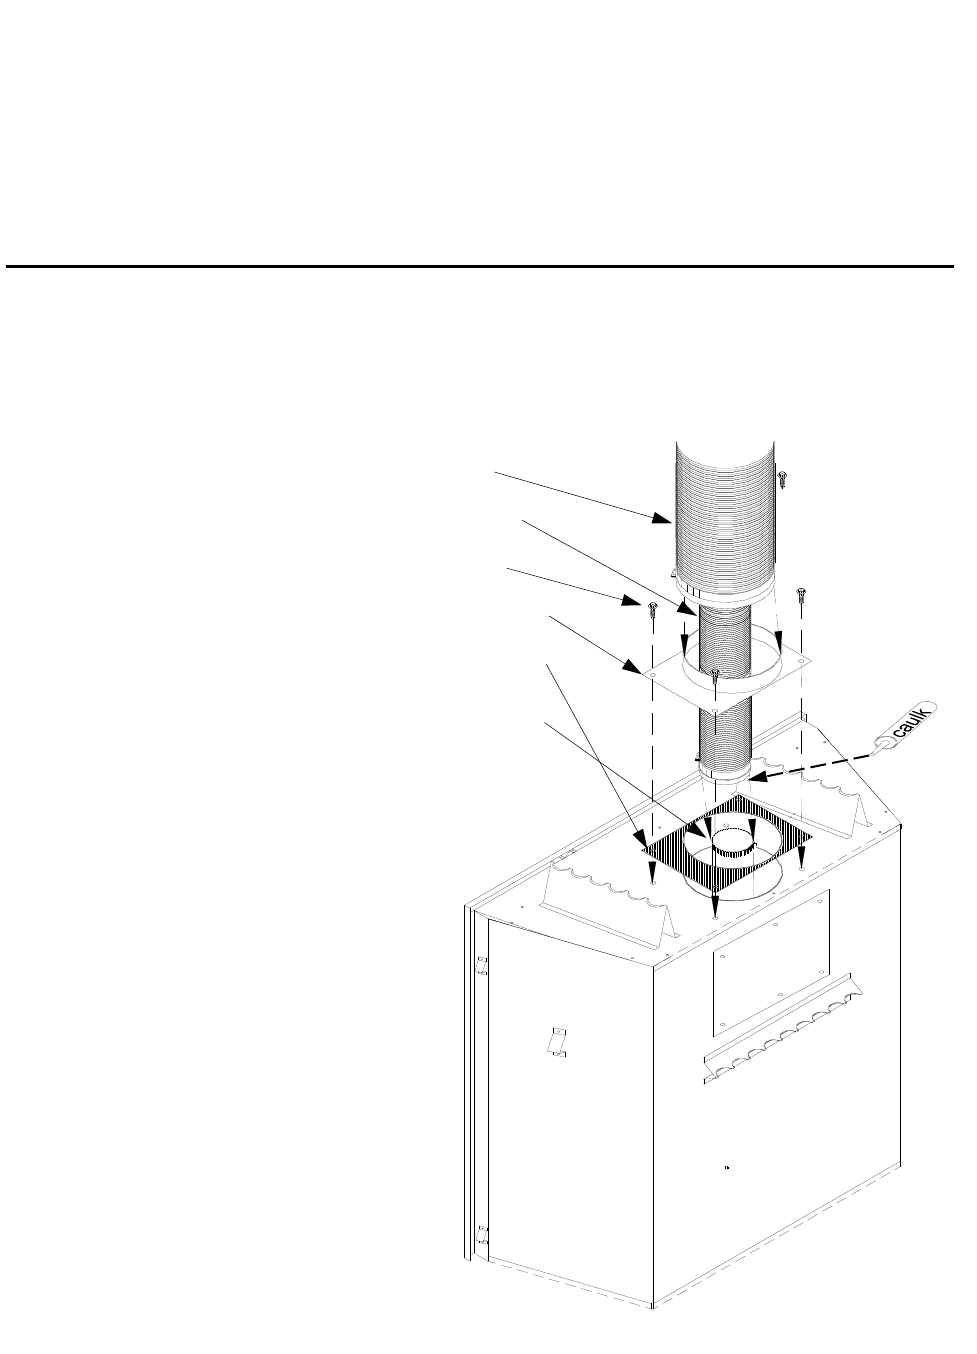
FIGURE 7
OUTER 7” VENT PIPE
INNER 4” FLUE PIPE
SELF TAPPING SCREWS
FLEX ADAPTER COLLAR WITH
GASKET (Gasket may come attach
to the collar from the manufacturer)
NOTE: TOP VENT INSTALLATION SHOWN ABOVE. FOL-
LOW THE SAME INSTRUCTIONS FOR OPTIONAL REAR
VENT INSTALLATION.
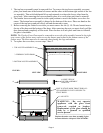
A. Add High temperature
sealant (caulk) to the
inside (inner) edge of
the 4” flexible flue
pipe.
B. Place the 4” flexible
flue pipe through the
center of the flex
adapter collar w/
gasket , leaving the
adapter collar unat-
tached to the appliance
and pulled up the pipe
out of the way. With
the 4” clamp also over
the 4” flex flue and
loose, push the 4” flex
flue pipe onto (over)
the 4” flue adapter col-
lar until it is properly
seated (about 1” to 1-
1/4”).
APPLIANCE 4” FLUE ADAPTOR
COLLAR (FLUE EXIT). PRE-
INSTALLED BY THE APPLIANCE
MANUFACTURER.
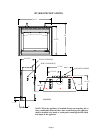
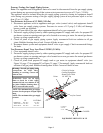
C. Place the 4” clamp over the section of 4” flex flue
pipe that is pushed onto the flue adapter and
tighten the clamp.
D. Seat the flex flue adapter collar with gasket on to
the appliance centering around the flue adapter
and secure it to the appliance using (4) four of the
self tapping screws provided with the venting kit.
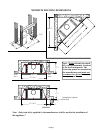
E. Next place the 7” clamp over the end of the 7” flex
vent pipe and leave it loose for now.
F. With both hands pull the 7” flex vent pipe onto
(over) the flex flue adapter and push it onward
until it is properly seated.
G. Place the 7” clamp over the section of 7” flex vent
pipe you just seated and tighten.
Page 11