


67
BUTTONHOLE AND BUTTON SEWING
KNOPFLÖCHER UND KNÖPFE NÄHEN
ОБМЕТЫВАНИЕ ПЕТЕЛЬ И ПРИШИВАНИЕ ПУГОВИЦ
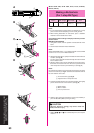
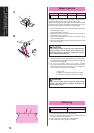
Step 2
(Left side)
Step 4
(Right side)
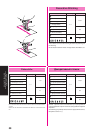
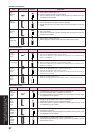
MAKING A BUTTONHOLE
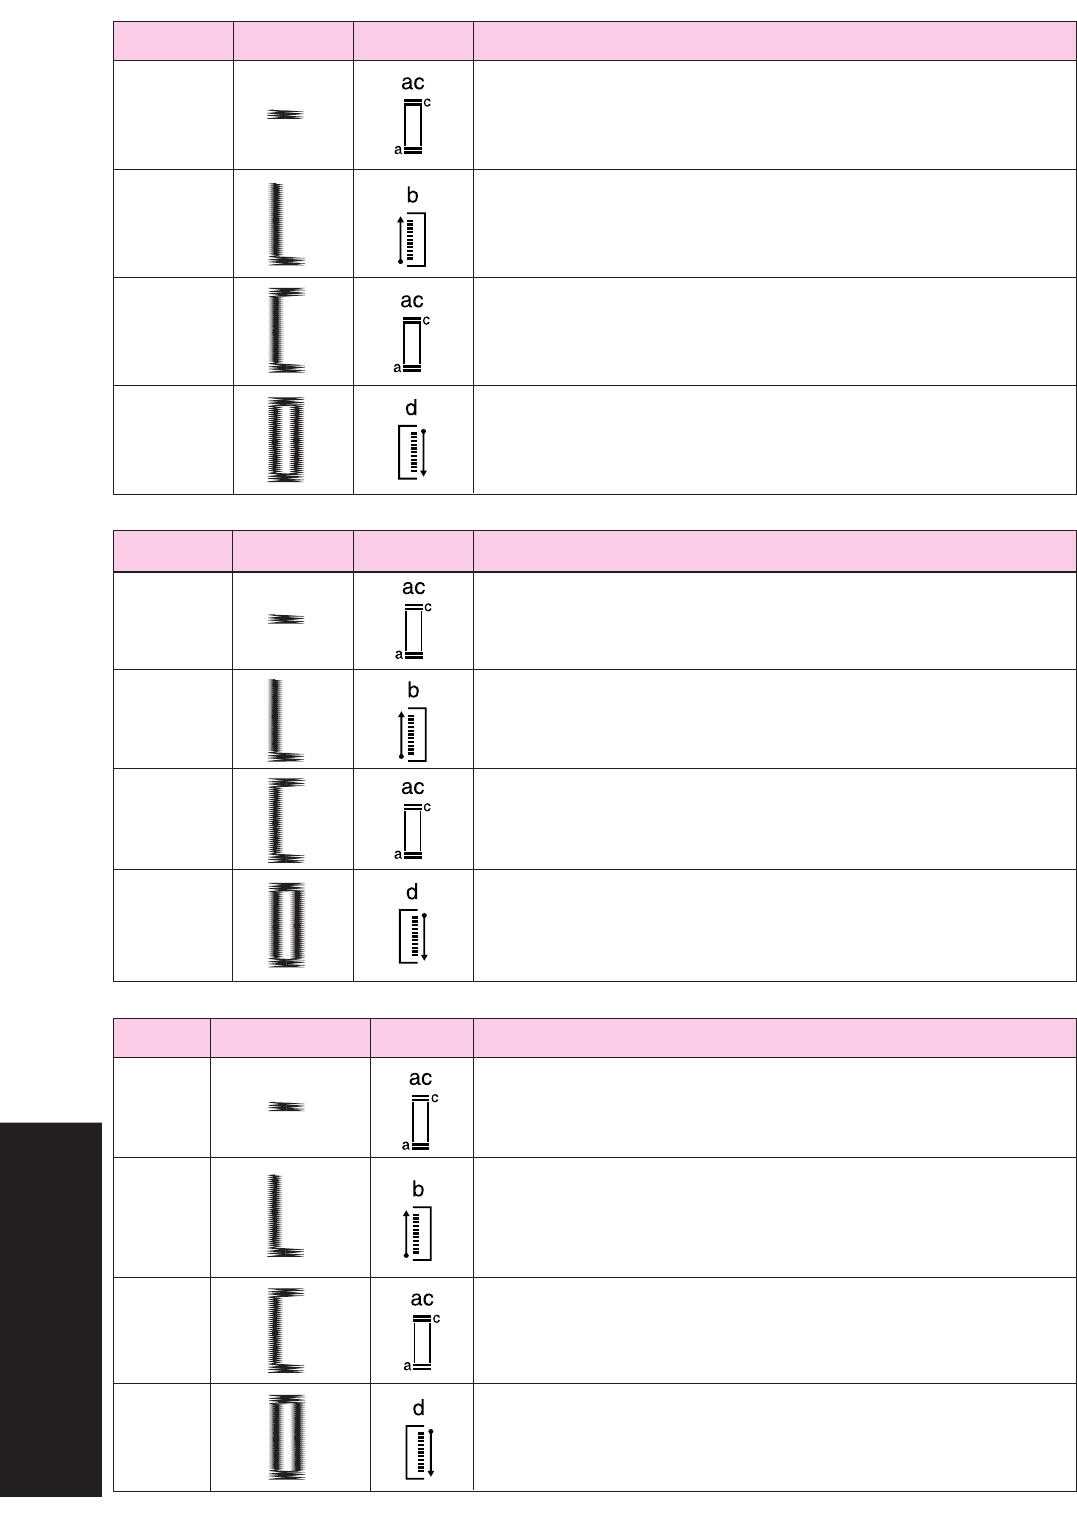
Step Sewn Portion Pattern How to Sew
1. Set the pattern selection dial to “a”.
2. Lower the presser foot and sew 5 to 6 stitches.
3. Stop the machine when the needle is at the left side of the stitches, then raise
the needle from the material.
1. Turn the pattern selection dial to “b”.
2. Sew the predetermined length of the tailor’s chalk line.
3. Stop the machine when the needle is at the left side of the stitch, then raise the
needle.
1. Turn the pattern selection dial to “c” (same position as in step 1).
2. Sew 5 to 6 stitches.
3. Stop the machine when the needle is at the right side of the stitch, then raise the
needle from the material.
1. Set the pattern selection dial to “d”.
2. Sew the right side until the needle reaches the stitches sewn in step 1.
Step 1
(Front bar
tack)
Step 3
(Back bar
tack)
a
b
c
d
a
b
c
d
Шаг 1
(Передняя
планка
петли)
Шаг 2
(Левая
планка
петли)
Шаг 3
(Задняя
планка
петли)
Шаг 4
(Правая
планка
петли)
Шаг
a
b
c
d
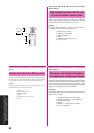
Schritt 2
(Linke Raupe)
Schritt 4
(Rechte
Raupe)
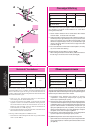
KNOPFLOCH NÄHEN
Schritt Genähter Teil Stichart Nähablauf
Schritt 1
(Vorderer
Riegel)
Schritt 3
(Hinterer
Riegel)
1. Stellen Sie den Musterwähler auf “a”.
2. Senken Sie den Nähfuß und nähen Sie einige Stiche.
3. Stoppen Sie die Maschine, wenn die Nadel auf der linken Stichseite ist und drehen Sie die
Nadel aus dem Material.
1. Drehen Sie den Musterwähler auf “b”.
2. Nähen Sie die Raupe entlang der vorgezeichneten Kreidelinie.
3. Stoppen Sie die Maschine, wenn die Nadel auf der linken Stichseite ist und drehen Sie die
Nadel aus dem Material.
1. Drehen Sie den Musterwähler auf “c” (gleiche Position wie 1).
2. Senken Sie den Nähfuß und nähen Sie einige Stiche.
3. Stoppen Sie die Maschine, wenn die Nadel auf der rechten Stichseite ist und drehen Sie
die Nadel aus dem Material.
1. Stellen Sie den Musterwähler auf “d”.
2. Nähen Sie die rechte Raupe, bis die Nadel die in Schritt 1 erzeugten Stiche erreicht.
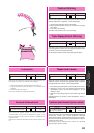
Обметывание петель
Обшиваемый элемент петли
Тип стежка Последовательность операций
1. Установите ручку выбора типа стежка в положение “a”.
2. Опустите нажимную лапку и сделайте 5-6 стежков.
3. Остановите машину, когда игла находится с левой стороны стежка, после
чего поднимите ее над тканью.
1. Поверните ручку выбора типа стежка в положение “b”.
2. Обработайте участок по длине, помеченной мелом.
3. Остановите машину, когда игла находится с левой стороны стежка, после
чего поднимите ее над тканью.
1. Поверни
те ручку выбора типа стежка в положение
“
c
”
(та же позиция, что и в шаге1).
2. Сделайте 5-6 стежков.
3. Остановите машину, когда игла находится с правой стороны стежка, после
чего поднимите ее над тканью.
1. Установите ручку выбора типа стежка в положение “d”.
2. Производите обметывание до тех пор, пока игла не достигнет стежков,
выполненных в шаге 1.