


128
Arranging Embroidery Designs (Layout & Editing)
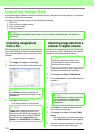
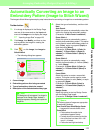
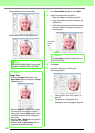
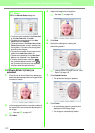
Pattern edited with the round mask
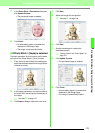
Pattern edited with the adjustable mask
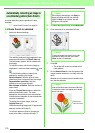
3. In the Select Mask dialog box, click Next.
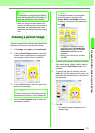
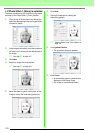
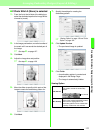
4. Adjust the image size and position.
• Drag the image to the desired position.
• Drag the handle to adjust the image to the
desired size.
• Embroidery pattern size that will be created
can be checked in the lower left corner of
the dialog box.
5. Click Next.
6. Specify the settings for creating the
embroidery pattern.
c
“Sewing Option” and “Color Option” on
page 131.
c
For details on clicking Select from
Candidates, refer to step on page 26.
a Note:
With a small original image, it may not be
possible to reduce the size of the mask.
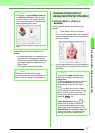
b Memo:
Image Tune
• Clicking the
Image Tune
button in the
Select Mask
dialog box displays an
Image
Tune
dialog box.
• Move the
Original – Sharp
slider to adjust
the sharpness of the image’s outlines. A
setting more towards
Sharp
makes a more
noticeable boundary between bright and
dark areas.
• Move the
Dark – Bright
slider to adjust the
brightness of the image.
• Move the
Low – High Contrast
slider to
adjust the contrast of the image.
b Memo:
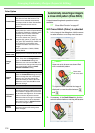
Click
Fit to Page
to adjust the mask to the size
of the Design Page.
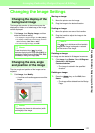
Embroidery
pattern
size
7