


50
The depth of the buildup should be measured periodically. Water heaters will have about 3 inches (7.6 cm) of lime
buildup when the level of lime has reached the bottom of the cleanout opening or about 1 inch (2.5 cm) of lime buildup if
it has reached the drain valve opening. A schedule for deliming should be set up, based on the amount of time it would
take for a ½ inch (1.3 cm) buildup of lime.
Example 1: Initial inspection shows ½ inch (1.3 cm) of lime accumulation. Therefore, the water heater can be delimed
once a year.
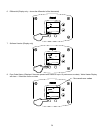
To remove sediment and lime scale:
1. Drain the heater. Refer to DRAINING THE WATER instructions in this section.
2. Remove outer cover plate from lower side of water heater jacket.
3. Remove cover and gasket from cleanout opening.
4. Remove lime, scale or sediment using care not to damage the glass-lining.
5. Inspect cleanout plate gasket: Replace gasket if necessary (Contact Bradford White Local Distributor for
correct part number).
6. Install gasket and cleanout plate. Be sure to draw plate up tight by tightening screws securely.
7. Close the drain valve. Open a hot water fixture to allow air to escape. Open the cold water supply to water
heater and allow the tank to fill. Follow the lighting instructions.
8. Check for water leakage.
9. Install outer jacket cover plate.
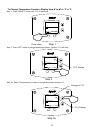
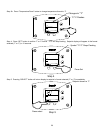
ANODE INSPECTION AND REPLACEMENT
This water heater is equipped with multiple sacrificial anodes to extend tank life. The anode rod should be inspected
periodically (every 2 years) and replaced when necessary to prolong tank life. Water conditions in your area will
influence the time interval for inspection and replacement of the anode rods. Consult the plumbing professional who
installed the water heater or the manufacturer listed on the rating plate for anode replacement information. The use of a
water softener may increase the speed of anode consumption. More frequent inspection of the anode is needed when
using softened (or phosphate treated) water.
To inspect or replace an anode:
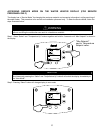
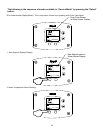
The anodes on this water heater are easily accessible from the top of the water heater making replacement simple and
quick. Use the following procedure to remove and inspect the anodes.
1. Drain the heater. Refer to DRAINING THE WATER HEATER instructions in this section.
2. Flush the heater. Refer to FLUSHING THE WATER HEATER instructions in this section.
3. Remove the combustion surround top by unlatching.
4. Remove the second pass access cover (if equipped).
5. Remove the second pass insulation.
6. Remove the second pass collector cover.
7. Remove the anode using a socket of the appropriate size. Sometimes a breaker bar will need to be used. Do
not use an impact wrench.
8. Inspect and replace the anode as required. Use pipe tape or sealant when reinstalling the anode.
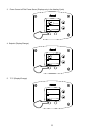
9. Close the drain valve. Open a hot water fixture to allow air to escape. Open the cold water supply to water
heater and allow the tank to fill.
10. Check your anode and drain valve for leaks.
11. Replace second pass collector cover. Make sure to clean off any sealant and reseal before fastening.
12. Replace second pass insulation.
13. Replace second pass access cover.
14. Replace combustion surround top and latch it securely in place.
15. Follow the lighting instructions.
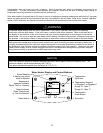
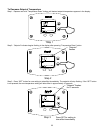
DRAIN VALVE AND TANK ACCESS PANEL
The water heaters are equipped with a ¾ inch (1.9 cm) drain valve.
An access panel covers the cleanout opening in the tank, which is sealed by a gasket and cover.
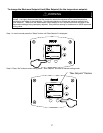
RELIEF VALVE
At least once a year, check the combination temperature and pressure relief valve to insure that the valve has not
become encrusted with lime. Lift the lever at the top of the valve several times until the valve seats properly without
leaking and operates freely.