


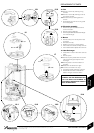
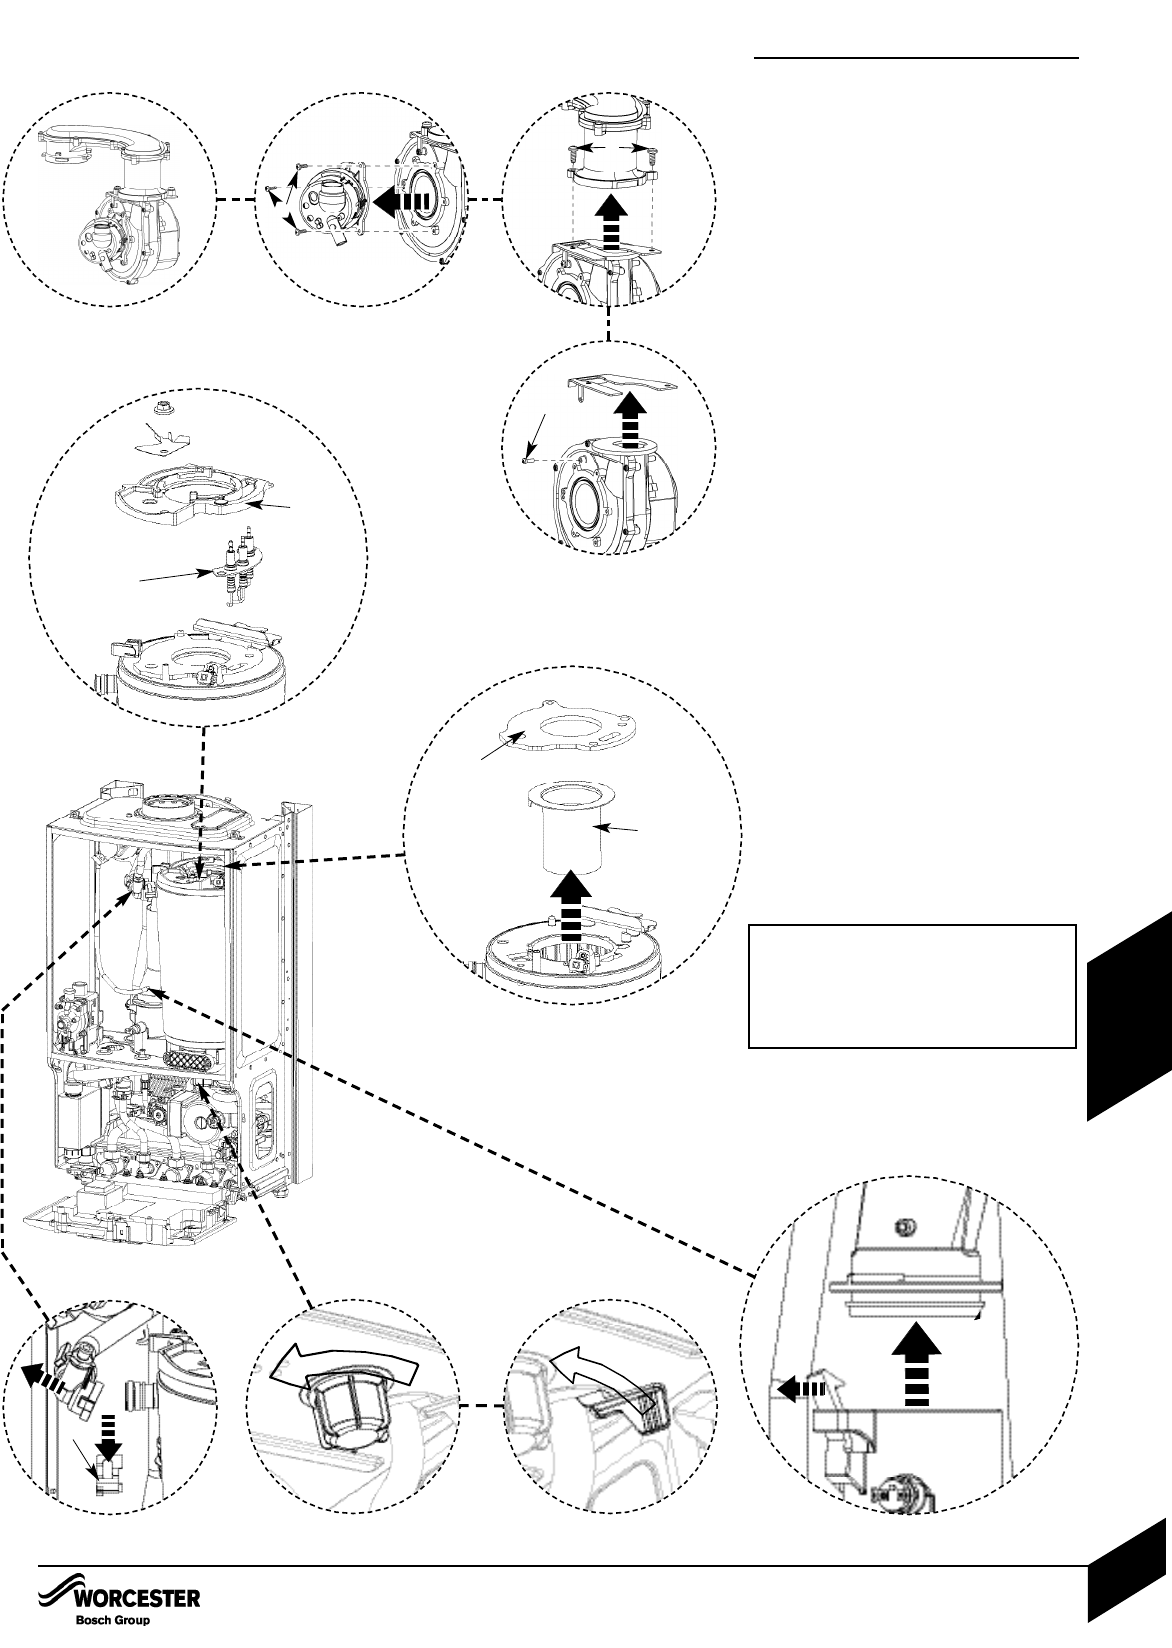
REPLACEMENT OF PARTS
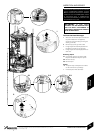
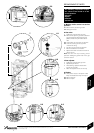
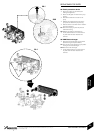
15. Fan
15.1
Remove 3 screws (A) retaining mixing
chamber.
15.2
Remove 2 screws (B) retaining the fan to
the air/gas manifold.
15.3
Remove screw (C) retaining plate and
remove.
Re-assemble with new fan ensuring seals
are correctly fitted.
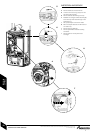
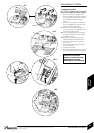
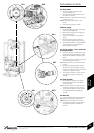
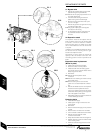
16. Electrode assembly
Disconnect spark electrodes and flame
sensor connection.
Remove clamping plate (D).
Remove spark/flame electrode assembly (E)
from heat exchanger.
17. Burner
Remove seal (F) from the top of the heat
exchanger.
Remove burner (G).
Replace new burner in correct position.
Ensure that burner tab fits correctly into hole.
Ensure that the seal is replaced with a new one.
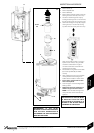
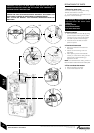
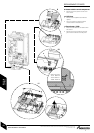
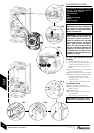
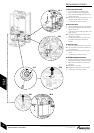
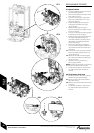
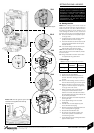
18. Heat Exchanger
Isolate flow and return valves then drain the
boiler.
Remove siphon.
18.1
Remove clip from plastic elbow on the flow
pipe and pull flow pipe away from heat
exchanger.
18.2
Remove plastic nut from the bottom of
the boiler.
18.3
Rotate lever to release return pipe.
18.4
Undo flue connection from sump.
Pull heat exchanger assembly up to clear.
Reassemble and check combustion as
stated in the gas conversion section.
18.4
15.1 15.2
15.3
18.2
18.1
18.3
A
B
C
H
IMPORTANT: IF THE JOINT
BETWEEN THE AIR/GAS MANIFOLD
AND THE HEAT EXCHANGER IS
DISTURBED THE SEALING GASKET
MUST BE REPLACED.
REPLACEMENT OF PARTS
INSTALLATION & SERVICING INSTRUCTIONS FOR WORCESTER GREENSTAR 24 i junior/28 i junior
8 716 107 336b (11/05)
46
SERVICING
& SPARES
17
16
F
G
D
E