


16
w ww.b is se ll .c om 8 00 .2 37 .7 69 1
6
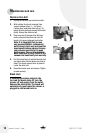
Assembly
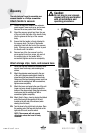
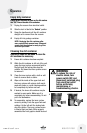
5. Make sure that crevice tool is inside the
extension wand. Store the extension wand
and crevice tool on the back of the unit.
Place tools on the extension wand support
and push toward the back of the unit until
clip holds tools in place.
6. Slide the dusting brush into the storage clip
on the left side of the unit (when viewing
from back.)
7. Place the TurboBrush tool in the hole marked
“tool” on the top of the handle arch.
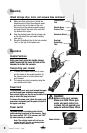
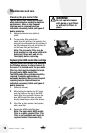
Handle Positions
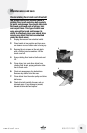
Using your foot, press the handle release
pedal, located on the lower left side of the
vacuum, to recline the vacuum.
Transporting your cleaner
1. To move your cleaner from room to room,
put the handle in the upright position, tilt
the cleaner back on its rear wheels and
push forward.
2. The cleaner can also be moved by using the
carry handle on the front.
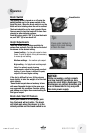
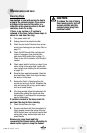
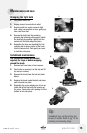
Power Cord
To store power cord, wrap cord around the upper
cord wrap and lower extension wand support.
Once wound tightly use the clip on the end of the
plug to attach the plug to the cord.
To release the power cord, rotate the upper cord
wrap down and gently pull the power cord off of
the upper cord wrap.
Power switch
The power button is located on the left side
(when viewing from back) of the vacuum. Push
the rocker switch “ON” (I) to vacuum, and “OFF”
(O) when cleaning is complete.
Note: The rotating brush will not turn on
unless the unit is in the reclined position
and the brush switch is on.
Attach storage clips, tools, and vacuum hose continued
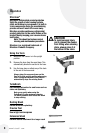
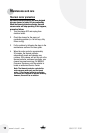
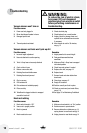
Operation
1 2
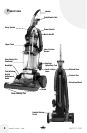
Crevice Tool
Extension Wand
Stretch Hose
Dusting/
Upholstery
Tool
TurboBrush
®
Tool
Power Switch
Caution:
Before using your vacuum,
Make sure both filters (pre-
motor and post-motor) are
in place. Do not operate your
vacuum without these filters.